Hitachi 55DMX01W Owners Guide - Page 72
Rear Panel, Connection To Pc, Front Panel
 |
View all Hitachi 55DMX01W manuals
Add to My Manuals
Save this manual to your list of manuals |
Page 72 highlights
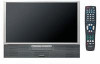
PC MODE CONNECTION AND OPERATION IMPORTANT: TURN POWER OFF ON THE DLPTM REAR PROJECTION TELEVISION AND THE PC BEFORE CONNECTING OR DISCONNECTING ANY CABLES. FRONT PANEL CONNECTION TO PC REAR PANEL CONNECTION TO PC S-VIDEO VIDEO AUDIO IN VIDEO 3/PC2 L/(MONO) R VIDEO 3 54321 10 9 8 7 6 15 14 13 12 11 PC2 INPUT MENU VOL- VOL+ CH- CH+ ̇ ̇ TV/PC EXIT SELECT ̇̈ Audio Cable (Optional) D-SUB 15 Pin RGB Cable (Optional) AUDIO OUT Audio Cable (Optional) RGB OUTPUT 54321 10 9 8 7 6 15 14 13 12 11 D-SUB 15 Pin RGB Cable (Optional) AUDIO OUT Back of PC PC Rear Panel of Television SUB WOOFER L R AUDIO TO HI-FI + - L R + - REAR SPEAKER 8Ω ONLY STOP CONNECT ONLY 8 OHM SPEAKERS DO NOT SHORT CIRCUIT THESE TERMINALS (Such damage is NOT COVERED by your television warranty) COAXIAL OPTICAL INPUT INPUT S-VIDEO S-VIDEO S-VIDEO VIDEO Y VIDEO Y (MONO) P B L PR R AUDIO INPUT 1 (MONO) L PB PR R AUDIO INPUT 2 VIDEO (MONO) L R AUDIO MONITOR OUT L R PC AUDIO INPUT 1 54321 10 9 8 7 6 15 14 13 12 11 PC RGB INPUT 1 ANT A TO CONVERTER ANT B 2. Turn the DLPTM Rear Projection TV/PC monitor power on. 3. Press the TV/PC button on the front panel or on the remote control until you select PC mode. 4. Turn the PC power on. 5. Press the menu button on the DLPTM Rear Projection TV/PC monitor front panel or on the remote control to display the PC on screen display. 6. Press the left (̇) or right (̈) cursor buttons to select the audio menu . 7. Press the select buttons to access the audio adjustment functions. 8. Use cursor and select button to adjust equalizer, loudness, and dynamic bass to your preference. 72
-
 1
1 -
2
-
3
-
4
-
5
-
6
-
7
-
8
-
9
-
10
-
11
-
12
-
13
-
14
-
15
-
16
-
17
-
18
-
19
-
20
-
21
-
22
-
23
-
24
-
25
-
26
-
27
-
28
-
29
-
30
-
31
-
32
-
33
-
34
-
35
-
36
-
37
-
38
-
39
-
40
-
41
-
42
-
43
-
44
-
45
-
46
-
47
-
48
-
49
-
50
-
51
-
52
-
53
-
54
-
55
-
56
-
57
-
58
-
59
-
60
-
61
-
62
-
63
-
64
-
65
-
66
-
 67
67 -
 68
68 -
 69
69 -
 70
70 -
 71
71 -
 72
72 -
 73
73 -
 74
74 -
 75
75 -
 76
76 -
 77
77 -
78
-
79
-
80
-
81
-
82
-
83
-
84
-
85
-
86
-
87
-
88
-
89
-
90
-
91
-
92
 |
 |
