Hitachi NR90AF Instruction Manual - Page 10
Lubrication, Cold Weather Care, Caution, Testing The Nailer, Danger, Warning
 |
UPC - 717709012875
View all Hitachi NR90AF manuals
Add to My Manuals
Save this manual to your list of manuals |
Page 10 highlights
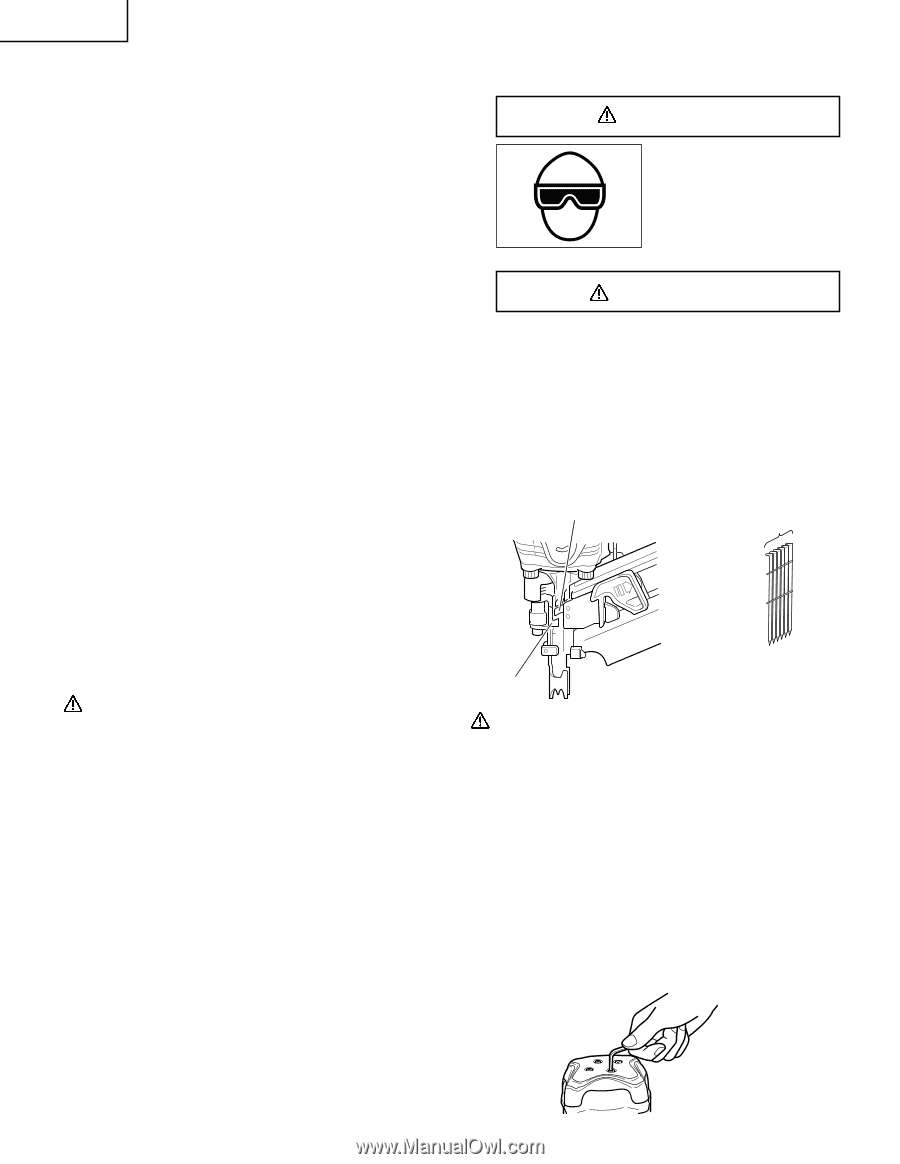
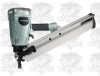
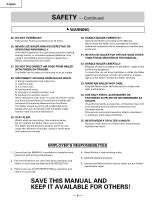
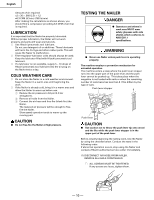
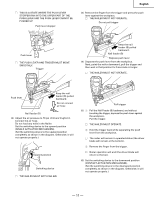
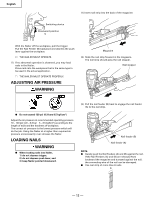
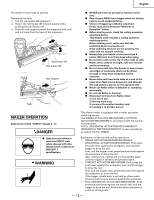
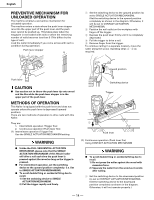
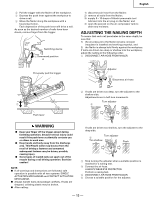
English Amount of air required =2 × 30 × .088 (2.5) × 1.2 =6.3 CFM (ft3/min) (180 ltr/min) After making the calculations as shown above, you should find a compressor providing 6.3 CFM of air that is required. LUBRICATION It is important that the Nailer be properly lubricated. Without proper lubrication, the Nailer will not work properly and parts will wear prematurely. ⅜ Use Hitachi pneumatic tool lubricant. Do not use detergent oil or additives. These lubricants will harm the O-rings and other rubber parts. This will cause the Nailer to malfunction. ⅜ Filter-regulator-lubricator units should always be used. Keep the lubricator filled with Hitachi pneumatic tool lubricant. ⅜ If a lubricator is not available, supply 5 - 10 drops of Hitachi pneumatic tool lubricant into the air plug on the Nailer twice a day. COLD WEATHER CARE ⅜ Do not store the Nailer in a cold weather environment. Keep the Nailer in a warm area until beginning the work. ⅜ If the Nailer is already cold, bring it in a warm area and allow the Nailer to warm up before use. 1 Reduce the air pressure to 64 psi (4.4 bar 4.5 kgf/cm2). 2 Remove all nails from the Nailer. 3 Connect the air hose and free-fire (blank-fire) the Nailer. The lowered air pressure will be enough to freefire the Nailer. Slow speed operation tends to warm up the moving part. CAUTION ⅷ Do not free-fire the Nailer at high pressure. TESTING THE NAILER DANGER ⅷ Operators and others in work area MUST wear safety glapsses with side shields which conforms to ANSI Z87.1 specifications. WARNING ⅷ Never use Nailer unless push lever is operating properly. The machine employs a preventive mechanism for unloaded operation. The machine enters a state where the push lever stopper runs into the upper part of the push lever and the push lever cannot be pushed up. This takes place when the magazine is not loaded with nails or when the remaining number of nails becomes less than 6 (This differs by the type of nail). Push lever stopper 6 Push lever CAUTION ⅷ Use caution not to throw the push lever tip onto wood and the like while the push lever stopper is in the upper part of the push lever. Before actually beginning the nailing work, test the Nailer by using the checklist below. Conduct the tests in the following order. If abnormal operation occurs, stop using the Nailer and contact a Hitachi authorized service center immediately. (1) DISCONNECT AIR HOSE FROM NAILER. REMOVE ALL NAILS FROM NAILER. Ⅺ ALL SCREWS MUST BE TIGHTENED. If any screws are loose, tighten them. - 10 -
-
 1
1 -
2
-
3
-
4
-
 5
5 -
 6
6 -
 7
7 -
 8
8 -
 9
9 -
 10
10 -
 11
11 -
 12
12 -
 13
13 -
 14
14 -
 15
15 -
16
-
17
-
18
-
19
-
20
-
21
-
22
-
23
-
24
-
25
-
26
-
27
-
28
-
29
-
30
-
31
-
32
-
33
-
34
-
35
-
36
-
37
-
38
-
39
-
40
-
41
-
42
-
43
-
44
-
45
-
46
-
47
-
48
-
49
-
50
-
51
-
52
-
53
-
54
-
55
-
56
 |
 |