Hitachi SP18VAH Instruction Manual - Page 14
After releasing the lock pin, check to be sure that it has returned to its normal position.
 |
UPC - 717709007680
View all Hitachi SP18VAH manuals
Add to My Manuals
Save this manual to your list of manuals |
Page 14 highlights
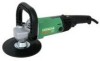
English q For use as a Sander (Fig. 7) (1) After placing the sanding disc (optional accessory) on the rubber pad (optional accessory), thread the washer nut (optional accessory) onto the spindle. (2) Press the lock pin to secure the spindle and tighten the washer nut with a wrench. (3) To remove the sanding disc, follow the above-mentioned procedure in reverse order. Washer Nut Rubber Pad Sanding Disc Spindle Lock Pin CAUTION: Fig. 7 q Tighten the backing pad sufficiently. q Use a wrench to tighten the washer nut sufficiently. q After releasing the lock pin, check to be sure that it has returned to its normal position. 14
-
 1
1 -
2
-
3
-
4
-
5
-
6
-
7
-
8
-
 9
9 -
 10
10 -
 11
11 -
 12
12 -
 13
13 -
 14
14 -
 15
15 -
 16
16 -
 17
17 -
 18
18 -
 19
19 -
20
-
21
-
22
-
23
-
24
-
25
-
26
-
27
-
28
-
29
-
30
-
31
-
32
-
33
-
34
-
35
-
36
-
37
-
38
-
39
-
40
-
41
-
42
-
43
-
44
-
45
-
46
-
47
-
48
 |
 |

14
English
●
For use as a Sander (Fig. 7)
(1)
After placing the sanding disc (optional
accessory) on the rubber pad (optional
accessory), thread the washer nut (optional
accessory) onto the spindle.
(2)
Press the lock pin to secure the spindle and
tighten the washer nut with a wrench.
(3)
To remove the sanding disc, follow the
above-mentioned procedure in reverse
order.
CAUTION:
●
Tighten the backing pad sufficiently.
●
Use a wrench to tighten the washer nut sufficiently.
●
After releasing the lock pin, check to be sure that it has returned to its normal position.
Fig. 7
Washer
Nut
Rubber
Pad
Sanding
Disc
Spindle
Lock Pin