HoMedics BPS-050 User Manual - Page 11
The measure, ment is then automatically stored into memory., minute, START/STOP button, START/STOP,
 |
View all HoMedics BPS-050 manuals
Add to My Manuals
Save this manual to your list of manuals |
Page 11 highlights
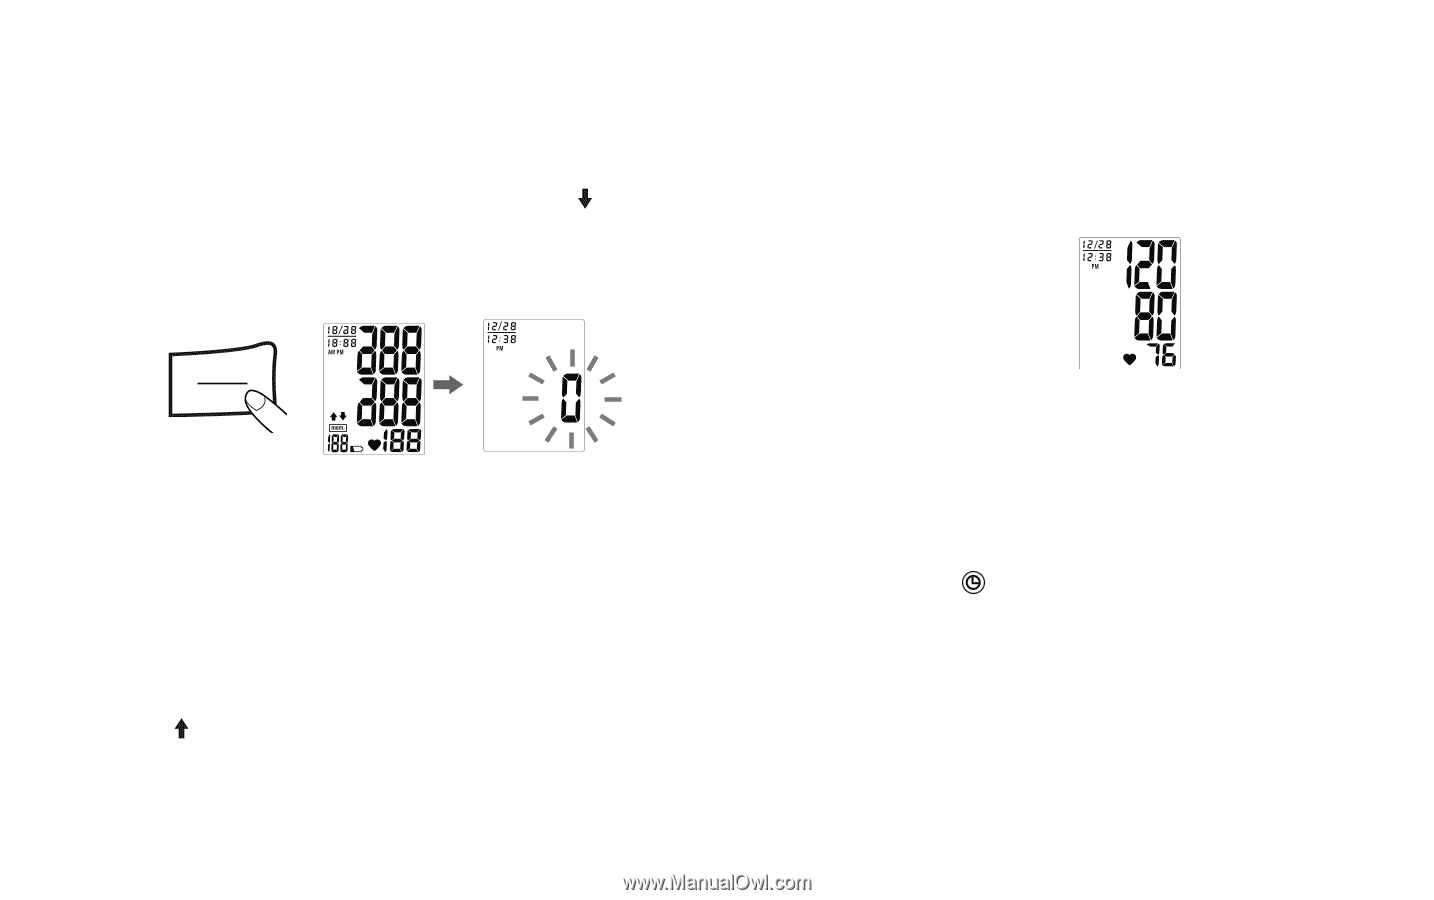
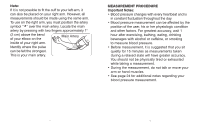
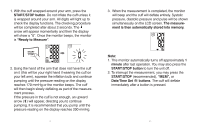
1. With the cuff wrapped around your arm, press the START/STOP button. Do not inflate the cuff unless it is wrapped around your arm. All digits will light up to check the display functions. The checking procedure will be completed after about 2 seconds. The arrow will appear momentarily and then the display will show a "0". Once the monitor beeps, the monitor is "Ready to Measure". OriginalDocumentName:AI-LD-01-V1 Original Document Name: AI-LD-01-V1 MEM START STOP 2. Using the hand of the arm that does not have the cuff on it (this will be your right hand if wearing the cuff on your left arm), squeeze the inflation bulb and continue pumping until the pressure reading on the display reaches 170 mmHg or the monitor beeps. The cuff will then begin slowly deflating as part of the measurement process. If the pressure in the cuff is not enough, an upward arrow ( ) will appear, directing you to continue pumping. It is recommended that you pump until the pressure reading on the display reaches 200 mmHg. 19 3. When the measurement is completed, the monitor OriginalDocumentName:AI-LD-01-V1 will beep and the cuff will deflate entirely. Systolic pressure, diastolic pressure and pulse will be shown simultaneously on the LCD screen. The measurement is then automatically stored into memory. Note: 1. This monitor automatically turns off approximately 1 minute after last operation. You may also press the START/STOP button to turn the unit off. 2. To interrupt the measurement, you may press the START/STOP (recommended), "MEM", or Date/Time Set buttons. The cuff will deflate immediately after a button is pressed. 20
-
 1
1 -
2
-
3
-
4
-
5
-
 6
6 -
 7
7 -
 8
8 -
 9
9 -
 10
10 -
 11
11 -
 12
12 -
 13
13 -
 14
14 -
 15
15 -
 16
16 -
17
-
18
-
19
-
20
-
21
-
22
-
23
-
24
-
25
-
26
-
27
-
28
-
29
-
30
-
31
-
32
 |
 |