HoMedics BPS-050 User Manual - Page 8
arm cuff that fits arms with circumferences
 |
View all HoMedics BPS-050 manuals
Add to My Manuals
Save this manual to your list of manuals |
Page 8 highlights
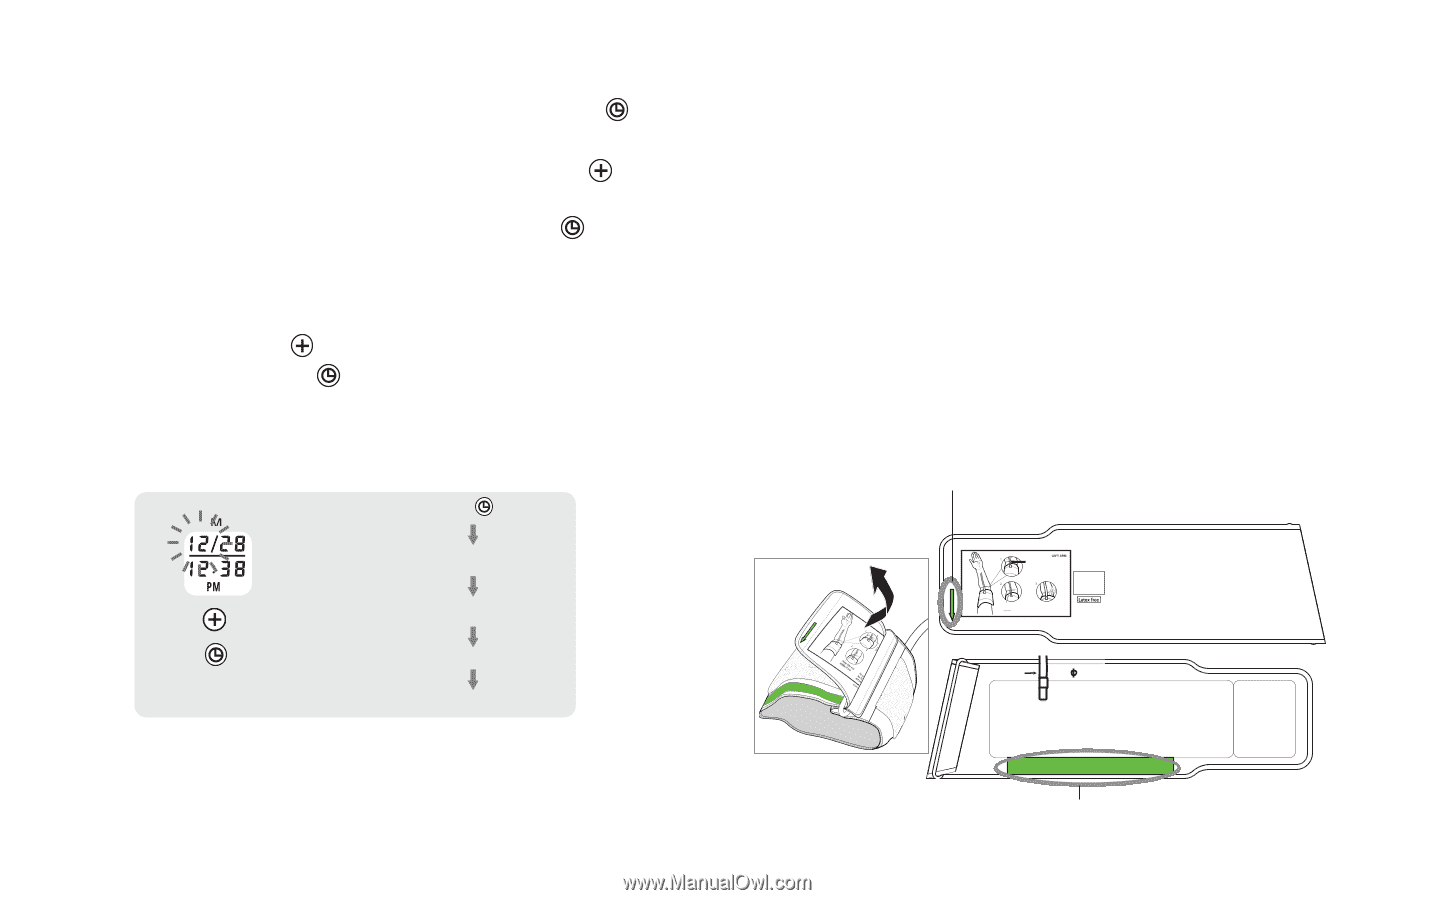
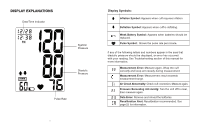
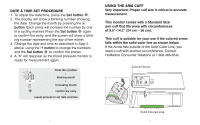
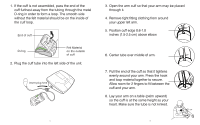
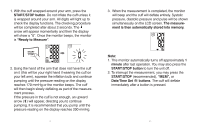
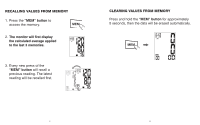
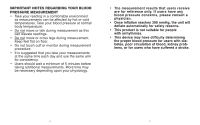
DATE & TIME SET PROCEDURE 1. To adjust the date/time, press the Set button . 2. The display will show a blinking number showing the date. Change the month by pressing the button. Each press will increase the number by one in a cycling manner. Press the Set button again to confirm the entry, and the screen will show a blinking number representing the day of the month. 3. Change the date and time as described in Step 2 above, using the button to change the numbers and the Set button to confirm the entries. 4. A "0" will reappear as the blood pressure monitor is ready for measurement again. Original Document Name: AI-LD-01-V1 Press the button blinking month increasing month confirm the entry repeat process to set date and time USING THE ARM CUFF Very Important: Proper cuff size is critical to accurate measurement. This monitor comes with a Standard Size arm cuff that fits arms with circumferences of 9.5"-14.2" (24 cm - 36 cm). This cuff is suitable for your use if the colored arrow falls within the solid color line as shown below. If the Arrow falls outside of the Solid Color Line, you need a cuff with another circumference. Contact HoMedics Consumer Relations at 1-800-466-3342. Colored Arrow WITAHIRNR YOEWLLMOUWSTBFAANLDL ARROW MUST FALL WITHIN YELLOW BAND Position cuff edge 0.6˝-1.0˝ (1.5-2.5cm) above elbow. Standard Size Cu Fits: 9.5-14.2 Inches 24-36 Centimeters Center tube over middle of arm. Fit cuff securely. Allow room for two fingers to fit between the cuff and your arm. MODEL# PP-BPCUFF5 Center tube over middle of arm Solid Colored Line 13 14
-
 1
1 -
2
-
 3
3 -
 4
4 -
 5
5 -
 6
6 -
 7
7 -
 8
8 -
 9
9 -
 10
10 -
 11
11 -
 12
12 -
 13
13 -
14
-
15
-
16
-
17
-
18
-
19
-
20
-
21
-
22
-
23
-
24
-
25
-
26
-
27
-
28
-
29
-
30
-
31
-
32
 |
 |