Honeywell CT3400 Owner's Manual - Page 10
Mount Thermostat Wallplate
 |
View all Honeywell CT3400 manuals
Add to My Manuals
Save this manual to your list of manuals |
Page 10 highlights
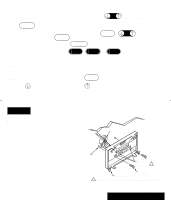
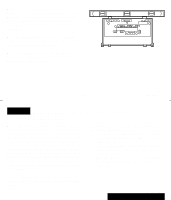
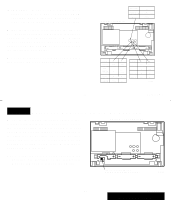
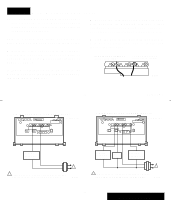
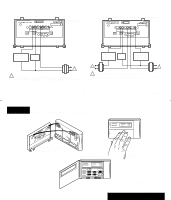
For operating or making changes, use this guide. a Temporarily Change temperature for current period only- Temp ; TEMPORARY indicator shows on display, and cancels itself at next scheduled change. To cancel sooner, you may press Run . Program Hold a temperature indefinitely (such as on vacation)- Hold Temp on display; to cancel, press Run . Program a , Temp Hold appears Current Check current temperature setting- Setting . Cancel a program-Press and hold Daytime , or Evening Night three seconds to cancel. Morning cannot be cancelled (only changed). Permanently Change a program-Repeat steps under Heating Program (page 13) or Cooling Program (page 14), as applicable. Return to normal program or start program- Run Program . a Press on to move number back; press on to move number ahead. 15 69-0733-3 STEP 5 Mount Thermostat Wallplate s Position wallplate on wall. Level the wallplate for appearance only. Use a pencil to mark the two mounting holes that best fit the application. WALL WIRES THROUGH WALL OPENING WALL ANCHORS (2) MOUNTING HOLES (3) 1 WALLPLATE MOUNTING SCREWS (2) 1 USE THE TWO MOUNTING HOLES THAT BEST FIT APPLICATION. M5932A 16 69-0733-3 INSTALLATION
-
 1
1 -
2
-
3
-
4
-
 5
5 -
 6
6 -
 7
7 -
 8
8 -
 9
9 -
 10
10 -
 11
11 -
 12
12 -
 13
13 -
 14
14 -
 15
15 -
16
-
17
-
18
-
19
-
20
 |
 |
