Hunter 25522 Owner's Manual - Page 3
preparing the fan site - ceiling fan
 |
View all Hunter 25522 manuals
Add to My Manuals
Save this manual to your list of manuals |
Page 3 highlights
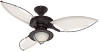
Angle Mounting (Figure 2) hangs from a vaulted or angled ceiling. 34º Max 8 Pitch 12 Figure 2 - Angle mounting preparing the fan site These guidelines are designed to help you select the best location for your fan and to prepare the site prior to installing the fan. Proper ceiling fan location and attachment to the building structure are essential for safety, reliable operation, maximum efficiency, and energy savings. choosing the fan site Within the room where you want to install the fan, choose a fan site where: • No object can come in contact with the rotating fan blades during normal operation. • The fan blades are at least 7 feet above the floor and the ceiling is at least 8 feet high. • The fan blades have no obstructions to air flow, such as walls or posts, within 30 inches of the fan blade tips. • The fan is directly below a joist or support brace that will hold the outlet box and the full weight of the fan. See Figure 3 for the minimum mounting distances. 3 using an existing fan site If you are preparing a new fan site, go to the preparing a new fan site section. If you plan to use an existing fan site, complete the following checklist for the support brace, ceiling hole, outlet box, and wiring. If you cannot check off every item, see the preparing a new fan site section for instructions on properly preparing the site for your new fan. fan support system • Fan must attach directly to building structure. • Fan support system must hold full weight of fan and light kit. ceiling hole • Outlet box clearance hole directly below the joist or support brace. outlet box • UL-approved octagonal 4" x 1-1/2" outlet box listed as "suitable for outdoor use" (or as specified by the support brace manufacturer). • Outlet box secured to joist or support brace by wood screws and washers through inner holes of outlet box. • Outer holes of outlet box aligned with joist or support brace. • Bottom of outlet box recessed a minimum of 1/16" into ceiling. wiring • Electrical cable secured to outlet box by approved connector. • Six inches of lead wires extend from outlet box. See Figure 4 for an adequate existing fan site. Support Brace Ceiling Joist Approved Connector 8' Minimum Ceiling Height 7' Minimum to Floor 30" From Wall or Nearest Obstruction Figure 3 - Minimum mounting distances 41877-01 06/14/2007 Washer Wood Screw Ceiling Outlet Box Figure 4 - Adequate existing fan site If your existing fan site is suitable, go to the installing the ceiling plate section and begin installing your new Hunter fan. preparing a new fan site To prepare the fan site follow four steps: • Cutting the Ceiling Hole • Installing the Support Brace (if necessary) • Installing the Outlet Box • Preparing the Wiring © 2007 Hunter Fan Company
-
 1
1 -
 2
2 -
 3
3 -
 4
4 -
 5
5 -
 6
6 -
 7
7 -
 8
8
 |
 |
