Hunter 25867 Owner's Manual - Page 11
Should you need to remove the canopy, trim ring, follow these steps
 |
View all Hunter 25867 manuals
Add to My Manuals
Save this manual to your list of manuals |
Page 11 highlights
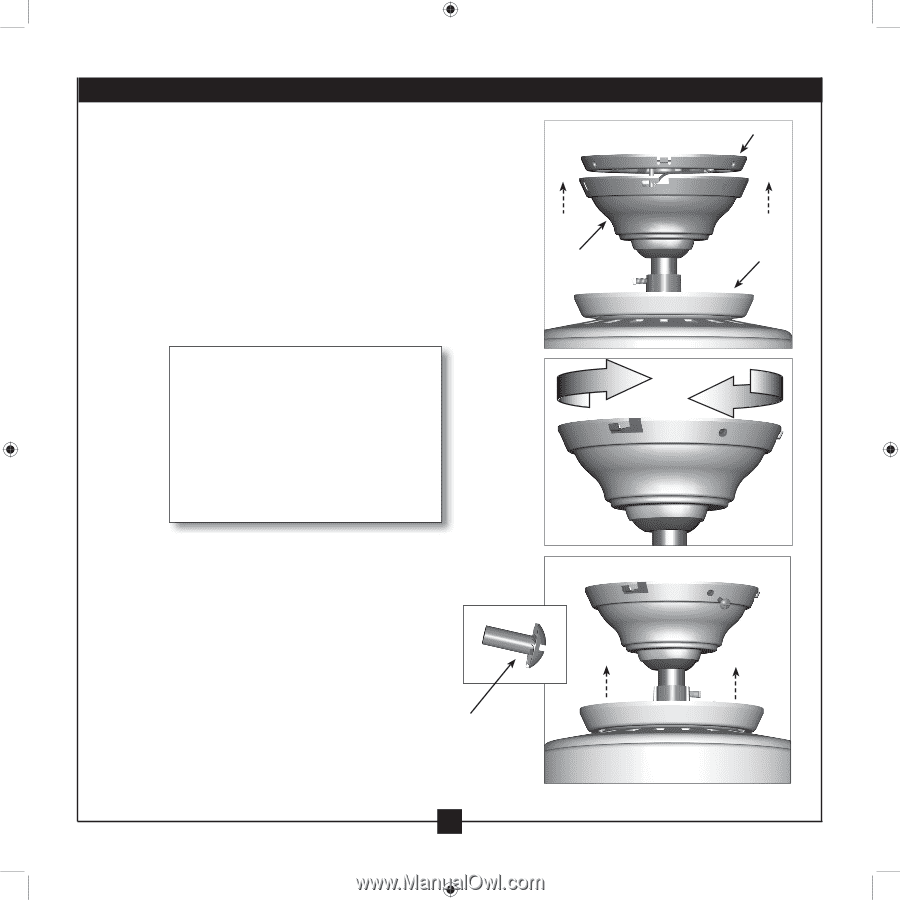
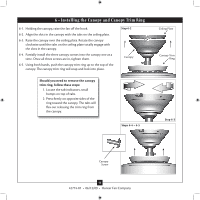
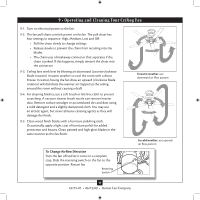
6 • Installing the Canopy and Canopy Trim Ring 6-1. Holding the canopy, raise the fan off the hook. 6-2. Align the slots in the canopy with the tabs on the ceiling plate. 6-3. Raise the canopy over the ceiling plate. Rotate the canopy clockwise until the tabs on the ceiling plate totally engage with the slots in the canopy. 6-4. Partially install the three canopy screws into the canopy one at a time. Once all three screws are in, tighten them. 6-5. Using both hands, push the canopy trim ring up to the top of the canopy. The canopy trim ring will snap and lock into place. Step 6-2 Canopy Should you need to remove the canopy trim ring, follow these steps: 1. Locate the tab indicators, small bumps on top of tabs. 2. Press firmly on opposite sides of the ring toward the canopy. The tabs will flex out releasing the trim ring from the canopy. Steps 6-4 - 6-5 Ceiling Plate Canopy Trim Ring Step 6-3 Canopy Screw 11 42774-01 • 06/12/09 • Hunter Fan Company
-
 1
1 -
2
-
3
-
4
-
5
-
 6
6 -
 7
7 -
 8
8 -
 9
9 -
 10
10 -
 11
11 -
 12
12 -
 13
13 -
 14
14 -
 15
15
 |
 |