Hunter 42999 Owner's Manual - Page 12
Continued - install thermostat
 |
View all Hunter 42999 manuals
Add to My Manuals
Save this manual to your list of manuals |
Page 12 highlights
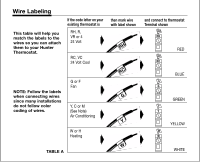
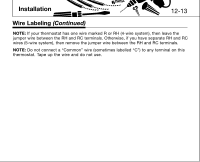
Installation 12-13 Wire Labeling (Continued) NOTE: If your thermostat has one wire marked R or RH (4-wire system), then leave the jumper wire between the RH and RC terminals. Otherwise, if you have separate RH and RC wires (5-wire system), then remove the jumper wire between the RH and RC terminals. NOTE: Do not connect a "Common" wire (sometimes labelled "C") to any terminal on this thermostat. Tape up the wire and do not use.
-
 1
1 -
2
-
3
-
4
-
5
-
6
-
 7
7 -
 8
8 -
 9
9 -
 10
10 -
 11
11 -
 12
12 -
 13
13 -
 14
14 -
 15
15 -
 16
16 -
 17
17 -
18
-
19
-
20
-
21
-
22
-
23
-
24
 |
 |

12-13
Installation
NOTE:
If your thermostat has one wire marked R or RH (4-wire system), then leave the
jumper wire between the RH and RC terminals. Otherwise, if you have separate RH and RC
wires (5-wire system), then remove the jumper wire between the RH and RC terminals.
NOTE:
Do not connect a “Common” wire (sometimes labelled “C”) to any terminal on this
thermostat. Tape up the wire and do not use.
Wire Labeling
(Continued)