Hunter 83001 Owner's Manual - Page 12
If ducting does not fit securely, an adapter may
 |
View all Hunter 83001 manuals
Add to My Manuals
Save this manual to your list of manuals |
Page 12 highlights
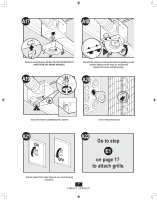
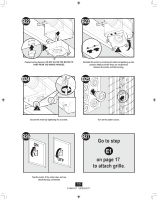
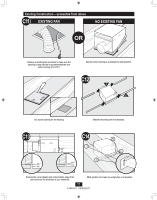
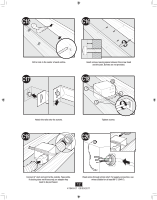
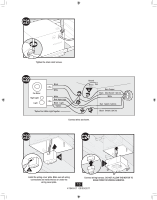
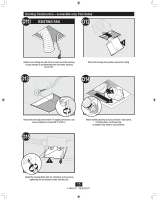
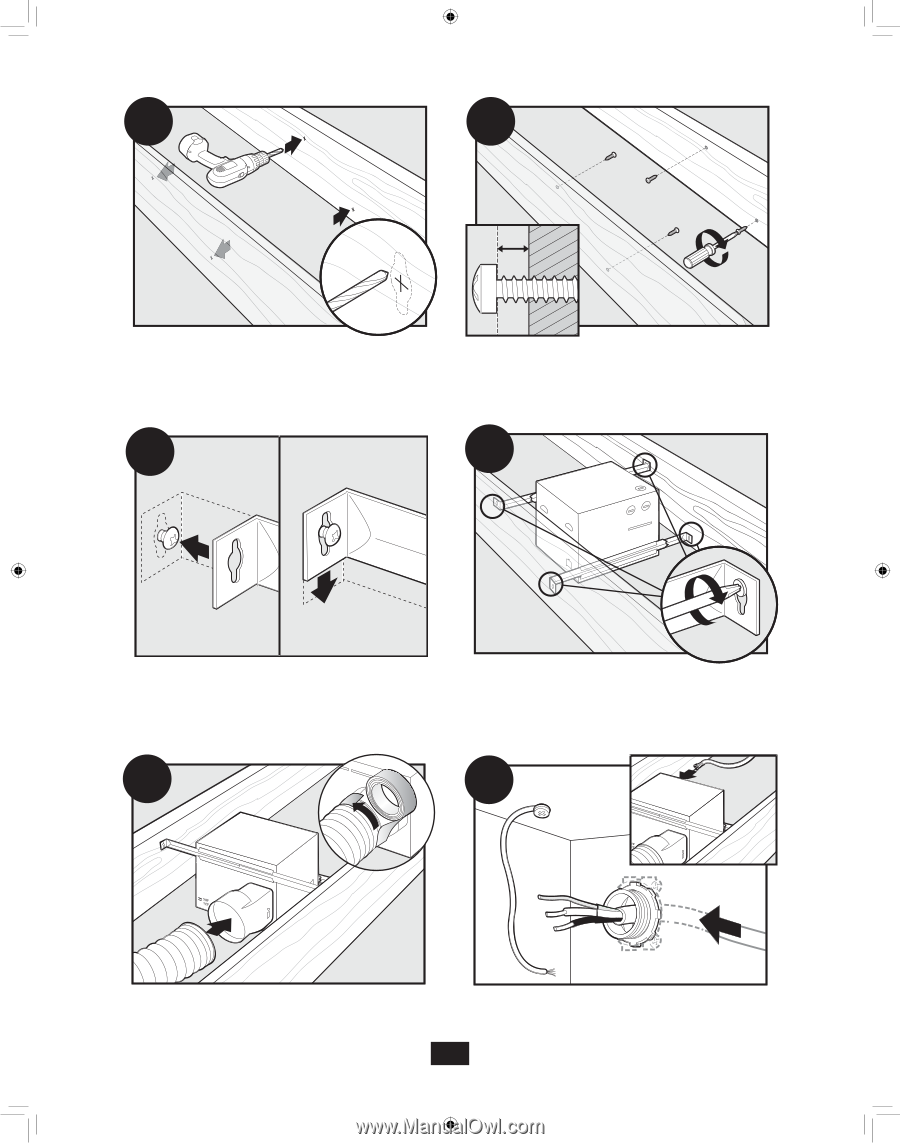
C15 C16 Drill a hole in the center of each outline. C17 Insert screws, leaving space between the screw head and the joist. Screws are not provided. C18 Attach the rails onto the screws. C19 Tighten screws. C20 Connect 4" duct and vent to the outside. Tape joints. If ducting does not fit securely, an adapter may need to be purchased. Route wires through strain relief. For supply connection, use wires suitable for at least 90º C (194º F). 12 41949-01 09/09/2011
-
 1
1 -
2
-
3
-
4
-
5
-
6
-
 7
7 -
 8
8 -
 9
9 -
 10
10 -
 11
11 -
 12
12 -
 13
13 -
 14
14 -
 15
15 -
 16
16 -
 17
17 -
18
-
19
-
20
-
21
-
22
-
23
-
24
-
25
-
26
-
27
-
28
-
29
-
30
-
31
-
32
-
33
-
34
-
35
-
36
-
37
-
38
-
39
-
40
 |
 |
41949-01
09/09/2011
12
C17
C18
C19
C20
C15
C16
Drill a hole in the center of each outline.
Insert screws, leaving space between the screw head
and the joist. Screws are not provided.
Attach the rails onto the screws.
Tighten screws.
Connect 4” duct and vent to the outside. Tape joints.
If ducting does not fit securely, an adapter may
need to be purchased.
Route wires through strain relief. For supply connection, use
wires suitable for at least 90º C (194º F).