Husqvarna 120 Mark II Owner Manual - Page 16
Assembly, Operation - 16 chainsaw
 |
View all Husqvarna 120 Mark II manuals
Add to My Manuals
Save this manual to your list of manuals |
Page 16 highlights
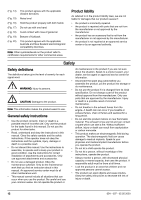
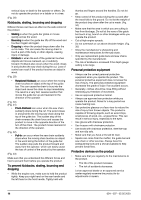
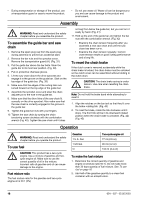
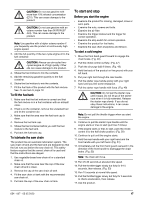
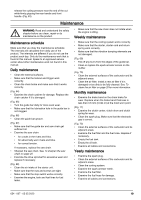
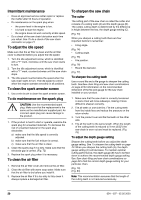
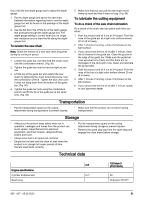
• During transportation or storage of the product, use a transportation guard or case to move the product. • Do not use waste oil. Waste oil can be dangerous to you and can cause damage to the product and environment. Assembly WARNING: Read and understand the safety chapter before you assemble the product. To assemble the guide bar and saw chain 1. Remove the spark plug cap from the spark plug during assembly to prevent an accidental start. 2. Remove the bar nuts and the sprocket cover. Remove the transportation guard (A). (Fig. 37) 3. Put the guide bar above the bar bolts. Steer the guide bar to its most rear position. (Fig. 38) 4. Put on protective chainsaw gloves. 5. Lift the saw chain above the drive sprocket and engage it in the groove on the guide bar. Start on the top edge of the guide bar. (Fig. 39) 6. Make sure that the edges of the cutting links are turned forward on the top edge of the guide bar. 7. Assemble the sprocket cover and steer the chain adjuster pin to the hole in the guide bar. 8. Make sure that the drive links of the saw chain fit correctly on the drive sprocket. Also make sure that the saw chain is correctly engaged in the groove in the guide bar. 9. Tighten the guide bar nuts with your fingers. 10. Tighten the saw chain by turning the chain tensioning screw clockwise with the combination wrench (Fig. 40). Tighten the saw chain until it does not sag from below the guide bar, but you can turn it easily by hand. (Fig. 41) 11. Hold up the end of the guide bar and tighten the bar nuts with the combination wrench. (Fig. 42) • Examine the chain tension frequently after you assemble a new saw chain and until the saw chain has been run-in. • Examine the chain tension regularly. Correct chain tension results in good cutting performance and a long life. To reset the chain brake If the clutch cover is removed accidentally while the chain brake is locked, the chain brake must be unlocked so the clutch cover can be assembled without binding to the clutch drum. CAUTION: The chain brake spring is under tension. Use care when resetting the chain brake. Note: Do not hold the brake band while attempting to reset it. 1. Align the notches on the bar tool so that they fit over the brake rotating link. (Fig. 43) 2. To reset the brake, rotate the link clockwise until it stops. The front link will be in its downward rotated position when the chain brake is unlocked. (Fig. 44) (Fig. 45) Operation WARNING: Read and understand the safety chapter before you operate the product. To use fuel CAUTION: This product has a two-cycle engine. Use a mixture of gasoline and twocycle engine oil. Make sure to use the correct quantity of oil in the mixture. Incorrect ratio of gasoline and oil can cause damage to the engine. Fuel mixture ratio The fuel mixture ratio for the gasoline and two-cycle engine oil is 50:1 (2%) Gasoline 1 U.S. Gal. 1 UK Gal. 5 l Two-cycle engine oil 77 ml (2.6 oz) 95 ml (3.2 oz) 100 ml (3.4 oz) To make the fuel mixture 1. Determine the correct quantity of gasoline and engine oil (mixture ratio 50:1). Do not make more than 30 days quantity of fuel mixture. See To use fuel on page 16. 2. Add half of the gasoline quantity to a clean fuel container with an antispill valve. 16 654 - 007 - 05.05.2020
-
 1
1 -
2
-
3
-
4
-
5
-
6
-
7
-
8
-
9
-
10
-
 11
11 -
 12
12 -
 13
13 -
 14
14 -
 15
15 -
 16
16 -
 17
17 -
 18
18 -
 19
19 -
 20
20 -
 21
21 -
22
-
23
-
24
-
25
-
26
-
27
-
28
-
29
-
30
-
31
-
32
-
33
-
34
-
35
-
36
-
37
-
38
-
39
-
40
-
41
-
42
-
43
-
44
-
45
-
46
-
47
-
48
-
49
-
50
-
51
-
52
-
53
 |
 |