Husqvarna 120 Mark II Owner Manual - Page 18
To fell a tree, To limb a tree, To buck a log
 |
View all Husqvarna 120 Mark II manuals
Add to My Manuals
Save this manual to your list of manuals |
Page 18 highlights
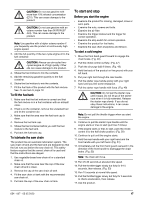
To start a warm engine 1. Move the front hand guard forward to engage the chain brake. 2. Pull the choke control out fully. 3. Push the air purge bulb 6 times. 4. Push the choke control in fully. 5. Hold the body of the product on the ground with your left hand. 6. Put your right foot through the rear handle. 7. Pull the starter rope handle slowly with your right hand until you feel some resistance. 8. Pull the starter rope handle with force. CAUTION: Do not pull the starter rope until it stops. Do not let go of the starter rope when it is fully extended. Release the starter rope slowly. If you do not obey these instructions, it can cause damage to the engine. Note: Do not pull the throttle trigger when you start the engine. 9. Pull the starter rope handle until the engine starts. 10. Hold the rear handle with your right hand and the front handle with your left hand. 11. Immediately pull the front hand guard rearward in the direction of the front handle to disengage the chain brake. Note: The chain will move. 12. Wait 10-15 seconds. 13. Pull the throttle trigger lightly to set normal idle. 14. Use the product. To start the engine when the fuel is too hot If the product does not start, the fuel can be too hot. Note: Always use new fuel and decrease the operation time during warm weather. 1. Put the product in a cool area away from open sunlight. 2. Let the product cool down for 20 minutes at minimum. 3. Press the air purge bulb again and again for 10-15 seconds. 4. Obey the procedure to start a cold engine. Refer to To start a cold engine on page 17. To stop the engine • Push the stop switch to stop the engine. Note: The stop switch automatically goes back to its initial position. To fell a tree 1. Remove dirt, stones, loose bark, nails, staples and wire from the tree. 2. Make a notch 1/3 the diameter of the tree, perpendicular to the direction of the fall. (Fig. 54) 3. Make the lower horizontal notch cut. This will prevent either the saw chain or the guide bar from being pinched when the second notch is made. 4. Make the felling back cut (X) at least 50 mm (2 in) higher than the horizontal notching cut. Keep the felling back cut parallel to the horizontal notching cut so enough wood is left to act as a hinge. Do not cut through the hinge. The hinge wood keeps the tree from twisting and falling in the wrong direction. (Fig. 55) (Fig. 56) 5. As the felling back cut nears the hinge, the tree starts to fall. Make sure that the tree can fall in the correct direction and not rock rearward and pinch the saw chain. Stop the cut before the felling back cut is complete to prevent this. Use wedges of wood, plastic or aluminium to open the cut and let the tree fall along the necessary line of fall. (Fig. 57) 6. When the tree begins to fall, remove the product from the cut, stop the engine, put the product down, then use the retreat path planned. Be alert for overhead limbs falling and watch your footing. (Fig. 58) To limb a tree 1. Use larger limbs to hold the log off the ground. 2. Remove small limbs in one cut. (Fig. 59) 3. Cut branches that have tension from the bottom to the top to prevent pinching the saw chain or the guide bar. To buck a log CAUTION: Do not let the saw chain touch the ground. • If the log is supported along its entire length, cut from the top of the log (known as overbucking). (Fig. 60) • If the log is supported on one end, cut 1/3 the diameter from the underside of the log (known as underbucking) . (Fig. 61) • If the log is supported on both ends, cut 1/3 the diameter from the top. Complete the cut by underbucking the lower 2/3 of the log to meet the first cut. (Fig. 62) • If you buck a log on a slope, always stand on the uphill side of the log. Cut through the log while you maintain complete control of the product, then 18 654 - 007 - 05.05.2020
-
 1
1 -
2
-
3
-
4
-
5
-
6
-
7
-
8
-
9
-
10
-
11
-
12
-
 13
13 -
 14
14 -
 15
15 -
 16
16 -
 17
17 -
 18
18 -
 19
19 -
 20
20 -
 21
21 -
 22
22 -
 23
23 -
24
-
25
-
26
-
27
-
28
-
29
-
30
-
31
-
32
-
33
-
34
-
35
-
36
-
37
-
38
-
39
-
40
-
41
-
42
-
43
-
44
-
45
-
46
-
47
-
48
-
49
-
50
-
51
-
52
-
53
 |
 |
