Husqvarna 120 Owner Manual - Page 18
Transportation, Storage, Technical data
 |
View all Husqvarna 120 manuals
Add to My Manuals
Save this manual to your list of manuals |
Page 18 highlights
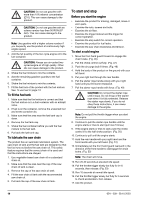
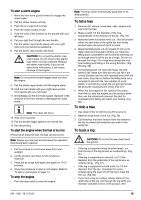
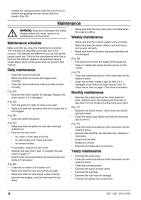
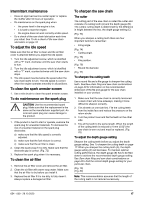
Use a flat file and depth gauge tool to adjust the depth gauge. 1. Put the depth gauge tool above the saw chain. Detailed information regarding how to use the depth gauge tool will be found on the package of the depth gauge tool. 2. Use the flat file to file off the tip of the depth gauge that protrudes through the depth gauge tool. The depth gauge setting is correct when you no longer feel resistance as you draw the file along the depth gauge tool. To tension the saw chain Note: Check the tension of a new saw chain frequently during its running-in period. 1. Loosen the guide bar nuts that hold the clutch cover. Use the combination wrench. (Fig. 81) 2. Tighten the guide bar nuts by hand as tight as you can. 3. Lift the top of the guide bar and extend the saw chain by tightening the chain tensioning screw. Use the combination wrench. Tighten the saw chain until it does not hang down from the bottom of the guide bar. (Fig. 82) 4. Tighten the guide bar nuts using the combination wrench and lift the tip of the guide bar at the same time. (Fig. 83) 5. Make sure that you can pull the saw chain round freely by hand and that it does not sag. (Fig. 84) To lubricate the cutting equipment To do a check of the saw chain lubrication Do a check of the chain saw lubrication each time you refuel. 1. Start the product and let it run at 3/4 speed. Point the nose of the guide bar at a light color surface almost 20 cm (8 in) away. 2. After 1 minute of running, a line of oil shows on the light surface. 3. If you cannot see the line of oil after 1 minute, clean the oil channel in the guide bar. Clean the groove in the edge of the guide bar. Make sure the guide bar nose sprocket turns freely and that there are no blockages in the lubrication hole. Clean and lubricate the tip sprocket. 4. Start the product and let it run at 3/4 speed. Point the nose of the bar at a light color surface almost 20 cm (8 in) away. 5. After 1 minute of running, a line of oil shows on the light surface. 6. If you cannot see the line of oil after 1 minute, speak to your approved dealer. Transportation • Put the transportation guard on the cutting attachment during transportation to prevent injuries. • Make sure that the product can not move during transportation. Storage • Always put the product away safely when not in operation. Leakages and fumes from the product can touch sparks, naked flames from electrical equipment, electrical mowers, relays/switches, boilers and more. • Always save fuel in an approved container. • Empty the fuel tank and the chain oil tank when the product is in storage for longer periods of time. Discard used fluids correctly. • Put the transportation guard on the cutting attachment during storage to prevent injuries. • Remove the spark plug cap from the spark plug and engage the chain brake before storage. Technical data Engine specifications Cylinder displacement Spark plug unit 120 (P02138HV) cm3 38 Champion RCJ7Y 18 654 - 009 - 29.10.2020
-
 1
1 -
2
-
3
-
4
-
5
-
6
-
7
-
8
-
9
-
10
-
11
-
12
-
 13
13 -
 14
14 -
 15
15 -
 16
16 -
 17
17 -
 18
18 -
 19
19 -
 20
20 -
 21
21 -
 22
22 -
 23
23 -
24
-
25
-
26
-
27
-
28
-
29
-
30
-
31
-
32
-
33
-
34
-
35
-
36
-
37
-
38
-
39
-
40
-
41
-
42
-
43
-
44
-
45
-
46
-
47
-
48
-
49
-
50
 |
 |
