Husqvarna 520iLX Owner Manual - Page 15
Troubleshooting
 |
View all Husqvarna 520iLX manuals
Add to My Manuals
Save this manual to your list of manuals |
Page 15 highlights
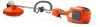
3. Make sure that the terminals on the battery and the battery charger are clean before the battery is put in the battery charger or the product. To do a check of the trimmer line Only use the recommended trimmer line. See the illustration on the last pages of the manual. 1. Put the cord into the hole on the cover of the product to make sure it follows the recommendation. 2. Pull out the line chute assembly. 3. Remove the nut that holds the trimmer head and the drive disc. To replace the trimmer head Note: To increase the life of the cord it can be soaked in water for a couple of days before it is assembled. This will make the cord tougher. 1. Press the snap-in clips on the trimmer head and remove the trimmer head and trimmer line. 4. Replace the trimmer head. 5. Install the nut. 6. Install the line chute assembly. 7. Install the trimmer head. Troubleshooting Keypad LED display Green activate LED flashing Possible faults Low battery voltage. Possible action Charge the battery. 756 - 001 - 24.10.2018 15
-
 1
1 -
2
-
3
-
4
-
5
-
6
-
7
-
8
-
9
-
 10
10 -
 11
11 -
 12
12 -
 13
13 -
 14
14 -
 15
15 -
 16
16 -
 17
17 -
 18
18 -
 19
19 -
 20
20 -
21
-
22
-
23
-
24
-
25
-
26
-
27
-
28
-
29
-
30
-
31
-
32
-
33
-
34
-
35
-
36
-
37
-
38
-
39
-
40
-
41
-
42
-
43
-
44
-
45
-
46
-
47
-
48
-
49
-
50
-
51
-
52
-
53
-
54
-
55
-
56
-
57
-
58
-
59
-
60
 |
 |
