Husqvarna HUV4414G Owners Manual - Page 44
Air Intake System, Air Filter Replacement
 |
View all Husqvarna HUV4414G manuals
Add to My Manuals
Save this manual to your list of manuals |
Page 44 highlights
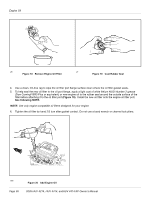
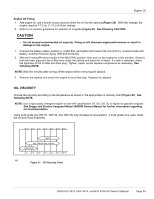
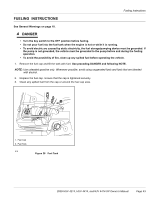
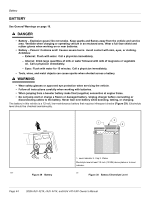
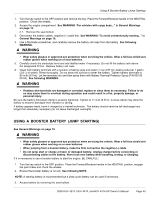
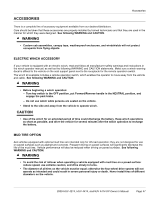
Air Intake System AIR INTAKE SYSTEM AIR FILTER REPLACEMENT The air filter should be inspected periodically and replaced when necessary. Filter changes should not exceed the recommended interval. See Periodic Service Schedule on page 31. More frequent service may be required in extremely dirty operating environments. In the event of a loss of power, sluggish acceleration, or a roughly running engine, service the air filter immediately. Air Filter Removal 1. Raise the cargo bed, remove the center plastic access panel (1) (Figure 16) and locate the air filter housing. 2. Release both housing retaining clips (Figure 27). 3. Lift the housing cover up off of the air filter housing. 4. Remove knob (1) and plate (2). Carefully remove the foam pre-cleaner (3) and air filter cartridge (4) assembly to prevent debris from entering carburetor. See following NOTE. NOTE: To clean foam pre-cleaner, separate it from cartridge and wash in liquid detergent and water. Squeeze dry in a clean cloth. The air filter cartridge and foam pre-cleaner are specifically designed for this engine. Use only engine-compatible air filter cartridges and foam pre-cleaners designed for your engine. Do not oil the foam pre-cleaner. 1 2 3 4 817 Figure 27 Air Filter Element Air Filter Installation 1. Reassemble clean (or new) pre-cleaner on clean (or new) cartridge. 2. Place the air cleaner assembly into the air filter housing. 3. Place the housing cover on the top of the air filter housing. 4. Secure the housing cover with both retaining clips. 5. Replace the center plastic access panel (1) (Figure 16) and lower and latch the cargo bed. Page 42 2009 HUV 4214, HUV 4414, andHUV 4414-XP Owner's Manual
-
 1
1 -
2
-
3
-
4
-
5
-
6
-
7
-
8
-
9
-
10
-
11
-
12
-
13
-
14
-
15
-
16
-
17
-
18
-
19
-
20
-
21
-
22
-
23
-
24
-
25
-
26
-
27
-
28
-
29
-
30
-
31
-
32
-
33
-
34
-
35
-
36
-
37
-
38
-
 39
39 -
 40
40 -
 41
41 -
 42
42 -
 43
43 -
 44
44 -
 45
45 -
 46
46 -
 47
47 -
 48
48 -
 49
49 -
50
-
51
-
52
-
53
-
54
-
55
-
56
-
57
 |
 |
