Husqvarna MZ54ROPS Owner Manual - Page 26
Cutting Blades, Replacing Pump Belt, Belt Removal, Belt Installation, Blade Replacement
 |
View all Husqvarna MZ54ROPS manuals
Add to My Manuals
Save this manual to your list of manuals |
Page 26 highlights
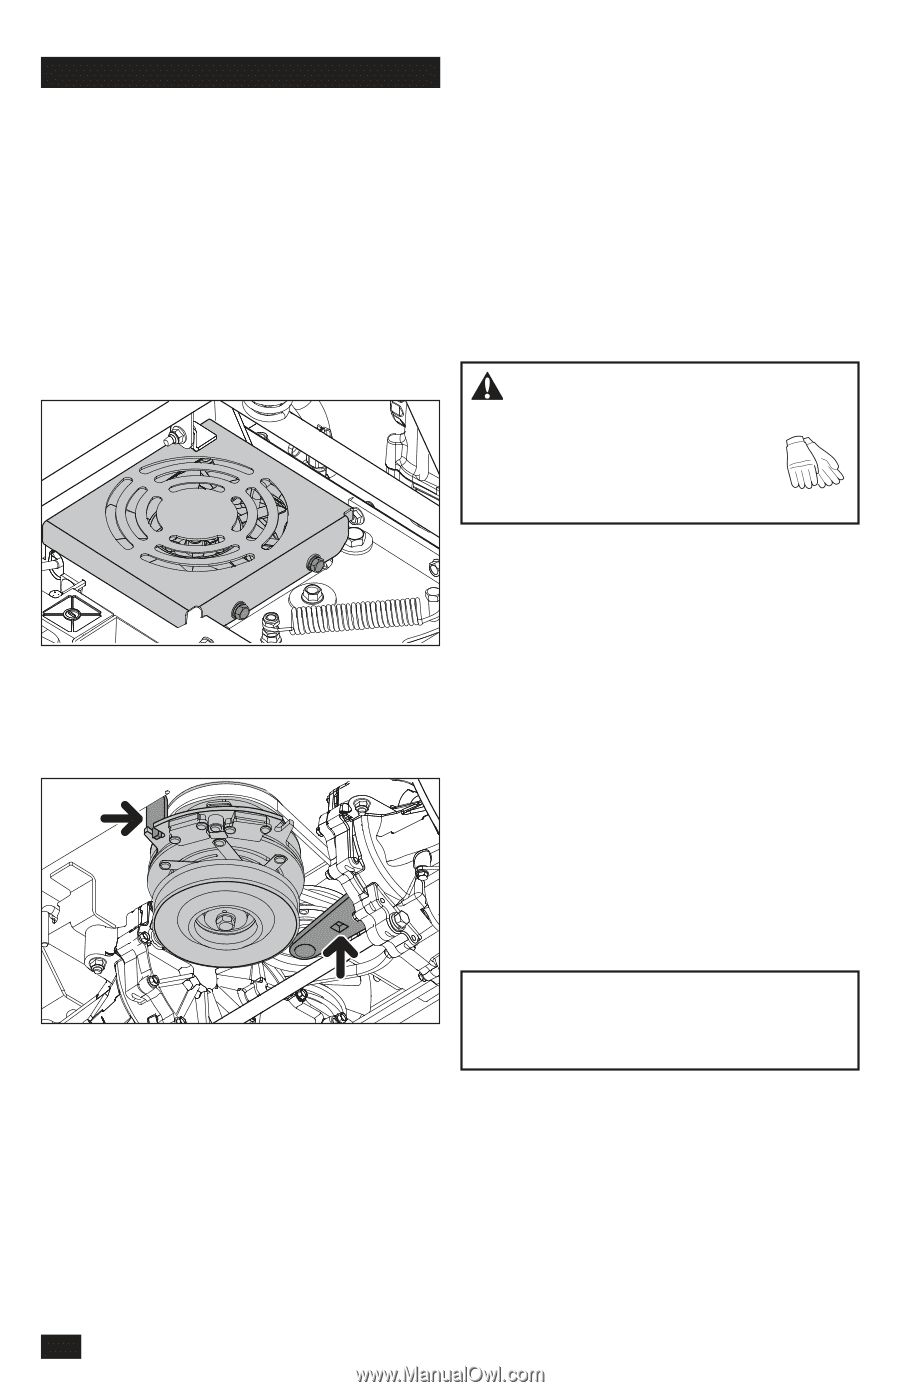
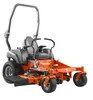
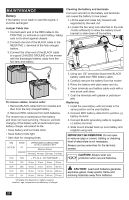
MAINTENANCE Pump Belt The belts are not adjustable. Replace belts if they begin to slip from wear. Replacing Pump Belt Park the mower on a level surface. Engage the park brake. Belt Removal From the top side of the deck: 1. Remove the deck belt (see Deck Belt Removal in this section of the manual). 2. Tilt seat forward to access fan covers. Remove both fan covers. 2. Slip the belt over the fans and put it between the idler pulleys. 3. Place the belt over the right and left idler pulleys. 4. Place the belt on the engine pulley. 5. Use the breaker bar to hold the tension off the belt while removing the implement used as a brace in the plate. 6. Install and tighten the clutch stop. 7. Install the fan shields. 8. Install the deck belt. Cutting Blades CAUTION! Blades are sharp. Protect your hands with gloves and/or wrap blades with a heavy cloth when handling. The sharpening of blades must be carried out by an authorized service workshop. From the underside of the mower: 3. Remove clutch stop to access the belt. 4. With a 1/2" breaker bar and using the square opening in the pump idler arm, shift the arm to create slack in the belt. 5. With the idler arm in the slack position, slip a screwdriver, clevis pin or similar into the 3/8" hole in the plate that sits between the two fan covers. This will keep the idler in the extended position and allow removal of the breaker bar. 6. Remove belt from the engine and pump pulleys over the top of the fans. Belt Installation 1. If the pump is not locked in the extended position, do Steps 4 and 5 from the above instructions again. For the best mowing effect, it is important that the blades are well sharpened and not damaged. Replace blades that have been bent or cracked when hitting obstacles. Let the service workshop decide whether a blade with large nicks can be repaired/ground or must be replaced. Balance the blades after sharpening. Check the blade mounts. Blade Replacement 1. Remove blade bolt by turning it counter clockwise. 2. Install new or re-sharpened blade with stamped GRASS SIDE facing toward the ground/grass (down) or THIS SIDE UP facing the deck and cutter housing. 3. Install and tighten the blade bolt correctly. 4. Torque the blade bolt to 45-55 lb-pie (122 Nm). IMPORTANT INFORMATION The special blade bolt is heat treated. Replace it with a Husqvarna bolt if necessary. Do not a use lower grade hardware than specified. 26
-
 1
1 -
2
-
3
-
4
-
5
-
6
-
7
-
8
-
9
-
10
-
11
-
12
-
13
-
14
-
15
-
16
-
17
-
18
-
19
-
20
-
 21
21 -
 22
22 -
 23
23 -
 24
24 -
 25
25 -
 26
26 -
 27
27 -
 28
28 -
 29
29 -
 30
30 -
 31
31 -
32
-
33
-
34
-
35
-
36
-
37
-
38
-
39
-
40
-
41
-
42
-
43
-
44
-
45
-
46
-
47
-
48
-
49
-
50
-
51
-
52
-
53
-
54
-
55
-
56
-
57
-
58
-
59
-
60
-
61
-
62
-
63
-
64
-
65
-
66
-
67
-
68
-
69
-
70
-
71
-
72
-
73
-
74
-
75
-
76
-
77
-
78
-
79
-
80
 |
 |