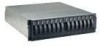
IBM 17011RS Quick Installation Guide
IBM 17011RS - TotalStorage DS300 Model NAS Server Manual
 |
UPC - 000435304971
View all IBM 17011RS manuals
Add to My Manuals
Save this manual to your list of manuals |
IBM 17011RS manual content summary:
- IBM 17011RS | Quick Installation Guide - Page 1
Guide Before using this information and the product it supports, read the "IBM Statement of Limited Warranty" in the IBM Machine Types 1700 and 1701 Warranty and Support Information document on the IBM® Documentation CD. Obtaining the documentation from the IBM Support 's Guide for instructions). - IBM 17011RS | Quick Installation Guide - Page 2
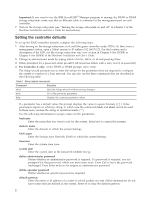
to use the IBM ServeRAID™ Manager in Chapter 9 of the Hardware Installation and User's Guide for instructions). Setting the controller defaults To set up the RAID Function abort Quit the Setup wizard without saving changes back Go to the previous parameter help Display the current parameter - IBM 17011RS | Quick Installation Guide - Page 3
the ServeRAID Application CD that comes with the DS300 or DS400 storage subsystem (see Chapter 1 of the IBM TotalStorage DS300 and DS400 Software Installation Guide for instructions). 2. Install the Management Station program on the management station (see Chapter 1 of the Software Installation - IBM 17011RS | Quick Installation Guide - Page 4
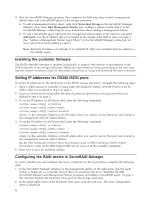
want to use for that port, and netmask is the management network subnet address. See the IBM TotalStorage DS300 Problem Determination Guide or IBM TotalStorage DS400 Problem Determination Guide on the IBM Support Web site for a list of all the available commands. 5. Enter save to save the modified - IBM 17011RS | Quick Installation Guide - Page 5
3. In the array configuration menu, select Create logical drive in a new array; then, click Next. 4. To select the drives that you want in the array (see the "Creating arrays and hot-spare drives" section in the ServeRAID Manager online help for more information), complete the following steps: a. - IBM 17011RS | Quick Installation Guide - Page 6
Manual and Troubleshooting Guide or Problem Determination and Service Guide on the IBM Documentation CD that comes with your system. Note: For some server options, the Hardware Maintenance Manual and Troubleshooting Guide is available only from the IBM support Web site. v Go to the IBM support - IBM 17011RS | Quick Installation Guide - Page 7
problems with xSeries servers, BladeCenter products, IntelliStation workstations, and appliances. For information about which products are supported by Support Line in your country or region, see http://www.ibm.com/services/sl/products/. For more information about Support Line and other IBM services - IBM 17011RS | Quick Installation Guide - Page 8
right may be used instead. However, it is the user's responsibility to evaluate and verify the operation of any non-IBM product, program, or service. IBM may have patents or pending patent applications covering subject matter described in this document. The furnishing of this document does not - IBM 17011RS | Quick Installation Guide - Page 9
. Other company, product, or service names may be trademarks or service marks of others. Important notes IBM products. Support (if any) for the non-IBM products is provided by the third party, not IBM. Some software may differ from its retail version (if available), and may not include user manuals - IBM 17011RS | Quick Installation Guide - Page 10
your user manual or service manual for specific battery information. The battery must be recycled or disposed of properly. Recycling facilities may not be available in your area. For information on disposal of batteries outside the United States, go to http://www.ibm.com/ibm/environment/products - IBM 17011RS | Quick Installation Guide - Page 11
energy and, if not installed and used in accordance with the instruction manual, may cause harmful interference to radio communications. Operation of this and connectors must be used in order to meet FCC emission limits. IBM is not responsible for any radio or television interference caused by using - IBM 17011RS | Quick Installation Guide - Page 12
© Copyright International Business Machines Corporation 2005. All rights reserved. US Government Users Restricted Rights - Use, duplication or disclosure restricted by GSA ADP Schedule Contract with IBM Corp. (1P) P/N: 31R1617
-
 1
1 -
 2
2 -
 3
3 -
 4
4 -
 5
5 -
 6
6 -
 7
7 -
8
-
9
-
10
-
11
-
12
 |
 |

±²³
IBM
TotalStorage
DS300
and
DS400
Quick
Installation
Guide
Before
using
this
information
and
the
product
it
supports,
read
the
“IBM
Statement
of
Limited
Warranty”
in
the
IBM
Machine
Types
1700
and
1701
Warranty
and
Support
Information
document
on
the
IBM
®
Documentation
CD.
Obtaining
the
documentation
from
the
IBM
Support
Web
site
All
IBM
TotalStorage
®
documentation
that
is
referred
to
in
this
Quick
Installation
Guide
is
on
the
IBM
Documentation
CD
that
comes
with
the
storage
subsystem.
The
storage
subsystem
might
have
features
that
are
not
described
in
the
documentation
that
you
received
with
the
unit.
The
documentation
might
be
updated
occasionally
to
include
information
about
those
features,
or
technical
updates
might
be
available
to
provide
additional
information
that
is
not
included
in
the
storage
subsystem
documentation.
These
updates
are
available
from
the
IBM
Web
site.
To
check
for
updated
documentation
and
technical
updates,
complete
the
following
steps.
Note:
Changes
are
made
periodically
to
the
IBM
Web
site.
The
actual
procedure
might
vary
slightly
from
what
is
described
in
this
document.
1.
Go
to
2.
On
the
“Support
for
TotalStorage
products”
page,
under
Select
your
product
,
in
the
Product
family
field,
select
Disk
storage
systems
.
3.
In
the
Product
field,
select
DS300
Disk
System
or
DS400
Disk
System
.
4.
Click
Go
.
5.
Under
Technical
resources
,
select
Documentation
.
Before
you
begin,
you
should
have
a
plan
for
how
you
want
to
install
this
storage
subsystem
into
a
storage
network.
This
plan
should
allow
for
the
data
servers,
management
station,
host
bus
adapters,
switches,
and
other
equipment.
See
Chapter
2
(for
TotalStorage
DS300)
or
Chapter
5
(for
TotalStorage
DS400)
in
the
IBM
TotalStorage
DS300
and
DS400
Hardware
Installation
and
User’s
Guide
for
more
information.
Installing
the
hardware
To
install
the
hardware,
complete
the
following
steps:
1.
Remove
all
packing
materials.
2.
Install
the
rails
and
the
DS300
or
DS400
storage
subsystem
into
a
standard
EIA
19-inch
rack
(see
the
printed
Rack
Installation
Instructions
document
that
comes
with
the
storage
subsystem
for
instructions).
3.
Install
the
front
bezel
on
the
DS300
or
DS400
storage
subsystem
(see
Chapter
10
of
the
Hardware
Installation
and
User’s
Guide
for
instructions).
4.
Install
hard
disk
drives
in
the
DS300
or
DS400
storage
subsystem
(see
Chapter
10
of
the
Hardware
Installation
and
User’s
Guide
for
instructions).
5.
Connect
the
power
cables
that
come
with
the
DS300
or
DS400
storage
subsystem
to
the
power
distribution
unit
(see
“Power
cabling”
in
Chapter
9
of
the
Hardware
Installation
and
User’s
Guide
for
instructions).
6.
Install
the
small-form-factor
pluggable
(SFP)
modules
and
connect
the
Ethernet
and
Fibre
Channel
cables.
For
instructions,
see
Chapter
3
(for
DS300)
or
Chapter
7
(for
DS400)
of
the
Hardware
Installation
and
User’s
Guide
.