IBM 17011RS Quick Installation Guide - Page 1
IBM 17011RS - TotalStorage DS300 Model NAS Server Manual
 |
UPC - 000435304971
View all IBM 17011RS manuals
Add to My Manuals
Save this manual to your list of manuals |
Page 1 highlights
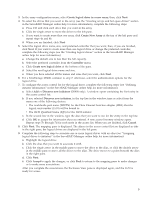
IBM TotalStorage DS300 and DS400 Quick Installation Guide Before using this information and the product it supports, read the "IBM Statement of Limited Warranty" in the IBM Machine Types 1700 and 1701 Warranty and Support Information document on the IBM® Documentation CD. Obtaining the documentation from the IBM Support Web site All IBM TotalStorage® documentation that is referred to in this Quick Installation Guide is on the IBM Documentation CD that comes with the storage subsystem. The storage subsystem might have features that are not described in the documentation that you received with the unit. The documentation might be updated occasionally to include information about those features, or technical updates might be available to provide additional information that is not included in the storage subsystem documentation. These updates are available from the IBM Web site. To check for updated documentation and technical updates, complete the following steps. Note: Changes are made periodically to the IBM Web site. The actual procedure might vary slightly from what is described in this document. 1. Go to http://www.ibm.com/servers/storage/support/. 2. On the "Support for TotalStorage products" page, under Select your product, in the Product family field, select Disk storage systems. 3. In the Product field, select DS300 Disk System or DS400 Disk System. 4. Click Go. 5. Under Technical resources, select Documentation. Before you begin, you should have a plan for how you want to install this storage subsystem into a storage network. This plan should allow for the data servers, management station, host bus adapters, switches, and other equipment. See Chapter 2 (for TotalStorage DS300) or Chapter 5 (for TotalStorage DS400) in the IBM TotalStorage DS300 and DS400 Hardware Installation and User's Guide for more information. Installing the hardware To install the hardware, complete the following steps: 1. Remove all packing materials. 2. Install the rails and the DS300 or DS400 storage subsystem into a standard EIA 19-inch rack (see the printed Rack Installation Instructions document that comes with the storage subsystem for instructions). 3. Install the front bezel on the DS300 or DS400 storage subsystem (see Chapter 10 of the Hardware Installation and User's Guide for instructions). 4. Install hard disk drives in the DS300 or DS400 storage subsystem (see Chapter 10 of the Hardware Installation and User's Guide for instructions). 5. Connect the power cables that come with the DS300 or DS400 storage subsystem to the power distribution unit (see "Power cabling" in Chapter 9 of the Hardware Installation and User's Guide for instructions). 6. Install the small-form-factor pluggable (SFP) modules and connect the Ethernet and Fibre Channel cables. For instructions, see Chapter 3 (for DS300) or Chapter 7 (for DS400) of the Hardware Installation and User's Guide.
-
 1
1 -
 2
2 -
 3
3 -
 4
4 -
 5
5 -
 6
6 -
 7
7 -
8
-
9
-
10
-
11
-
12
 |
 |