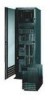
IBM 86802SY Installation Guide - Page 9
Installing Hot-Swap Hard Disk Drives, 3. Installing an Additional Microprocessor
 |
UPC - 087944496816
View all IBM 86802SY manuals
Add to My Manuals
Save this manual to your list of manuals |
Page 9 highlights
2. Installing Hot-Swap Hard Disk Drives Use the following procedure to install hot-swap hard disk drives in your Netfinity 7000 M10. 1 Touch the static-protective bag containing the drive to any unpainted metal surface on the server; then, remove the drive from the bag. 2 Remove the filler panel 1 from one of the hot-swap bays. Refer to the following illustration. 3 Insert the drive 2 into the bay. Ensure that the tray handle 3 on the drive is in the open position (perpendicular to the drive). 4 Slide the drive assembly into the bay until it connects to the backplane; then, move the handle to the locked (closed) position. 3. Installing an Additional Microprocessor If you have an additional microprocessor to install, do so now; then, return here and continue with "4. Cabling Your Server" on page 8. For installation instructions, refer to the "Microprocessor Installation" information in the "Hardware Information" section of this Server Library and the information provided with the microprocessor. If you do not have an additional microprocessor to install, continue with "4. Cabling Your Server" on page 8. Express Setup and Installation 7
-
 1
1 -
2
-
3
-
 4
4 -
 5
5 -
 6
6 -
 7
7 -
 8
8 -
 9
9 -
 10
10 -
 11
11 -
 12
12 -
 13
13 -
 14
14 -
15
-
16
-
17
 |
 |
