IBM ThinkPad T500 Service Guide - Page 61
BIOS Setup Utility.
 |
UPC - 074450008664
View all IBM ThinkPad T500 manuals
Add to My Manuals
Save this manual to your list of manuals |
Page 61 highlights
c. Push the front side of the palm rest until it clicks into place. d. Close the computer display, and turn the computer over. Reinstall the four screws for the palm rest. 12. Reinstall the battery. 13. Turn the computer over, and reconnect the AC adapter and the cables to the computer. To make sure that the SO-DIMM is installed correctly, do as follows: 1. Turn on the computer. 2. When the ThinkPad logo comes up, immediately press F1 to enter the BIOS Setup Utility. 3. The "Installed memory" item shows the total amount of memory installed in your computer. Chapter 5. Upgrading and replacing devices 53
-
 1
1 -
2
-
3
-
4
-
5
-
6
-
7
-
8
-
9
-
10
-
11
-
12
-
13
-
14
-
15
-
16
-
17
-
18
-
19
-
20
-
21
-
22
-
23
-
24
-
25
-
26
-
27
-
28
-
29
-
30
-
31
-
32
-
33
-
34
-
35
-
36
-
37
-
38
-
39
-
40
-
41
-
42
-
43
-
44
-
45
-
46
-
47
-
48
-
49
-
50
-
51
-
52
-
53
-
54
-
55
-
 56
56 -
 57
57 -
 58
58 -
 59
59 -
 60
60 -
 61
61 -
 62
62 -
 63
63 -
 64
64 -
 65
65 -
 66
66 -
67
-
68
-
69
-
70
-
71
-
72
-
73
-
74
-
75
-
76
-
77
-
78
-
79
-
80
-
81
-
82
-
83
-
84
-
85
-
86
-
87
-
88
-
89
-
90
-
91
-
92
-
93
-
94
 |
 |
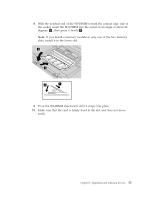
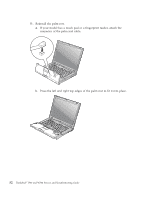
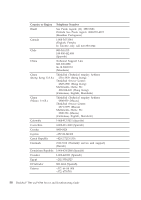
c.
Push the front side of the palm rest until it clicks into place.
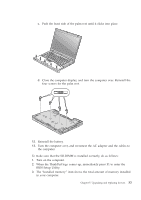
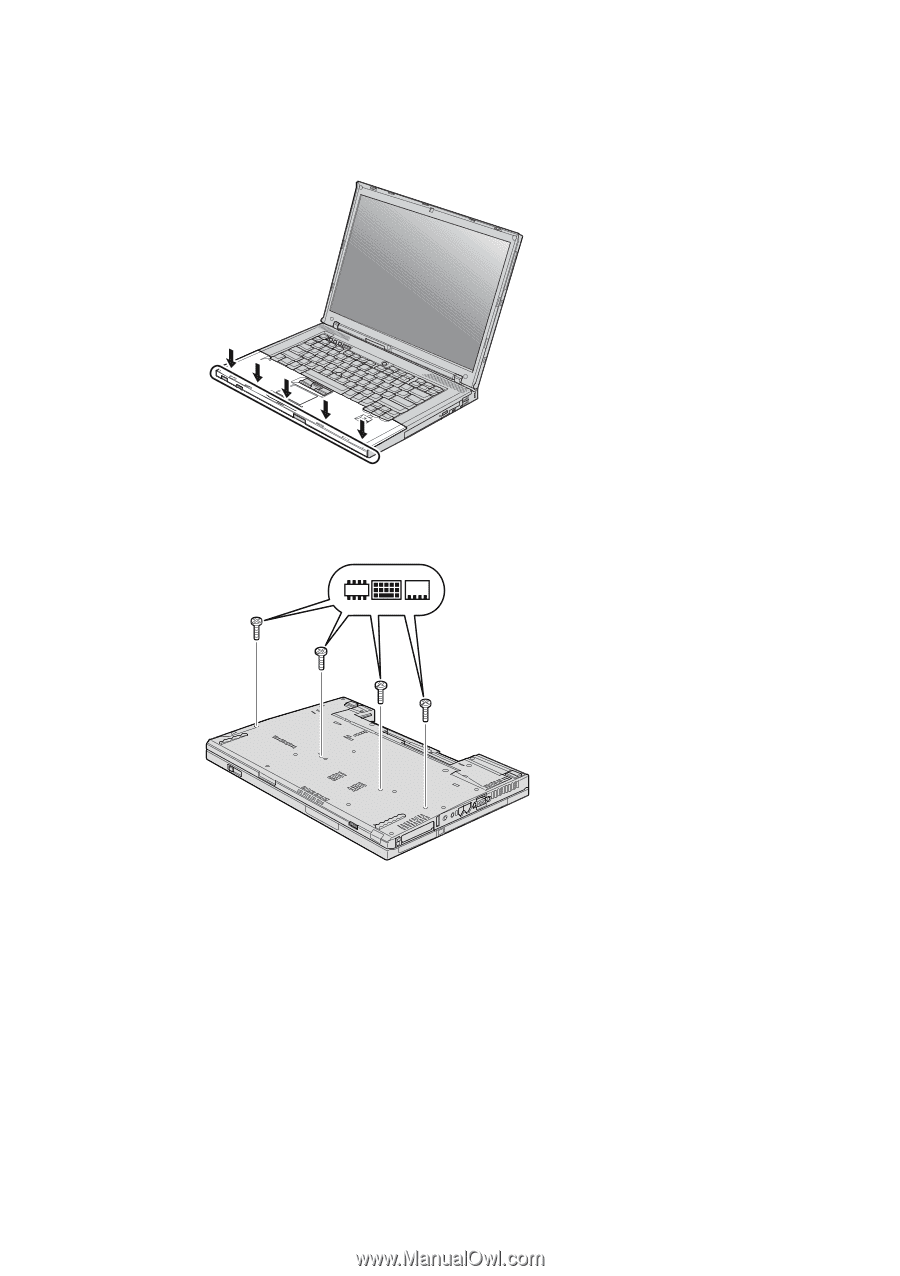
d.
Close the computer display, and turn the computer over. Reinstall the
four screws for the palm rest.
12.
Reinstall the battery.
13.
Turn the computer over, and reconnect the AC adapter and the cables to
the computer.
To make sure that the SO-DIMM is installed correctly, do as follows:
1.
Turn on the computer.
2.
When the ThinkPad logo comes up, immediately press F1 to enter the
BIOS Setup Utility.
3.
The “Installed memory” item shows the total amount of memory installed
in your computer.
Chapter 5. Upgrading and replacing devices
53