IC Realtime IPEG-B40F-IRW2 Quick Start Guide - Page 7
IC Realtime IPEG-B40F-IRW2 Manual
 |
View all IC Realtime IPEG-B40F-IRW2 manuals
Add to My Manuals
Save this manual to your list of manuals |
Page 7 highlights
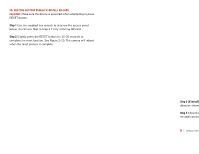
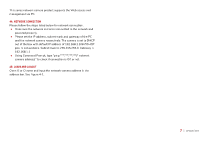
This series network camera product supports the Web access and management via PC. 4A. NETWORK CONNECTION Please follow the steps listed below for network connection. ● Make sure the network camera is connected to the network and powered properly. ● Please set the IP address, subnet mask and gateway of the PC and the network camera respectively. The camera is set to DHCP out of the box with default IP address of 192.168.1.108 if DHCP pool is not available. Subnet mask is 255.255.255.0. Gateway is 192.168.1.1 ● Using Command Prompt, type "ping network camera address)" to check if connection is OK or not. 4B. LOGIN AND LOGOUT Open IE or Chrome and input the network camera address in the address bar. See Figure 4-1. The login interface is shown as below. See Figure 4-2. Note: If it is your first time logging into the camera (and it has not been initialized through the ConfigTool or NVR), the camera will need to be initialized. A pop-up will appear to select your region. After selecting region, you will be prompted to create a password for the admin account as well as security questions in case the password is lost After initializing, you will be able to login to the web interface of the camera. Please input your user name and password. Figure 4-1 7 | www.icrealtime.com Figure 4-2
-
 1
1 -
 2
2 -
 3
3 -
 4
4 -
 5
5 -
 6
6 -
 7
7 -
 8
8 -
 9
9 -
 10
10
 |
 |
