IC Realtime PTZ-5323-IR Product Manual - Page 10
Protocol, Baud Rate, Address setup, Protocol/Baud Rate /Address Setup
 |
View all IC Realtime PTZ-5323-IR manuals
Add to My Manuals
Save this manual to your list of manuals |
Page 10 highlights
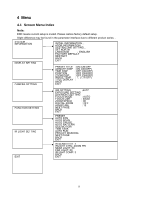
2 Protocol, Baud Rate, Address setup Before you operate, you need to set address, baud rate and parity. Otherwise you can not control the product! Note: Please reboot the speed dome to get all the setups activated! 2.1 Protocol/Baud Rate /Address Setup There are two dial switch buttons on the PCB of one side of the speed dome (There are labels.). You can use them to set speed dome protocol, baud rate, address and etc. See Figure 2-1 . It is 1 when you set the button as ON. For the protocol dial switch, you can refer to the following sheet. 1 is the lowest bit and the 8 is the highest bit. 1 234 5 6 7 8 ON NC 120Ω Parity Baud rate Connect to the 120Ω Please note the IR speed dome can automatically recognize the DH-SD, PELCO-D. PELCO-P. Usually you do not need to set the protocol. 1 ON 2 OFF 3 1. Address and dial switch button label 2. Protocol dial switch button. 3. Address dial switch button. Figure 2-1 2.1.1 Parity Setup Please refer to the parity setup sheet for detailed information. 5 6 Parity OFF OFF NONE ON OFF EVEN OFF ON ON ON ODD NONE 2.1.2 Baud Rate Please refer to the baud rate sheet for detailed information. 3
-
 1
1 -
2
-
3
-
4
-
 5
5 -
 6
6 -
 7
7 -
 8
8 -
 9
9 -
 10
10 -
 11
11 -
 12
12 -
 13
13 -
 14
14 -
 15
15 -
16
-
17
-
18
-
19
-
20
-
21
-
22
-
23
-
24
-
25
-
26
-
27
-
28
-
29
-
30
-
31
-
32
-
33
-
34
 |
 |
