Icom IC-A6 Instruction Manual - Page 33
Transceiver to transceiver cloning, Cloning using PC, Cloning error
 |
View all Icom IC-A6 manuals
Add to My Manuals
Save this manual to your list of manuals |
Page 33 highlights
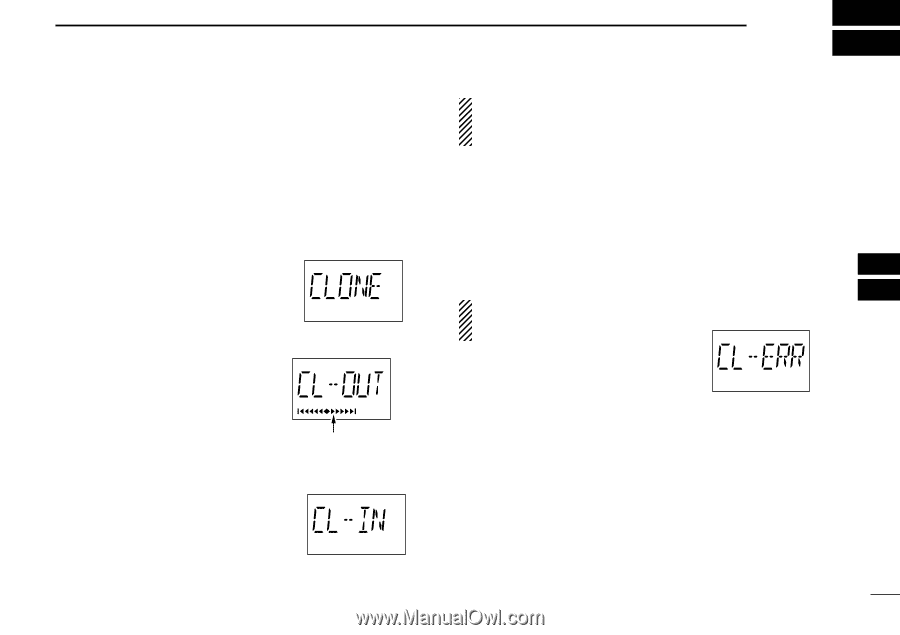
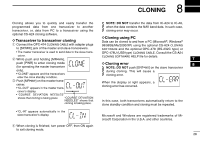
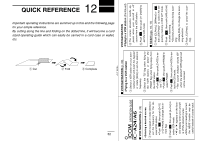
8 CLONING Cloning allows you to quickly and easily transfer the NOTE: DO NOT transfer the data from IC-A24 to IC-A6, programmed data from one transceiver to another when the data contains the NAV band data. In such case, transceiver, or, data from PC to a transceiver using the cloning error may occur. optional CS-A24 cloning software. D Transceiver to transceiver cloning q Connect the OPC-474 CLONING CABLE with adapter plugs DCloning using PC Data can be cloned to and from a PC (Microsoft®, Windows® 98/98SE/Me/2000/XP) using the optional CS-A24 CLONING to [SP/MIC] jack of the master and slave transceivers. SOFTWARE and the optional OPC-478 (RS-232C type) or • The master transceiver is used to send data to the slave trans- OPC-478U (USB type) CLONING CABLE. Consult the CS-A24 ceiver. w While push and holding [MR•MW], CLONING SOFTWARE HELP file for details. 7 push [PWR] to enter cloning mode (for operating the master transceiver only). • "CLONE" appears and the transceivers enter the clone standby condition. D Cloning error 8 NOTE: DO NOT push [ENT•WX] on the slave transceiver during cloning. This will cause a cloning error. e Push [MR•MW] on the master transceiver. • "CL-OUT" appears in the master trans- When the display at right appears, a cloning error has occurred. ceiver's display. • "COURSE DEVIATION NEEDLES" shows that cloning is taking place "COURSE DEVIATION NEEDLES" shows that cloning is taking place. In this case, both transceivers automatically return to the clone standby condition and cloning must be repeated. •"CL-IN" appears automatically in the slave transceiver's display. Microsoft and Windows are registered trademarks of Microsoft Corporation in the U.S.A. and other countries. r When cloning is finished, turn power OFF, then ON again to exit cloning mode. 28
-
 1
1 -
2
-
3
-
4
-
5
-
6
-
7
-
8
-
9
-
10
-
11
-
12
-
13
-
14
-
15
-
16
-
17
-
18
-
19
-
20
-
21
-
22
-
23
-
24
-
25
-
26
-
27
-
 28
28 -
 29
29 -
 30
30 -
 31
31 -
 32
32 -
 33
33 -
 34
34 -
 35
35 -
 36
36 -
 37
37 -
 38
38 -
39
-
40
 |
 |