Image Fitness 10.6 Treadmill English Manual - Page 18
exercising.
 |
View all Image Fitness 10.6 Treadmill manuals
Add to My Manuals
Save this manual to your list of manuals |
Page 18 highlights
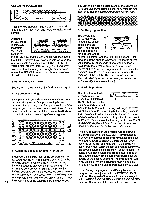
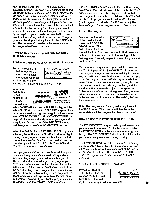
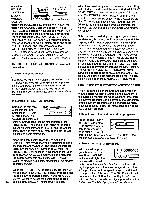
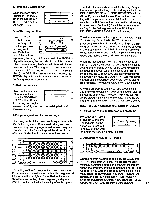
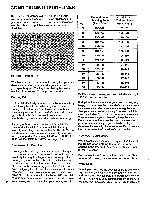
3. The program settings The speed and incline settings of the program you have selected will be shown in the columns of indicators in the center of the console. Red indicators will show the speed setting of each segment, and green indicators will show the incline setting of each segment. WEINIII01•I•1•1•1•101•I•10101•101010101•10I01•111EINEll EIESSEMPI•DI•I•Z•Zd4Z0IK•I•I•Z•I•Z•DI•DI GM: 9,38 MAIIEIEIDIPI•14•I•I•I•I•I•I•I•DDI•I•I•DI•DIII=111311 IFIENEICIPI•DI•I•DI•I•10101•DI•I•DI•I•IPI•IUll IIMICEMPI•I•I•I•DDI•DDI•1•DI•DI•DI•1•I•111=rn IMEME01110Iel•I•1•141•I•I•I•I•I•I•I•I•I•DI•I•I•MIME 1.5 3.5 60 2 C 0 0 ®o rrrNEss LDS 4.. 0 0 CD4= 4. Adjust the difficulty level of the program Step onto the walking belt and begin exercising. The time remaining in the program will be shown in the TIME display. (If the SEGMENT TIME button is pressed, the number of seconds remaining in the first segment will be shown). During the last three seconds of the first segment, the TIME display will flash three times. When the first segment is completed, the second column of indicators will begin to flash, and the treadmill will automatically adjust to the speed and incline settings of the second segment. The program will continue in this manner until the twentieth column is flashing and no time remains. The walking belt will then slow to a stop. Note: During the program, the difficulty level of the program can be adjusted with the FITNESS LEVEL buttons. The length of time that the program will last can be changed with the TIME SET buttons. The program can be stopped at any time with the STOP button. The console will then be in the same state as if the program had been completed. If desired, the difficulty level of the program can be adjusted with the FITNESS LEVEL buttons (see the drawing above). Each time the FITNESS LEVEL increase button is pressed, the speed and incline settings of all segments will increase. Each time the FITNESS LEVEL decrease button is pressed, the speed and incline settings of all segments will decrease. Note: The difficulty level of the program can be increased only until the highest indicator in one of the columns is lit, and decreased only until the lowest indicator in one of the columns is lit. 5. Adjust the program time Note: Although the difficulty level of the program can be adjusted, only the original speed and incline settings will be saved in memory. If you desire to change the original speed and incline settings, see HOW TO CREATE CUSTOM WORKOUT PROGRAMS on page 16. HOW TO TURN OFF THE POWER To turn off the power, remove the key from the console. Store the key in a secure location. In addition, move the on/off switch to the "off position. (See the drawing near the bottom of page 10.) The length of time TIME the program will 12 111O.00 last can be adjust- 11 17.117.1•0 0 ed, if desired, with 10 9 OTM~ 02%04 we the TIME SET but- 8 Ems sEr 7 tons. Each time 6 one of the buttons is pressed, the length of time will change by 20 sec- onds. If one of the buttons is held down, the length of time will change in increments of 1 minute. The pro- gram can be set to last for a minimum of 5 minutes, up to a maximum of 80 minutes. (If the SEGMENT TIME button is pressed, the TIME display will show how many seconds each of the twenty segments will last.) 6. Start the program Stand on the foot rails of the treadmill and press the PROGRAM so, - 11.4•1 1.5 0 C PROGRAM SL 7 ) START button. The first column of indicators will begin to flash, and the treadmill will automatically adjust 18 to the speed and incline settings of the first segment. HOW TO SELECT THE INFORMATION MODE The console features an information mode that keeps track of trip time and distance, as well as the total time and distance accumulated. To select the information mode, hold down the STOP button while inserting the key into the console. The indicator on the SEGMENT TIME button will light, and the trip time and distance will be shown in the TIME and DISTANCE displays. (Note: If the distance exceeds 999 miles, the thousands digits will be shown in the SPEED display.) If desired, the trip time and distance can be reset to zero by pressing the TIME SET decrease button. To view the total time and distance, press the TIME button. The total time and distance will then be shown. The total time and distance cannot be reset. Note: The PULSE display will show the letter ui,n indicating that the console is set for an li infrared (cordless) pulse sensor.
-
 1
1 -
2
-
3
-
4
-
5
-
6
-
7
-
8
-
9
-
10
-
11
-
12
-
 13
13 -
 14
14 -
 15
15 -
 16
16 -
 17
17 -
 18
18 -
 19
19 -
 20
20 -
 21
21 -
 22
22 -
 23
23 -
24
-
25
-
26
-
27
 |
 |
