Insignia NS-DSC1112SL User Manual (English) - Page 14
Taking photos, Using the zoom control, Simple Mode, OK/DISP, To take photos - digital camera
 |
UPC - 600603128745
View all Insignia NS-DSC1112SL manuals
Add to My Manuals
Save this manual to your list of manuals |
Page 14 highlights
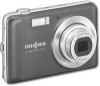
NS-DSC1112SL/NS-DSC1112SL-CN Insignia 12 Megapixel Camera 5 Press / or / to highlight Simple Mode, then press OK/DISP to open the submenu. 4 Press the shutter button down halfway. Your camera automatically adjusts the focus and exposure. When your camera is ready to take the photo, the focus bracket turns green, and the aperture value, shutter speed, and ISO setting are displayed. 6 Press / or / to highlight Off or On, then press OK/DISP to save the setting and exit to the previous menu. 7 Press MENU again to exit the on-screen menu and begin taking photos or video. Taking photos To take photos: 1 Turn on your camera. 2 Slide the MODE to switch to Photo mode. The Photo mode icon appears in the upper-left of the LCD. Note If the shake warning icon appears on the LCD, hold the camera steady, with your arms at your sides, or use a tripod to stabilize the camera in order to prevent blurred images. 5 Fully press the shutter button to capture the image. Using the zoom control • Your camera features 4x optical zoom and 5x digital zoom. To use the zoom control: • Press left to zoom out. Press right to zoom in. 3 Frame the image using the focus bracket on the LCD. The zoom indicator appears on the LCD. The section of the zoom indicator on the right side indicates that digital zoom is being used. 10 www.insigniaproducts.com
-
 1
1 -
2
-
3
-
4
-
5
-
6
-
7
-
8
-
 9
9 -
 10
10 -
 11
11 -
 12
12 -
 13
13 -
 14
14 -
 15
15 -
 16
16 -
 17
17 -
 18
18 -
 19
19 -
20
-
21
-
22
-
23
-
24
-
25
-
26
-
27
-
28
-
29
-
30
-
31
-
32
 |
 |
