Insignia NS-LCD37 User Manual (English) - Page 16
Customizing the picture, Adjusting the video features - screen black
 |
View all Insignia NS-LCD37 manuals
Add to My Manuals
Save this manual to your list of manuals |
Page 16 highlights
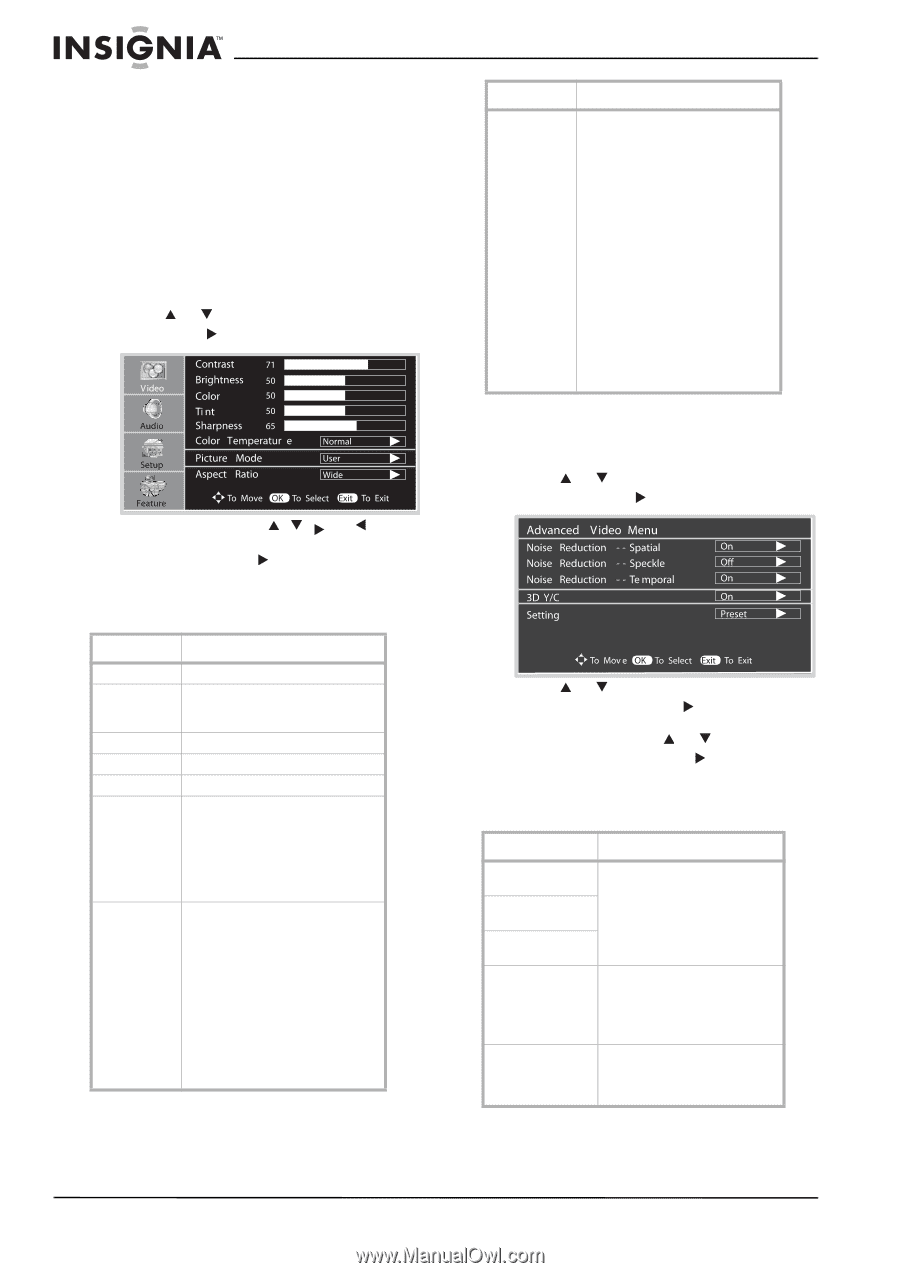
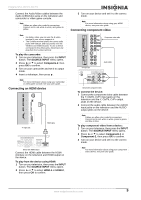
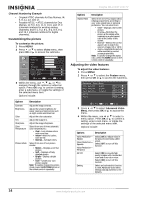
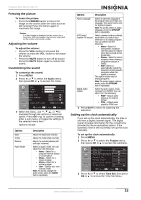
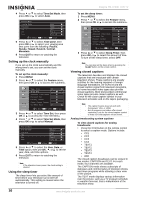
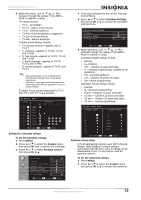
Channel Numbering Example • Original NTSC channels for Des Moines, IA: 5, 8, 11, 13, and 17. • Possible NTSC + ATSC channels for Des Moines, IA: 5-0, 8-0, 11-0, 13-0, and 17-0 (channel numbers for existing analog channels) and 5-1, 5-2, 8-1, 8-2, 8-3, 8-4, and 13-1 (channel numbers for digital channels). Customizing the picture To customize the picture: 1 Press MENU. 2 Press or to select Video menu, then press OK or to access the submenu. 3 Within the menu, use , , , or to navigate through the options or adjust an option. Press OK or to confirm a setting, enter a sub-menu, or toggle the settings of the selected menu item. Options include: Options Contrast Brightness Color Tint Sharpness Color Temperature Picture Mode Description Adjust the image contrast. Adjust the screen brightness for easier viewing of dark picture such as night scenes and black hair. Adjust the color saturation. Adjust the image tint. Adjust the image sharpness. Select from one of three automatic color temperatures.: • Cool-Less intense colors with more blue. • Warm-More hot colors, such as red. • Normal-Average colors. Select from one of four picture modes: • Nature-Displays a normal picture. • Soft-Displays a finely detailed picture. • Bright-Display a bright picture. • User-Create your own picture quality. Note: To quickly change the picture mode, press the PICTURE button on the remote control repeatedly. Insignia NS-LCD37 LCD TV Options Aspect Ratio Description Select from one of four aspect ratios (display proportions) according to your video signal type or personal preference. You can select from: • Wide-Displays a full-screen picture. • Cinema-Stretches the picture at the edges while maintaining a good aspect ratio at the center of the screen. • Normal-Selects the correct aspect ratio to match the source's image (4:3 or 16:9) • Zoom-Magnifies the picture while maintaining correct screen proportions. Note: To quickly change the aspect ratio, press the ZOOM button on the remote control repeatedly. Adjusting the video features To adjust the video features: 1 Press MENU. 2 Press or to select the Feature menu, then press OK or to access the submenu. 3 Press or to select Advanced Video Menu, then press OK or to access the menu. 4 Within the menu, use or to select a menu option. Press OK or to confirm a setting, enter a sub-menu, or toggle the settings of the selected menu item. Options include: Options Description Noise Reduction- Spatial Noise Reduction- Speckle Noise Reduction- Temporal 3D Y/C Setting Select [ON] to reduce noise in the picture (commonly called snow). Select [OFF] to turn off this function. Select [ON] to provide high quality images with minimal dot crawl and cross color noise. Select [OFF] to turn off this function. Select and activate this function to reset Advanced Video Menu settings and adjustments to the defaults. 14 www.insignia-products.com
-
 1
1 -
2
-
3
-
4
-
5
-
6
-
7
-
8
-
9
-
10
-
 11
11 -
 12
12 -
 13
13 -
 14
14 -
 15
15 -
 16
16 -
 17
17 -
 18
18 -
 19
19 -
 20
20 -
 21
21 -
22
-
23
-
24
-
25
-
26
-
27
-
28
-
29
-
30
-
31
-
32
-
33
-
34
-
35
-
36
-
37
-
38
-
39
-
40
-
41
-
42
-
43
-
44
-
45
-
46
-
47
-
48
-
49
-
50
-
51
-
52
-
53
-
54
-
55
-
56
-
57
-
58
-
59
-
60
-
61
-
62
-
63
-
64
-
65
-
66
-
67
-
68
-
69
-
70
-
71
-
72
-
73
-
74
-
75
-
76
-
77
-
78
-
79
-
80
-
81
-
82
-
83
-
84
-
85
-
86
-
87
-
88
-
89
-
90
-
91
-
92
-
93
-
94
-
95
-
96
-
97
-
98
-
99
-
100
 |
 |