Intel D815EEA2U Product Guide - Page 45
Intel D815EEA2U - P3 Socket 370 ATX Motherboard Manual
 |
UPC - 735858146135
View all Intel D815EEA2U manuals
Add to My Manuals
Save this manual to your list of manuals |
Page 45 highlights
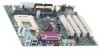
Installing and Replacing Desktop Board Components Replacing the Battery on the D815EEA2 and D815EPEA2 Boards To replace the battery on the D815EEA2 and D815EPEA2 boards, follow these steps: 1. Observe the precautions in "Before You Begin" (see page 25). 2. Turn off all peripheral devices connected to the computer. Always turn off the power and unplug the power cord from the computer before replacing the battery. 3. Remove the computer cover. 4. Locate the battery on the desktop board (see Figure 23). 5. With your fingernail or a medium flat-bladed screwdriver, gently pry the battery hold-down latch back enough to free the battery from its socket. 6. Install the new battery in the socket, orienting the "+" as shown in Figure 23. 7. Replace the computer cover before reconnecting the computer. OM11636 Figure 23. Removing the Battery from the D815EEA2 and D815EPEA2 Boards ✏ NOTE If your local ordinances permit, you may dispose of individual batteries as normal trash. Do not expose batteries to excessive heat or fire. Keep all batteries away from children. 45
-
 1
1 -
2
-
3
-
4
-
5
-
6
-
7
-
8
-
9
-
10
-
11
-
12
-
13
-
14
-
15
-
16
-
17
-
18
-
19
-
20
-
21
-
22
-
23
-
24
-
25
-
26
-
27
-
28
-
29
-
30
-
31
-
32
-
33
-
34
-
35
-
36
-
37
-
38
-
39
-
 40
40 -
 41
41 -
 42
42 -
 43
43 -
 44
44 -
 45
45 -
 46
46 -
 47
47 -
 48
48 -
 49
49 -
 50
50 -
51
-
52
-
53
-
54
-
55
-
56
-
57
-
58
-
59
-
60
-
61
-
62
-
63
-
64
-
65
-
66
-
67
-
68
-
69
-
70
-
71
-
72
-
73
-
74
-
75
-
76
-
77
-
78
-
79
-
80
-
81
-
82
-
83
-
84
-
85
-
86
-
87
-
88
-
89
-
90
-
91
-
92
-
93
-
94
-
95
-
96
 |
 |
