Intel DH67CF English Product Guide - Page 42
Connecting SATA Drives,
 |
View all Intel DH67CF manuals
Add to My Manuals
Save this manual to your list of manuals |
Page 42 highlights
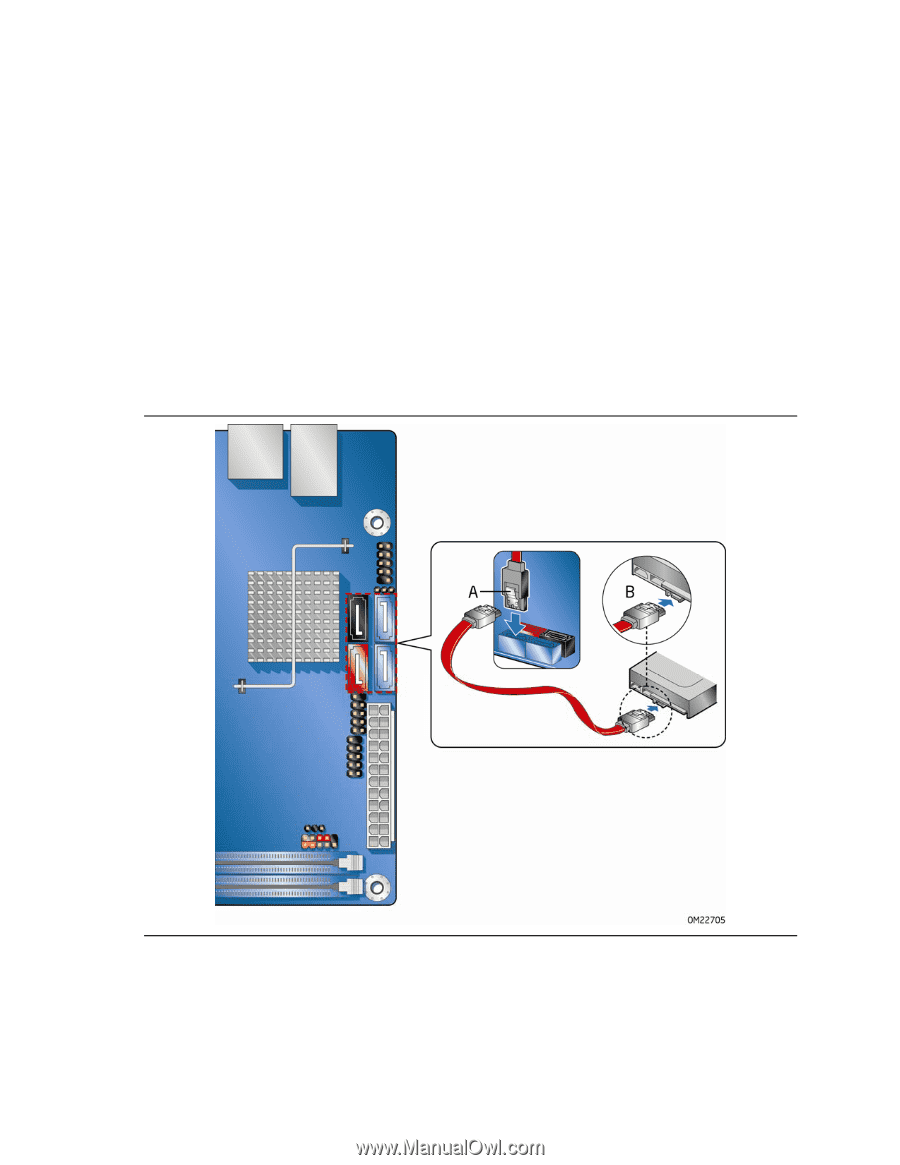
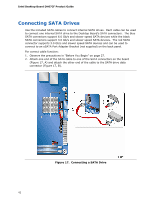
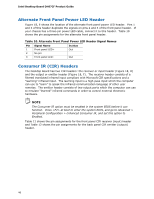
Intel Desktop Board DH67CF Product Guide Connecting SATA Drives Use the included SATA cables to connect internal SATA drives. Each cable can be used to connect one internal SATA drive to the Desktop Board's SATA connectors. The blue SATA connectors support 6.0 Gb/s and slower speed SATA devices while the black SATA connectors support 3.0 Gb/s and slower speed SATA devices. The red SATA connector supports 3.0 Gb/s and slower speed SATA devices and can be used to connect to an eSATA Port Adapter Bracket (not supplied) on the back panel. For correct cable function: 1. Observe the precautions in "Before You Begin" on page 27. 2. Attach one end of the SATA cable to one of the SATA connectors on the board (Figure 17, A) and attach the other end of the cable to the SATA drive data connector (Figure 17, B). Figure 17. Connecting a SATA Drive 42
-
 1
1 -
2
-
3
-
4
-
5
-
6
-
7
-
8
-
9
-
10
-
11
-
12
-
13
-
14
-
15
-
16
-
17
-
18
-
19
-
20
-
21
-
22
-
23
-
24
-
25
-
26
-
27
-
28
-
29
-
30
-
31
-
32
-
33
-
34
-
35
-
36
-
 37
37 -
 38
38 -
 39
39 -
 40
40 -
 41
41 -
 42
42 -
 43
43 -
 44
44 -
 45
45 -
 46
46 -
 47
47 -
48
-
49
-
50
-
51
-
52
-
53
-
54
-
55
-
56
-
57
-
58
-
59
-
60
-
61
-
62
-
63
-
64
-
65
-
66
-
67
-
68
-
69
-
70
-
71
-
72
-
73
-
74
-
75
-
76
 |
 |