Intel ISP2150 Quick Start Guide - Page 15
Removing a Diskette Drive, Re-Installing a Diskette Drive, Close the Cover - specifications
 |
UPC - 735858134668
View all Intel ISP2150 manuals
Add to My Manuals
Save this manual to your list of manuals |
Page 15 highlights
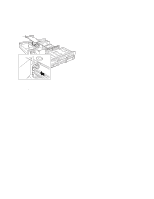
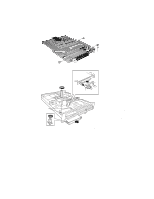
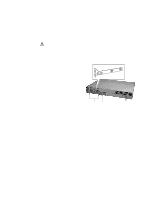
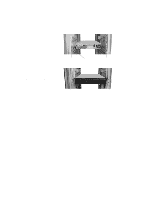
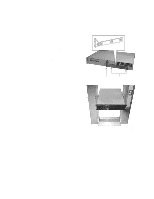
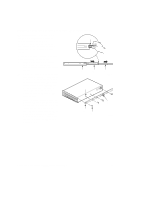
Removing a Diskette Drive A B 1. Disconnect the power (B) and signal (A) cables from the diskette drive. The connectors are keyed for ease in reconnecting them to the drive. 2. Remove and save the screws (C) that secure the diskette drive carrier to the front of the chassis. 3. Slide the drive carrier out the front of the chassis. 4. Remove and save the screws from the sides of the drive carrier. 5. Pull the drive out of the carrier and place the drive in an antistatic protective wrapper if you are not reinstalling it. C OM09316 Re-Installing a Diskette Drive 1. Remove the 3.5-inch diskette drive from its protective wrapper, and place it component-side up on an anti-static surface. 2. Install the drive into the drive carrier and secure it with the screws that you removed. 3. Slide the drive carrier through the front of the chassis. 4. Secure the drive carrier to the front of the chassis with the screws you removed earlier. 5. Connect the signal and power cables to the drive according to the manufacturer's specifications. Close the Cover 1. Place the cover on the chassis and slide it forwards as far as possible. The sides and front of the cover fit inside the chassis. 2. Tighten the three screws on the rear of the chassis. ISP2150 2U Rack Server Platform Quick Start Guide 17
-
 1
1 -
2
-
3
-
4
-
5
-
6
-
7
-
8
-
9
-
 10
10 -
 11
11 -
 12
12 -
 13
13 -
 14
14 -
 15
15 -
 16
16 -
 17
17 -
 18
18 -
 19
19 -
 20
20 -
21
-
22
-
23
-
24
-
25
-
26
-
27
-
28
 |
 |
