Intel ISP2150 Quick Start Guide - Page 8
Installing a Microprocessor, CAUTION, Single-Processor, Configurations - processors
 |
UPC - 735858134668
View all Intel ISP2150 manuals
Add to My Manuals
Save this manual to your list of manuals |
Page 8 highlights
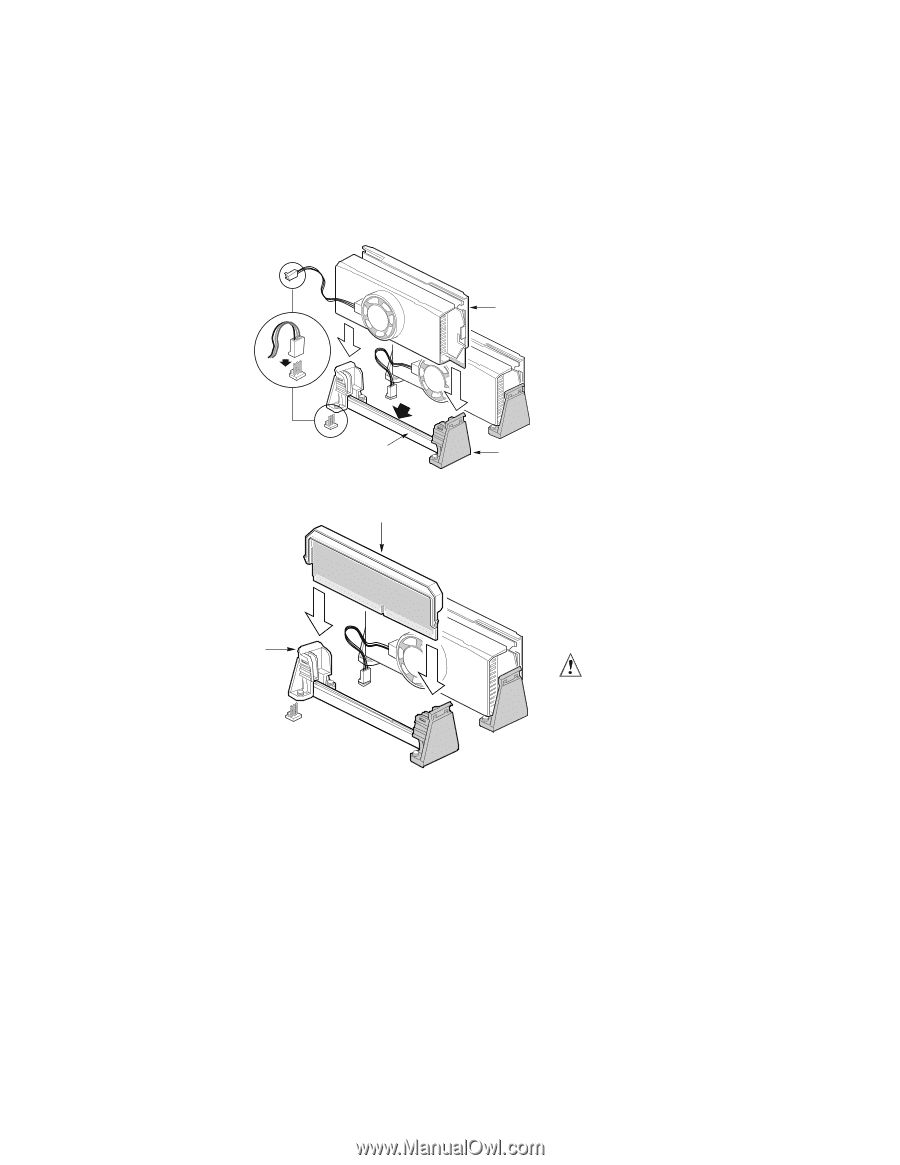
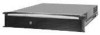
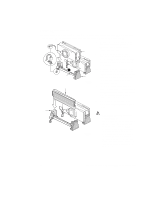
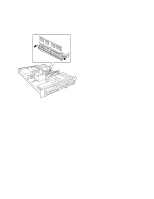
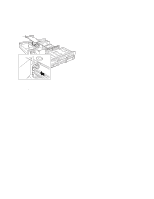
Installing a Microprocessor The server supports up to two Intel® Pentium® II or Pentium III processors (with 100 MHz system bus). If you are installing two processors, make sure they are the same speed, voltage, and stepping. 1. Remove the new processor from its anti-static package and place it on a grounded, static free surface or conductive foam pad. A 2. Attach the small end of the power cable to the fan connector on the E S.E.C. cartridge, then attach the large F end (B) to the 3-pin connector on the server board. C D B OM09315 3. Orient the processor so that the heat sink faces the I/O connectors. Slide the processor into the retention module. Push down firmly, with even pressure on both sides of the top, until the processor is seated. 4. To lock in the processor, push the A latches inward on the retention module until they click into place. The latches must be secured for proper electrical connection of the processor. 5. After you have installed the processor, you must configure its speed in BIOS set-up. B OM09328 CAUTION, Single-Processor Configurations If you install only one processor in a system, it must go in the primary connector (closest to the DIMM sockets). With a single-processor configuration, you must install a termination board and termination latch assembly (A) in the empty secondary connector (B) to ensure proper operation of your system. A termination board is provided with your system. 10 ISP2150 2U Rack Server Platform Quick Start Guide
-
 1
1 -
2
-
 3
3 -
 4
4 -
 5
5 -
 6
6 -
 7
7 -
 8
8 -
 9
9 -
 10
10 -
 11
11 -
 12
12 -
 13
13 -
14
-
15
-
16
-
17
-
18
-
19
-
20
-
21
-
22
-
23
-
24
-
25
-
26
-
27
-
28
 |
 |