Intel SRCZCRX Hardware User Guide - Page 21
Inserting the SRCZCRX Adapter Card in an MROMB-enabled PCI-X Slot
 |
UPC - 735858168410
View all Intel SRCZCRX manuals
Add to My Manuals
Save this manual to your list of manuals |
Page 21 highlights
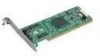
5) Check the Jumpers Ensure that the jumper settings on the SRCZCRX controller are correct. See Chapter 3, "Intel RAID Controller SRCZCRX Technical Reference," for diagrams of the SRCZCRX controllers with their jumpers and connectors. 6) Install the SRCZCRX controller in an available MROMB-enabled PCI slot. Press down gently but firmly to ensure that the card is properly seated in the slot, as shown in Section Figure 2.2, "Inserting the SRCZCRX Adapter Card in an MROMB-enabled PCI-X Slot," page 21. Screw the bracket into the computer chassis. Note: See your server board documentation to detemine which PCI-X slot(s) are MROMB enabled. Figure 2.2 Inserting the SRCZCRX Adapter Card in an MROMB-enabled PCI-X Slot Bracket Screw edge of server board 32-bit slots 64-bit slots Detailed Installation 21
-
 1
1 -
2
-
3
-
4
-
5
-
6
-
7
-
8
-
9
-
10
-
11
-
12
-
13
-
14
-
15
-
 16
16 -
 17
17 -
 18
18 -
 19
19 -
 20
20 -
 21
21 -
 22
22 -
 23
23 -
 24
24 -
 25
25 -
 26
26 -
27
-
28
-
29
 |
 |
