Intermec CK71 Intermec Terminal Emulator (ITE) User Guide - Page 82
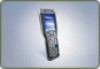
Shows the RSSI Radio or Ready Signal Strength Indicator retrieved, CK3, CN3, or CN4 with IP30
 |
View all Intermec CK71 manuals
Add to My Manuals
Save this manual to your list of manuals |
Page 82 highlights
Chapter 2 - Configuring and Managing ITE Toolbar Button and Icon Descriptions (continued) Name Reader State Description Shows the status for an associated RFID reader. The size of this button is adjustable. CK3, CN3, or CN4 with IP30, or CV41 with IF4 or IV7: Valid socket connection to the data collection engine exists. CK3, CN3, or CN4 with IP30: Reader trigger state is set to scan. Session 1, Session 2, Session 3, Session 4 CK3, CN3, or CN4 with IP30, or CV41 with IF4 or IV7: No socket connection, or there is a communication error between the computer and reader. Shows the status of each session (Session 1 icons shown as examples). The size of this button is adjustable. Session is connected to the host and active. Session is connected to the host but not active. Session is configured, but not connected to the host. Session is not configured and not connected. Signal Indicator Shows the RSSI (Radio or Ready Signal Strength Indicator) retrieved from the radio module, or an active Ethernet connection. Radio information is updated every 5 seconds. For a Wi-Fi network: For WAN: SIP Toggle For Ethernet: (connected) or (disconnected) Tap to hide or display the SIP. The size of this button is adjustable. SnapShot Tap to use the SnapShot feature. If the Intermec computer has an EAxx imager, this feature lets you use the imager to capture highquality greyscale images. If the Intermec computer has a camera, this feature lets you take high-quality color pictures. For more information, see "Using the SnapShot Feature" on page 75. The size of this button is adjustable. For information on using the imager or camera, see the computer user manual. 70 Intermec Terminal Emulator (ITE) User Guide
-
 1
1 -
2
-
3
-
4
-
5
-
6
-
7
-
8
-
9
-
10
-
11
-
12
-
13
-
14
-
15
-
16
-
17
-
18
-
19
-
20
-
21
-
22
-
23
-
24
-
25
-
26
-
27
-
28
-
29
-
30
-
31
-
32
-
33
-
34
-
35
-
36
-
37
-
38
-
39
-
40
-
41
-
42
-
43
-
44
-
45
-
46
-
47
-
48
-
49
-
50
-
51
-
52
-
53
-
54
-
55
-
56
-
57
-
58
-
59
-
60
-
61
-
62
-
63
-
64
-
65
-
66
-
67
-
68
-
69
-
70
-
71
-
72
-
73
-
74
-
75
-
76
-
 77
77 -
 78
78 -
 79
79 -
 80
80 -
 81
81 -
 82
82 -
 83
83 -
 84
84 -
 85
85 -
 86
86 -
 87
87 -
88
-
89
-
90
-
91
-
92
-
93
-
94
-
95
-
96
-
97
-
98
-
99
-
100
-
101
-
102
-
103
-
104
-
105
-
106
-
107
-
108
-
109
-
110
-
111
-
112
-
113
-
114
-
115
-
116
-
117
-
118
-
119
-
120
-
121
-
122
-
123
-
124
-
125
-
126
-
127
-
128
-
129
-
130
-
131
-
132
-
133
-
134
-
135
-
136
-
137
-
138
-
139
-
140
-
141
-
142
-
143
-
144
-
145
-
146
-
147
-
148
-
149
-
150
-
151
-
152
-
153
-
154
-
155
-
156
-
157
-
158
-
159
-
160
-
161
-
162
-
163
-
164
-
165
-
166
-
167
-
168
-
169
-
170
-
171
-
172
-
173
-
174
-
175
-
176
-
177
-
178
-
179
-
180
-
181
-
182
-
183
-
184
-
185
-
186
-
187
-
188
-
189
-
190
-
191
-
192
-
193
-
194
-
195
-
196
-
197
-
198
-
199
-
200
-
201
-
202
-
203
-
204
-
205
-
206
-
207
-
208
-
209
-
210
-
211
-
212
-
213
-
214
-
215
-
216
-
217
-
218
-
219
-
220
 |
 |
