Intermec PM4i EasyADC for Microsoft Great Plains Installation Guide
Intermec PM4i Manual
 |
View all Intermec PM4i manuals
Add to My Manuals
Save this manual to your list of manuals |
Intermec PM4i manual content summary:
- Intermec PM4i | EasyADC for Microsoft Great Plains Installation Guide - Page 1
EasyADC™ System Installation Guide - Intermec PM4i | EasyADC for Microsoft Great Plains Installation Guide - Page 2
the part of Intermec Technologies Corporation. 2004 by Intermec Technologies Corporation. All rights reserved. The word Intermec, the Intermec license), InterDriver, Intermec Printer Network Manager, IRL, JANUS, LabelShop, Mobile Framework, MobileLAN, Nor*Ware, Pen*Key, Precision Print, PrintSet, - Intermec PM4i | EasyADC for Microsoft Great Plains Installation Guide - Page 3
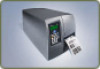
to your EasyADC PC through your Ethernet network. Powered over Ethernet by the MobileLAN power bridge. To Your Network EasyCoder® PM4i EasyADC PC Prints custom bar code labels you Manages the data interface to your design with LabelShop PRO software. Great Plains® application software. 4 5 - Intermec PM4i | EasyADC for Microsoft Great Plains Installation Guide - Page 4
the screws depends on the materials at the installation location. Drill and bit Screwdriver for the bracket mounting screws Three Ethernet cables (CAT5). The EasyADC System comes with three 3.05 m (10 ft) Ethernet cables. You need to supply your own cables if you need longer cable runs. 6 7 - Intermec PM4i | EasyADC for Microsoft Great Plains Installation Guide - Page 5
box contents, see the EasyCoder PM4i Bar Code Label Printer User's Guide in the box. Media for PM4i 2 rolls 4x6-inch label media 1 roll thermal transfer ribbon AC2 4-Bay Charging Dock AC2 charging dock Quick start guide EasyADC System Installation CD 2 CK30 Handheld Computers CK30 - Intermec PM4i | EasyADC for Microsoft Great Plains Installation Guide - Page 6
-to- ceiling distance), close to the area where the CK30s will be used. • Keep the WA22 clear of metal surfaces like beams or girders, which may decrease the radio range. • Keep large quantities of paper products from blocking the line-of-sight between the WA22 and the CK30s, as these products will - Intermec PM4i | EasyADC for Microsoft Great Plains Installation Guide - Page 7
STEP 2 Installing the WA22 (continued) Route the Ethernet cables through the cable Out Data In To Ethernet On the WA22, the green Power light turns on and stays solid and the other lights start blinking as the WA22 boots. The blue light turns on and remains on after the WA22 has finished booting - Intermec PM4i | EasyADC for Microsoft Great Plains Installation Guide - Page 8
the Microsoft .NET Compact Framework. Follow the onscreen instructions to install .NET components. After this part is complete, you are prompted to install Adobe® Reader®. Follow the onscreen instructions to install Adobe Reader. If Reader is already installed on this PC, you will see a screen that - Intermec PM4i | EasyADC for Microsoft Great Plains Installation Guide - Page 9
Open. Progress screens appear showing you the status of the installation. When this part is done, the SQL Server Setup screen appears. Choose your Great Plains server from the Server drop-down list. Enter the SQL system administrator password in the Password field and click Find Databases. After your - Intermec PM4i | EasyADC for Microsoft Great Plains Installation Guide - Page 10
want to launch Avalanche Enabler. Do not choose this option. The installation continues and you are prompted to install LabelShop® PRO 6. Follow the onscreen instructions to install LabelShop PRO 6 and accept all default settings. If prompted for a User Name and Company Name, enter the name of your - Intermec PM4i | EasyADC for Microsoft Great Plains Installation Guide - Page 11
Configuration Wizard completes each task, that box is checked in the list. Note: This process may take up to ten minutes. When this part of the installation is complete, this screen appears. Enter a range of IP addresses for your EasyADC System. Click Finish. A message box appears showing you the - Intermec PM4i | EasyADC for Microsoft Great Plains Installation Guide - Page 12
. Click the icon next to "Exit the Installation." The EasyADC Console screen appears. Double-click the Great Plains icon on the desktop of the EasyADC PC. Microsoft Great Plains starts and a login screen appears. Enter your Great Plains user ID and password, and then click OK twice. Double-click - Intermec PM4i | EasyADC for Microsoft Great Plains Installation Guide - Page 13
the power supply to the power connector on the back of the AC2. Connect the power supply to an AC power outlet. The yellow Power light turns on showing instructions in the shipping bag to install the handstrap on the CK30. You will need to unhook the bottom of the handstrap to remove and install - Intermec PM4i | EasyADC for Microsoft Great Plains Installation Guide - Page 14
installed batteries, press I to turn them on. When the CK30s turn on, the Setup Assistant screen appears. Follow the next procedure to configure the CK30s. Keys you need is finished, the Setup - Complete screen appears. 26 Press Enter. After the CK30 reboots, the blue light starts blinking as the - Intermec PM4i | EasyADC for Microsoft Great Plains Installation Guide - Page 15
AC power cord The other items in the Printer Accessories box are described in the user's guide. Set these items aside for now. Note: The sample media and ribbon in the printer box are not intended for use with the EasyADC System. Do not use them in this installation. Get the 3.05 m (10 ft) Ethernet - Intermec PM4i | EasyADC for Microsoft Great Plains Installation Guide - Page 16
STEP 6 Installing the PM4i (continued) Remove the wrapper from the ribbon and set the cardboard takeup roll aside. Slide the ribbon onto the supply hub so the shiny side faces up when the ribbon is routed through the print mechanism. Without releasing the ribbon, turn the printhead lift lever - Intermec PM4i | EasyADC for Microsoft Great Plains Installation Guide - Page 17
with the edges of the core. Manually advance the ribbon until all of the metallic leader has passed the printhead and the ribbon becomes tight. Turn the printhead lever clockwise to release the ribbon. 32 Remove the installed low edge guide: a. Tilt the low edge guide so it is parallel to the - Intermec PM4i | EasyADC for Microsoft Great Plains Installation Guide - Page 18
STEP 6 Installing the PM4i (continued) Install the high edge guide by reversing Step 17. For help, see "Media Supply Roll Post" in Chapter 2 of the EasyCoder PM4i Bar Code Label Printer User's Guide. Get a roll of 4x6-inch media from the EasyADC shipping box. Place the roll on the supply post and - Intermec PM4i | EasyADC for Microsoft Great Plains Installation Guide - Page 19
and prints a test label. The red error light turns off, and the blue light stays on, indicating that the PM4i has been configured correctly. Skip ahead to Step 7, "Setting Security." If the test label does not print and the red error light stays on, there is a problem connecting the printer. Continue - Intermec PM4i | EasyADC for Microsoft Great Plains Installation Guide - Page 20
and choose Configure > Discover. The Console looks for the printer and connects it to the network. The PM4i pulls the excess ribbon back in and prints a test label. The red error light turns off and the blue light stays on, indicating that the PM4i has been configured and added to the network. Right - Intermec PM4i | EasyADC for Microsoft Great Plains Installation Guide - Page 21
, see the user's manual or quick start guide for that product. Complete manuals for your Intermec products are available as PDF files on the EasyADC CD. On the CD, browse to Training > Manuals. For complete information on configuring, operating, maintaining, and troubleshooting the software components - Intermec PM4i | EasyADC for Microsoft Great Plains Installation Guide - Page 22
warns you that the access point will be reset to factory defaults and prompts you to continue. c. Click Yes, and then click Finish. Restore the defaults on the PM4i as follows: a. Press Setup on the PM4i. b. Press the right arrow key until Test/Service appears. c. Press the down arrow key. d. Press - Intermec PM4i | EasyADC for Microsoft Great Plains Installation Guide - Page 23
e. EasyADC Data Collection Manager f. EasyADC Master Install g. LabelShop PRO 6 Close the Add or following, select the data source name and click the Remove button. Follow the prompts to remove each data source. a. Files. Locate the Intermec folder and delete the folder and all its contents. The - Intermec PM4i | EasyADC for Microsoft Great Plains Installation Guide - Page 24
your EasyADC System. Please visit www.intermec.com to download PDF files of our current manuals. To order printed versions of the Intermec manuals, contact your local Intermec representative or distributor. Service and Support See the EasyADC Service and Support Card for specific information about - Intermec PM4i | EasyADC for Microsoft Great Plains Installation Guide - Page 25
6001 36th Avenue West Everett, WA 98203 U.S.A. www.intermec.com © 2004 Intermec Technologies Corp. All Rights Reserved EasyADC System Installation Guide *074830-001* P/N 074830-001
-
 1
1 -
 2
2 -
 3
3 -
 4
4 -
 5
5 -
 6
6 -
 7
7 -
8
-
9
-
10
-
11
-
12
-
13
-
14
-
15
-
16
-
17
-
18
-
19
-
20
-
21
-
22
-
23
-
24
-
25
 |
 |

EasyADC™ System
Installation Guide