Intermec PM4i EasyADC for Microsoft Great Plains Installation Guide - Page 20
Delete, Configure, Discover, Refresh, The EasyADC Console screen appears. - label printer blue light
 |
View all Intermec PM4i manuals
Add to My Manuals
Save this manual to your list of manuals |
Page 20 highlights
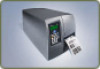
STEP 6 Installing the PM4i (continued) The EasyADC Console screen appears. Double-click the Discovered Devices folder. The Discovered Devices screen appears showing the components of the EasyADC System and their IP addresses. Right-click the printer icon and choose Delete. Right-click the EasyADC Console icon on the taskbar and choose Configure > Discover. The Console looks for the printer and connects it to the network. The PM4i pulls the excess ribbon back in and prints a test label. The red error light turns off and the blue light stays on, indicating that the PM4i has been configured and added to the network. Right-click the Discovered Devices screen and choose Refresh. The printer icon appears. 38 39
-
 1
1 -
2
-
3
-
4
-
5
-
6
-
7
-
8
-
9
-
10
-
11
-
12
-
13
-
14
-
 15
15 -
 16
16 -
 17
17 -
 18
18 -
 19
19 -
 20
20 -
 21
21 -
 22
22 -
 23
23 -
 24
24 -
 25
25
 |
 |

38
39
Right-click the printer icon and choose
Delete
.
Right-click the EasyADC Console icon on the taskbar and choose
Configure
>
Discover
. The Console looks for the printer and connects it to
the network. The PM4i pulls the excess ribbon back in and prints a test label.
The red error light turns off and the blue light stays on, indicating that the
PM4i has been configured and added to the network.
Right-click the Discovered Devices screen and choose
Refresh
. The printer
icon appears.
The EasyADC Console screen appears.
Double-click the Discovered
Devices folder. The Discovered
Devices screen appears showing
the components of the EasyADC
System and their IP addresses.
Installing the PM4i
(continued)
STEP
6