JVC CSDA1 Instructions - Page 12
Mounting on a commercially available board, Attaching the remote controller, How to use the wire clamp
 |
UPC - 046838031090
View all JVC CSDA1 manuals
Add to My Manuals
Save this manual to your list of manuals |
Page 12 highlights
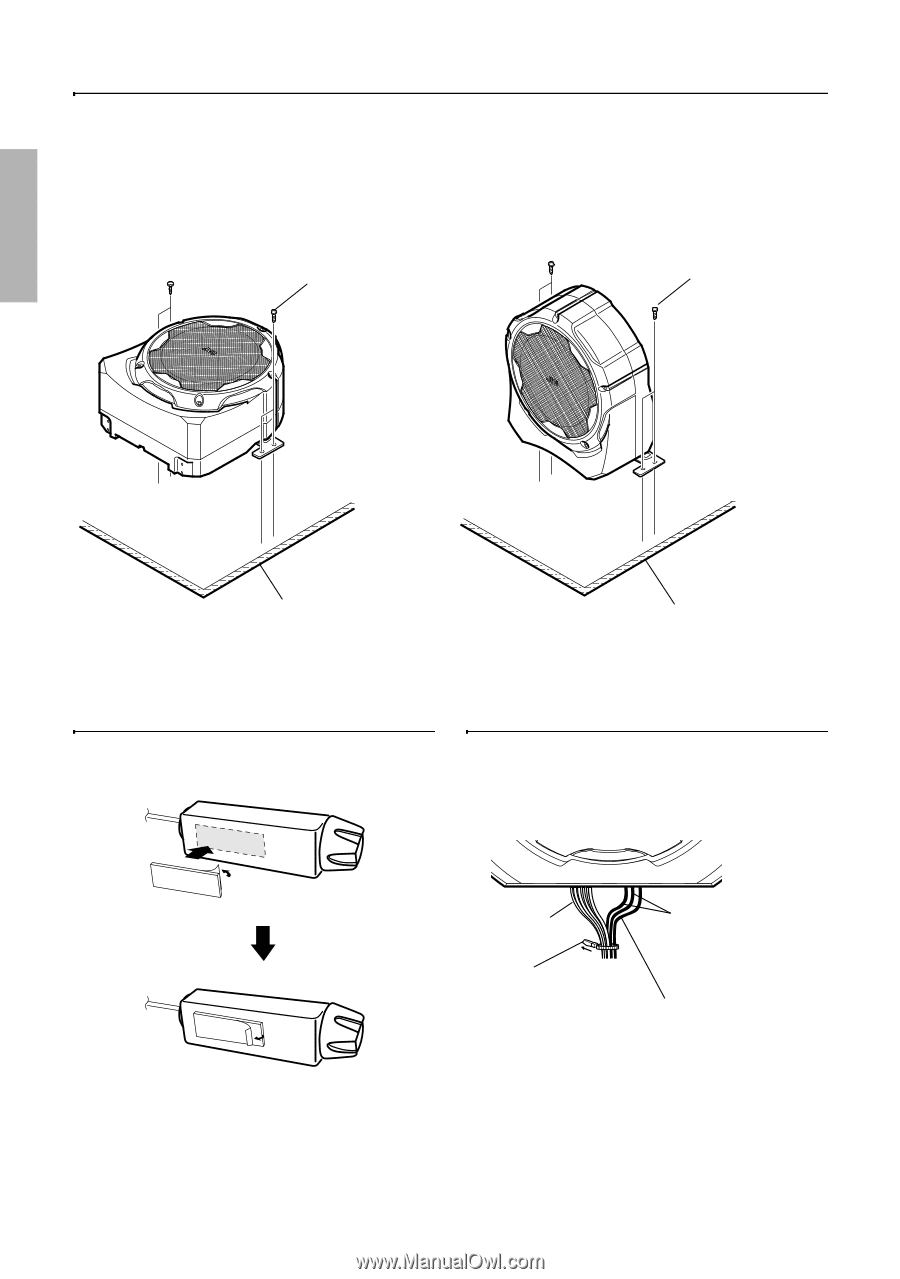
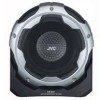
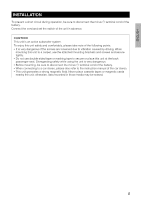
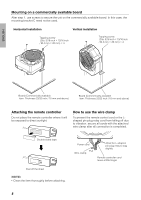
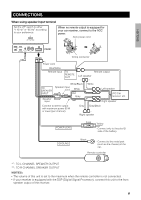
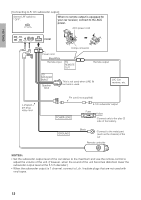
Mounting on a commercially available board After step 1, use screws to secure the unit on the commercially available board. In this case, the mounting bracket C need not be used. Horizontal installation Vertical installation Tapping screw (Dia. 3/16 inch c 13/16 inch / M 4 mm c 20 mm) c 4 Tapping screw (Dia. 3/16 inch c 13/16 inch / M 4 mm c 20 mm) c 4 ENGLISH Board (Commercially available item: Thickness 23/32 inch / 18 mm and above) Board (Commercially available item: Thickness 23/32 inch / 18 mm and above) Attaching the remote controller Do not place the remote controller where it will be exposed to direct sunlight. How to use the wire clamp To prevent the remote control cord or the Lshaped pin plug relay cord from falling off due to vibration, secure all cords with the attached wire clamp after all connection is completed. Double-sided tape Peel off the sheet NOTE: • Clean the item thoroughly before attaching. Power cord Pull Wire clamp Allow the L-shaped pin plug relay to sag slightly Remote controller cord leave a little longer 8
-
 1
1 -
2
-
3
-
4
-
5
-
6
-
 7
7 -
 8
8 -
 9
9 -
 10
10 -
 11
11 -
 12
12 -
 13
13 -
 14
14 -
 15
15 -
 16
16 -
 17
17 -
18
-
19
-
20
-
21
-
22
-
23
-
24
-
25
-
26
-
27
-
28
-
29
-
30
-
31
-
32
-
33
-
34
-
35
-
36
-
37
-
38
-
39
-
40
-
41
-
42
-
43
-
44
-
45
-
46
-
47
-
48
 |
 |