JVC GV-LS2W Basic User Guide - Page 10
Connecting the AC Adapter to, the pantilter, Enter the user name and password, of the administrator.
 |
View all JVC GV-LS2W manuals
Add to My Manuals
Save this manual to your list of manuals |
Page 10 highlights
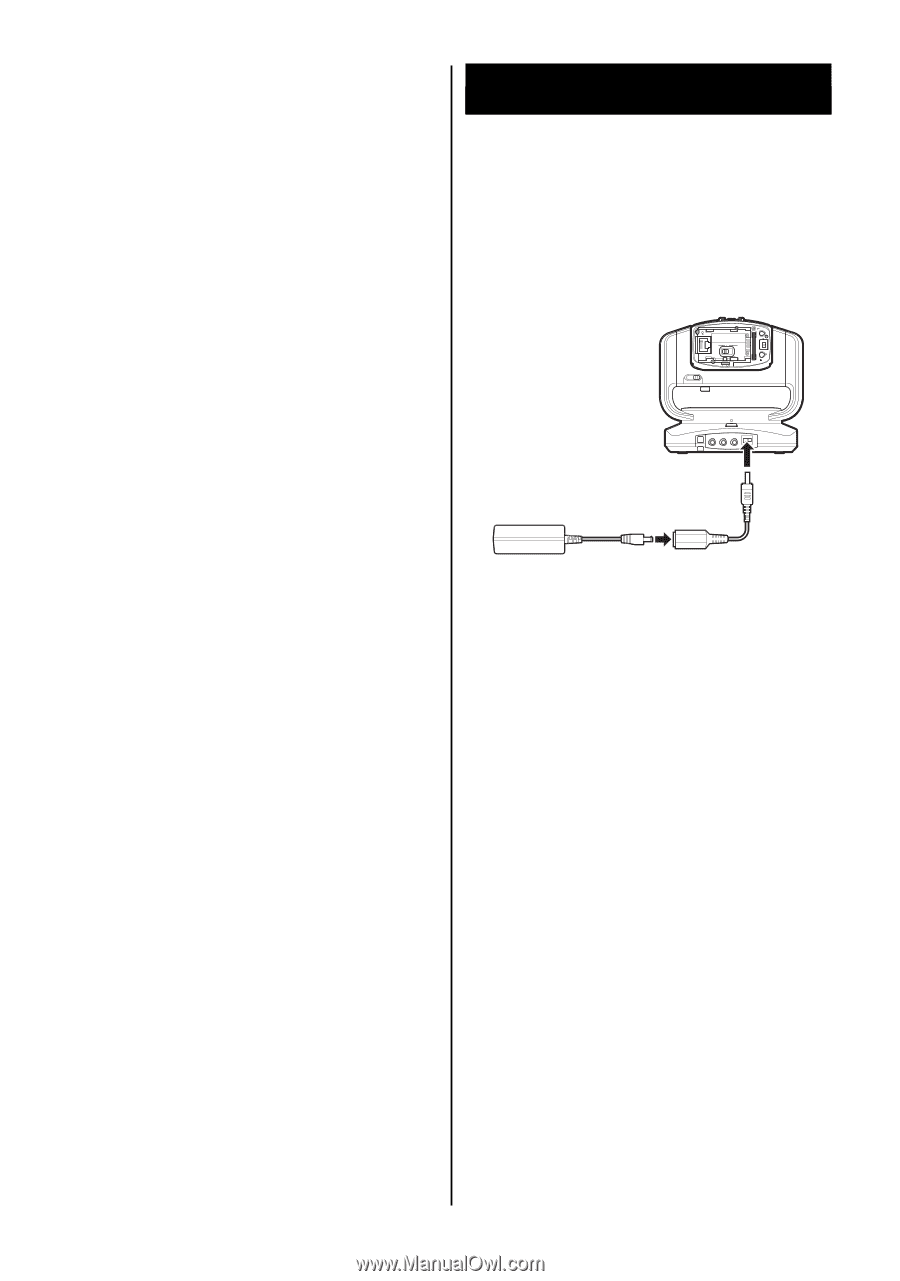
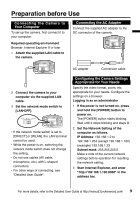
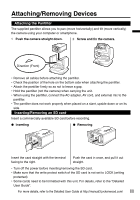
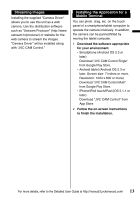
4 Enter the user name and password of the administrator. Initial setting: USERNAME "root", PASSWORD "password". If login is successful, the setup screen appears. Changing the settings Select "NETWORK", "CAMERA/PAN TILTER", or "MANAGE" in the left window of the screen to change the settings. Click "+" on the left of each item to show the sub categories. ● "NETWORK" • "WIRED NETWORK" For establishing a wired connection. • "WIRELESS NETWORK" For connecting wirelessly. • "MONITORING SETTINGS" For connecting via a network. • "STREAM SETTINGS" Format for transmitting/recording. ● "CAMERA/PAN TILTER" • "CAMERA SETTINGS" Camera settings such as zoom. • "PAN TILTER SETTINGS" Pantilter settings such as angle. ● "MANAGE" • "COMMON SETTINGS" Change the password of the administrator, set the clock, etc. • "MEDIA MANAGEMENT" Format the SD card. • "TURN OFF CAMERA" Turn off the power of the camera. * The power cannot be turned on via the browser. Connecting the AC Adapter to the pantilter For more details about attaching the pantilter, refer to page 11. Connect the supplied AC adapter to the DC connector of the pantilter. • Unlock the pantilter before connecting the AC adapter. (page 8) • Remove all tape from the pantilter. RESET DIRECT WLAN LAN(OFF) ETHERENT PLUG IN POWER MIC DC AV MIC PLUG IN POWER AV EXTEND DC AC adapter Conversion cable • After connecting the AC adapter, the power turns on and the pantilter moves automatically for position adjustment. The pantilter moves everytime the unit is turned on. • The power lamp blinks when the position adjustment fails. Turn off the unit and turn it on again for readjustment. • When the pantilter is not used, connect the AC adapter to the camera itself. For details, refer to the "Detailed User Guide". 10 For more details, refer to the Detailed User Guide at http://manual3.jvckenwood.com/
-
 1
1 -
2
-
3
-
4
-
 5
5 -
 6
6 -
 7
7 -
 8
8 -
 9
9 -
 10
10 -
 11
11 -
 12
12 -
 13
13 -
 14
14 -
 15
15 -
16
-
17
-
18
-
19
-
20
-
21
-
22
-
23
-
24
-
25
-
26
-
27
-
28
-
29
-
30
-
31
-
32
-
33
-
34
-
35
-
36
-
37
-
38
-
39
-
40
-
41
-
42
-
43
-
44
-
45
-
46
-
47
-
48
-
49
-
50
-
51
-
52
-
53
-
54
-
55
-
56
-
57
-
58
-
59
-
60
-
61
-
62
-
63
-
64
 |
 |