JVC SR-9090U SR-9090U Timelapse Recorder Instruction Manual (1137KB) - Page 9
JVC SR-9090U - High Resolution 960 Hour Density Manual
 |
View all JVC SR-9090U manuals
Add to My Manuals
Save this manual to your list of manuals |
Page 9 highlights
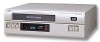
2 CONTROLS AND CONNECTORS 2-1 Front Panel 7 6 5 4 3 SR-9090U REC REC STOP REC CHECK OPERATE HDR EJECT OPERATE RESET/ CANCEL ON SCREEN SHIFT REW REVERSE PAUSE PLAY FF TRACKING V. LOCK TIMER SEARCH DISPLAY LOCK CNT RESET MENU TIME MODE - SET FIELD REV FIELD ADV - + - + + 8 9 10 11 12 1 [OPERATE] button 13 14 15 9 [REVERSE] button 2 1 Press to turn the operating mode ON/OFF. When this button is ON, the OPERATE indicator t lights and the unit can be operated. When a cassette is loaded, operating mode is switched on and the OPERATE indicator lights automatically. The OPERATE button does not completely shut off the mains power to the unit, but switches the operating current on and off. Starts reverse playback when pressed in any mode except Record, Record-Pause and Record Check. 0 [PAUSE] button • Engages the Record-Pause mode when pressed in the Record mode. • Displays a still picture when pressed in the Play mode. • Field advance or reverse playback is executed each time the [FF] or [REW] button is pressed while pressing this button in the Still mode. (When the [FF] or [REW] button is pressed for more than 2 seconds, Continuous Field Advance Playback mode is engaged. After about 3 minutes, the Stop mode is engaged.) 2 [EJECT] button Press to eject the cassette. * The cassette cannot be ejected during recording. 3 [REC] indicator This indicator lights during recording if menu switch on the screen is set to "ON". ! [PLAY] button • Press to play back the tape. • Press to engage the Record mode in the Rec-Pause mode. 4 Cassette loading slot Insert a cassette in this slot. Use a VHS cassette tape. 5 [REC CHECK] button Use this button to check recording. When pressed in the Record mode, the VCR will rewind the tape for about 5 seconds of tape time and then play back the rewound section in the 2H/6H mode to check recording quality. Recording is resumed automatically after playback at the point where recording was interrupted. • If picture quality is judged to be inferior during recording check, the heads are cleaned automatically and the error code "E-09" is shown on the display for about 10 seconds. Recording will continue regardless of the results of the recording check. @ [FF] button • Press to fast-forward the tape. • Starts fast-forward playback when pressed in the Play mode. • Starts forward alarm search or date/time search when the Search mode is specified with the ^ [SEARCH] button. • Also controls field-by-field playback in the forward direction. # [TRACKING +/-] buttons If picture noise appears during play or field advance, press these buttons to adjust tracking so that noise is reduced. When the [+] and [-] buttons are pressed simultaneously, tracking is reset to the preset level. 6 [STOP] button Press this button to stop the tape. $ [V. LOCK +/-] buttons Press to reduce vertical picture jitter in the Still, Field Advance Playback and Linear Slow Timelapse Play modes. 7 [REC] button Press this button in the Stop mode to engage the Record mode. % [TIMER] button Normally use this button for timer recording. For details, refer to "Timer Recording" on page 31. 8 [REW] button • Press this button to rewind the cassette. • Starts reverse playback when pressed in the Play mode. • Starts reverse alarm search or date/time search when the Search mode is specified with the ^ [SEARCH] button. • Also controls field-by-field playback in the reverse direction. 9
-
 1
1 -
2
-
3
-
 4
4 -
 5
5 -
 6
6 -
 7
7 -
 8
8 -
 9
9 -
 10
10 -
 11
11 -
 12
12 -
 13
13 -
 14
14 -
15
-
16
-
17
-
18
-
19
-
20
-
21
-
22
-
23
-
24
-
25
-
26
-
27
-
28
-
29
-
30
-
31
-
32
-
33
-
34
-
35
-
36
-
37
-
38
-
39
-
40
-
41
-
42
-
43
-
44
-
45
-
46
-
47
-
48
-
49
-
50
-
51
-
52
-
53
-
54
-
55
-
56
-
57
-
58
-
59
-
60
-
61
-
62
-
63
-
64
-
65
 |
 |
