Jensen JGC9536ADB Installation Manual - Page 5
ConversionTo LP Gas, ControlSettings - gas cooktop
 |
UPC - 719881123813
View all Jensen JGC9536ADB manuals
Add to My Manuals
Save this manual to your list of manuals |
Page 5 highlights
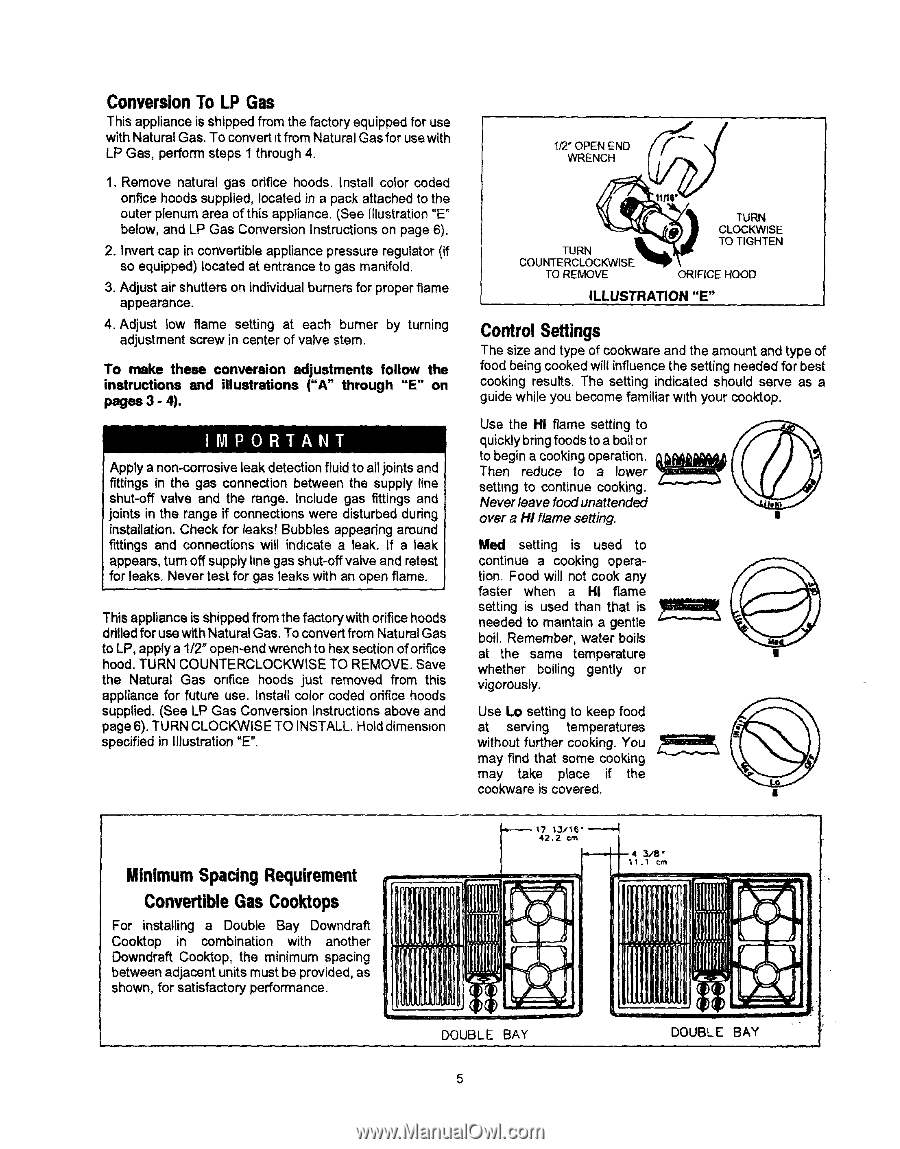
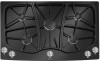
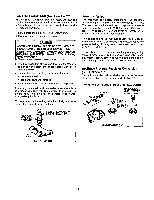
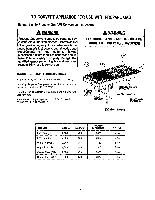
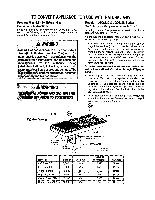
ConversionTo LP Gas This appliance is shippedfrom the factory equipped for use with Natural Gas. To convert it from Natural Gas for use with LP Gas, perform steps 1 through 4. 1. Remove natural gas orifice hoods. Install color coded orifice hoods supplied, located in a pack attached to the outer plenum area of this appliance. (See illustration "E" below, and LP Gas Conversion Instructions on page 6). 2. Invert cap in convertible appliance pressure regulator (if so equipped) located at entrance to gas manifold. 3. Adjust air shutterson individual burners for proper flame appearance. 4. Adjust low flame setting at each burner by turning adjustment screw in center of valve stem. To make these conversion adjustments follow the instructions and illustrations ("A" through "E" on pages 3 - 4). i Apply a non-corrosive leak detection fluid to all joints and fittings in the gas connection between the supply fine shut-off valve and the range. Include gas fittings and joints in the range if connections were disturbed during installation. Check for leaks! Bubbles appearing around fittings and connections will indicate a leak. If a leak appears, turn off supply hnegas shut-off valve and retest for leaks. Never test for gas leaks with an open flame. This appliance is shippedfrom the factorywith orifice hoods ddlledfor usewith Natural Gas. To convertfrom Natural Gas to LP, applya 1/2" open-end wrenchto hex sectionoforifice hood. TURN COUNTERCLOCKWISE TO REMOVE. Save the Natural Gas orifice hoods just removed from this appliance for future use. Instatl color coded odfice hoods supplied. (See LP Gas Conversion Instructions above and page 6). TURN CLOCKWISE TO INSTALL. Hold dimension specified in Illustration"E". I_OPEN END WRENCH TURN COUNTERCLOCKWISE TO REMOVE TURN CLOCKWISE TO TIGHTEN ORIFICE HOOD iLLUSTRATION "E" ControlSettings The size and type of cookwara and the amount and type of food being cooked wi(I influence the settingneeded for best cooking results. The setting indicated should serve as a guide while you become familiar with your cooktop. Use the HI flame setting to quickly bring foods to a boil or to begin a cooking operation. Then reduce to a lower setting to continue cooking. Never leave food unattended over a HI flame setting. Mad setting is used to continue a cooking opera- tion. Food will not cook any faster when a HI flame setting is used than that is needed to maintain a gentle boil. Remember, water boils at the same temperature | whether boiling gently or vigorous},/. Use Lo setting to keep food at serving temperatures without further cooking. You may find that some cooking may take place if the cookware is covered. I Minimum Spacing Requirement Convertible Gas Cooktops For installing a Double Bay Downdraft Cooktop in combination with another Downdraft Cooktop, the minimum spacing between adjacent units must be provided, as shown, for satisfactoryperformance. DOUBLE BAY DOUBLE BAY
-
 1
1 -
 2
2 -
 3
3 -
 4
4 -
 5
5 -
 6
6 -
 7
7 -
 8
8
 |
 |