Jensen NVXM1000 User Manual - Page 11
Check XM Mini-Tuner Warning Display Message, Check Antenna Warning Display
 |
UPC - 044476036439
View all Jensen NVXM1000 manuals
Add to My Manuals
Save this manual to your list of manuals |
Page 11 highlights
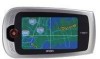
Figure 5. Check XM Mini-Tuner Warning Display Message b. Plug the external XM antenna cable into the XM ANT jack at the rear of the unit and set the Power On/Off slide switch to the On position. If the antenna is faulty or improperly connected, the following message appears on the display: Figure 6. Check Antenna Warning Display Message 3. Note Your ID Number a. When the operational modes default display appears, press the XM READY toolbox button on the LCD touch screen; the XM READY logo appears for 10 seconds, followed by the XM default screen. b. Select Channel 0 using the CH Up ( ) or Down ( ) buttons on the touch screen. The XM Mini tuner's eight-digit XM Satellite Radio ID number will appear on the display. Write the number here: 4. Activate Your Satellite Radio Service 10
-
 1
1 -
2
-
3
-
4
-
5
-
 6
6 -
 7
7 -
 8
8 -
 9
9 -
 10
10 -
 11
11 -
 12
12 -
 13
13 -
 14
14 -
 15
15 -
 16
16 -
17
-
18
-
19
-
20
-
21
-
22
-
23
-
24
-
25
-
26
-
27
-
28
-
29
-
30
-
31
-
32
-
33
-
34
-
35
-
36
-
37
-
38
-
39
-
40
-
41
 |
 |
