Kenmore 464324909 Use and Care Guide - Page 19
inside, left side shelf
 |
View all Kenmore 464324909 manuals
Add to My Manuals
Save this manual to your list of manuals |
Page 19 highlights
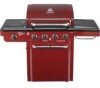
Attach left side lower fascia to left side upper fascia using three #10x3/8" screws, 5ram lock washers and 5ram flat washers, shown A. Remove the three screws and washers which were attached on left side of firebox front, shown B. Insert flange on left side shelf into side shelf brackets on side of firebox, shown C. Attach front of side shelf using the three screws and washers which were removed from left side of firebox front, shown D. Attach rear of shelf using one 1/4=20x1/2" screw, 7ram lock washer, fiber washer and 1/4" Nut, shown ElF. | inside of left side shelf #10×3/8" screw Qty.3 1_ /4-20xl/2"Screw Qty.1 5Qrtaym.3lock washer flat washer 5turnflat washer Qty.3 -- 5ramlock washer _#10×3/8" screw 7Qratym.1lock washer Fiber washer Qty.1 Note:somepartsomitted for clarityof illustration 464222609,19
-
 1
1 -
2
-
3
-
4
-
5
-
6
-
7
-
8
-
9
-
10
-
11
-
12
-
13
-
 14
14 -
 15
15 -
 16
16 -
 17
17 -
 18
18 -
 19
19 -
 20
20 -
 21
21 -
 22
22 -
 23
23 -
 24
24 -
25
-
26
-
27
-
28
-
29
-
30
-
31
-
32
 |
 |
