Kenmore 6823 Use and Care Guide - Page 13
Water Dispenser
 |
View all Kenmore 6823 manuals
Add to My Manuals
Save this manual to your list of manuals |
Page 13 highlights
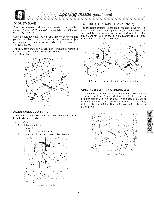
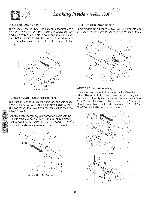
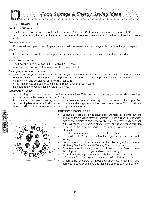
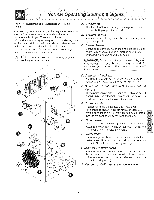
WATER DISPENSER Yourrefrigeratoinr cHudeasnautomatiwc aterdispenseorn Dispenser Lock thefrontoftherefrigeratodroorT. hedispenseirsdesigned toaccommodatceontaineruspto 7Y2incheshigh. The water disabHe the dispenser incHudes a switch water dispenser, You can use that this aHHowsyou to Hockto prevent accidentaH spHHss, uch as those caused by children pressing the dispensing button without a gHass,The switch is Hocated Dispensing bellow the Hocked/unHockedsymboHs on the dispenser face pHate, j j Dispensing Spout \ \ DripTra_ _spenser Lock Disoenser Lock Water Dispenser Dispensing Water To operate the water dispenser, press a drinking glass against the dispensing button. Hold the glass as far up as possible, ensuring that the water dispensing spout is inside the lip of the glass. To stop dispensing water, pull the glass away from the dispensing button. For colder water, first add ice to your drinking glass. Drip Tray The drip tray Hocated at the base of the dispenser catches smaHHspHHs and aHHowsthem to evaporate This tray is removabHe for easy cHeaning NOTE: Please do not pour excess water or ice into the drip tray. It does not have a drain. How the Water Dispenser Works The water tank, Hocated inside the refrigerator door, automaticaHHy firthsas water is dispensed, For proper dispenser operation, the recommended suppHy water pressure shouHd faHHbetween 20 psi and 100 psi, Water pressure must not excee d !00 Ibs. Excessive pressure may cause water filter to malfunction. After the refrigerator is connected to the water supply, fill the water tank by drawing one glass of water, it may take about !1/2 minutes after activating the dispenser button before water begins to fill this first glass. Continue flushing the system for 3 minutes to rid the tank and plumbing connections of any impurities. 13
-
 1
1 -
2
-
3
-
4
-
5
-
6
-
7
-
 8
8 -
 9
9 -
 10
10 -
 11
11 -
 12
12 -
 13
13 -
 14
14 -
 15
15 -
 16
16 -
 17
17 -
 18
18 -
19
-
20
-
21
 |
 |
