Kenmore 7756 Use and Care Guide - Page 17
Lockout, Feature, PRESS, Temperature, Fahrenheit, Celsius
 |
View all Kenmore 7756 manuals
Add to My Manuals
Save this manual to your list of manuals |
Page 17 highlights
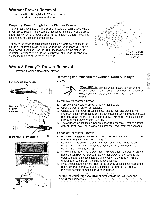
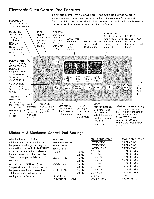
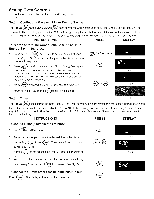
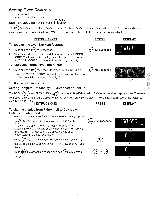
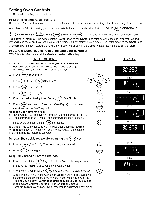
Setting Oven Controls * Oven Lockout * Setting Temperature Display Setting Oven Lockout Feature OVEN [_} LOCKOUT The Q pad controls the Oven Lockout feature. The Oven Lockout feature automatically locks the oven door and prevents most oven controls from being turned ON. It does not disable the clock, Timer or the interior oven light. INSTRUCTIONS To activate the Oven Lockout feature: 1. Press and hold s_ for 3 seconds. v 2. After 3 seconds a beep will sound, Loc will appear and "DOOR LOCKED" will flash in the display. Once the oven door is locked the "DOOR LOCKED" indicator will stop flashing. (See Fig. 1) To reactivate normal oven operation: 1. Press and hold _ for 3 seconds. A beep will sound. Loc will clear. The "DOOR LOCKED" will continue to flash until the oven door has completely unlocked (See Fig. 2). 2. The oven is fully operational. Setting Temperature Display m Fahrenheit or Celsius PRESS Q for 3 seconds Q for 3 seconds DISPLAY Fig. 1 Fig. 2 ill ii.i........... The BROIL _roil_ and FLEX CLEAN _ pads control the Fahrenheit or Celsius temperature display modes. The oven control can be programmed to display temperatures in Fahrenheit or Celsius. The oven has been preset at the factory to display in Fahrenheit. INSTRUCTIONS PRESS DISPLAY To change display from Fahrenheit to Celsius or Celsius to Fahrenheit: 1. To tell if the display is set for Fahrenheit (F) or Celsius (C) press _(See Fig. 3) and hold for 6 seconds; "550 °'' will first _for appear in the display and then a beep will sound. If "F" appears, the display is set to show temperatures in Fahrenheit (See Fig. 4). If "C" appears, the display is set to show temperatures in Celsius (See Fig. 5). 2. Press _Ftt_.j_ to switch between Fahrenheit or Celsius display modes. The display will show either "F" (See Fig. 4) or "C" (See Fig. 5). 3. Press _ change. to accept the change or press _ to reject the v 6 seconds Fig. 3 Fig. 4 Fig. 5 17
-
 1
1 -
2
-
3
-
4
-
5
-
6
-
7
-
8
-
9
-
10
-
11
-
 12
12 -
 13
13 -
 14
14 -
 15
15 -
 16
16 -
 17
17 -
 18
18 -
 19
19 -
 20
20 -
 21
21 -
 22
22 -
23
-
24
-
25
-
26
-
27
-
28
-
29
-
30
-
31
-
32
-
33
-
34
-
35
-
36
-
37
-
38
-
39
-
40
-
41
-
42
 |
 |
