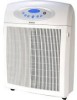
Kenmore AC2044-1 Operation Manual - Page 9
Maintenance, Cleaning - filter
 |
View all Kenmore AC2044-1 manuals
Add to My Manuals
Save this manual to your list of manuals |
Page 9 highlights
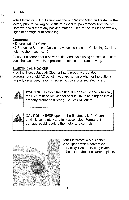
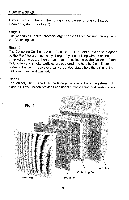
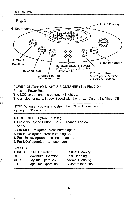
MAINTENANCE CLEANINGTHE PRE-FILTER When the Check Pre-Filter light is flashing (See fig. 2 A), it is time to clean the pre-filter. 1. Turn off the air cleaner by pressing the Power Switch. Then unplug the unit from the electrical outlet. DO NOT touch unit for 2 minutes after turning OFF and [_ unApUluTgIgOinNg:. To avoid harmless static shock that may occur, 2. Firmly grasp the notches on both sides of the front grill and pull the grill outward and remove. 3. There are 2 built-in retention clips on the top edge of the pre-filter. Push the top of the 2 clips and gently swing the pre-filter outward. 4. Lift up the pre-filter to remove it from air cleaner. 5. The pre-filter can be cleaned by gently vacuuming it, using the upholstery brush on your vacuum cleaner. 6. Now wash the pre-filter using warm, soapy water. Use a mild dish washing liquid detergent that is non-chlorine and non-abrasive. 7. Rinse the pre-filter thoroughly with clean, warm water. 8. Use paper towels to wipe off any excess water on the pre-filter frame. 9. ALLOW THE PREoFILTER TO DRY THOROUGHLY. A hand-held dryer may be used to speed dry Pre-Filter after washing. RE=INSTALLING CLEAN PRE°FiLTER 1. Place the completely dry pre-filter back into the air cleaner. 2. Fit the tabs on the bottom of the pre-filter into the slots at the base of cell cavity. 3. Push the pre-filter forward until the retention tabs snap into place. 4. Wipe off the front grill with a damp cloth. 5. Place front grill into the air cleaner front so that the tabs on the bottom engage into the slots at base of unit. 6. Gently push the front grill forward until the magnetic latches catch and hold the grill in place. 9
-
 1
1 -
2
-
3
-
 4
4 -
 5
5 -
 6
6 -
 7
7 -
 8
8 -
 9
9 -
 10
10 -
 11
11 -
 12
12 -
 13
13 -
 14
14 -
15
 |
 |
