Kenwood KTS300MR Instruction Manual - Page 17
Playing External Disc, Fast Forwarding and Reversing, Track/File Search, Disc Search/Folder Search - adapter
 |
UPC - 019048158987
View all Kenwood KTS300MR manuals
Add to My Manuals
Save this manual to your list of manuals |
Page 17 highlights
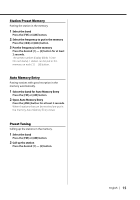
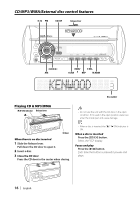
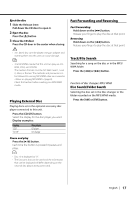
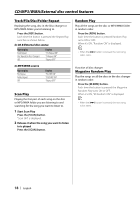
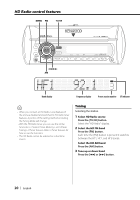
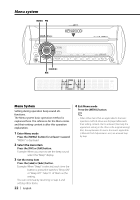
Eject the disc 1 Slide the Release lever. Pull down the CD door to open it. 2 Eject the disc Press the [0] button. 3 Close the CD door Press the CD door in the center when closing. Fast Forwarding and Reversing Fast Forwarding Hold down on the [¢] button. Release your finger to play the disc at that point. Reversing Hold down on the [4] button. Release your finger to play the disc at that point. • 3 in. (8cm) disc can't be played. Using an adapter and inserting them into this unit can cause damage. • The MP3/WMA media that this unit can play are CDROM, CD-R, and CD-RW. The medium formats must be ISO 9660 Level 1, Level 2, Joliet, or Romeo. The methods and precautions to be followed for writing MP3/WMA data are covered in (page 8). Check that section before creating your MP3/WMA media. Playing External Disc Playing discs set in the optional accessory disc player connected to this unit. Press the [CD/CH] button. Select the display for the disc player you want. Display examples: Display "CD2" "CD CH" Disc player CD player CD changer Pause and play Press the [3/8] button. Each time the button is pressed it pauses and plays. Track/File Search Searching for a song on the disc or in the MP3/ WMA folder. Press the [4] or [¢] button. Function of disc changer/ MP3/ WMA Disc Search/Folder Search Selecting the disc set in the Disc changer or the folder recorded on the MP3/WMA media. Press the [AM] or [FM] button. • Disc 10 is displayed as "0". • The functions that can be used and the information that can be displayed will differ depending on the external disc players being connected. English | 17
-
 1
1 -
2
-
3
-
4
-
5
-
6
-
7
-
8
-
9
-
10
-
11
-
 12
12 -
 13
13 -
 14
14 -
 15
15 -
 16
16 -
 17
17 -
 18
18 -
 19
19 -
 20
20 -
 21
21 -
 22
22 -
23
-
24
-
25
-
26
-
27
-
28
-
29
-
30
-
31
-
32
-
33
-
34
-
35
-
36
-
37
-
38
-
39
-
40
-
41
-
42
-
43
-
44
-
45
-
46
-
47
-
48
-
49
-
50
-
51
-
52
-
53
-
54
-
55
-
56
-
57
-
58
-
59
-
60
-
61
-
62
-
63
-
64
-
65
-
66
-
67
-
68
-
69
-
70
-
71
-
72
-
73
-
74
-
75
-
76
-
77
-
78
-
79
-
80
-
81
-
82
-
83
-
84
-
85
-
86
-
87
-
88
-
89
-
90
-
91
-
92
-
93
-
94
-
95
-
96
-
97
-
98
-
99
-
100
-
101
-
102
-
103
-
104
 |
 |