KitchenAid KDRP707RSS Installation Instructions
KitchenAid KDRP707RSS - 30" Pro-Style Dual Fuel Range Manual
 |
View all KitchenAid KDRP707RSS manuals
Add to My Manuals
Save this manual to your list of manuals |
KitchenAid KDRP707RSS manual content summary:
- KitchenAid KDRP707RSS | Installation Instructions - Page 1
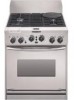
30" (76.2 CM) AND 36" (91.4 CM) CLASSIC COMMERCIAL-STYLE DUAL FUEL CONVECTION RANGE WITH STEAM-ASSIST INSTALLATION INSTRUCTIONS for residential use only Table of Contents...2 9758978 OFF OFF OFF OFF OFF OFF OFF OFF - KitchenAid KDRP707RSS | Installation Instructions - Page 2
TABLE OF CONTENTS RANGE SAFETY 3 INSTALLATION REQUIREMENTS 4 Tools and Parts 4 Location Requirements 4 Electrical Requirements 7 Gas Supply Requirements 7 INSTALLATION INSTRUCTIONS 9 Unpack Range 9 Level Range 9 Install Anti-Tip Bracket 9 Make Electrical Connection 10 Attach Backguard or - KitchenAid KDRP707RSS | Installation Instructions - Page 3
reach your gas supplier, call the fire department. - Installation and service must be performed by a qualified installer, service agency, or the gas supplier. In the State of Massachusetts, the following installation instructions apply: s Installations and repairs must be performed by a qualified or - KitchenAid KDRP707RSS | Installation Instructions - Page 4
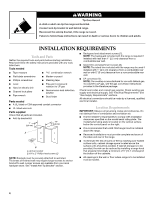
to wall behind range. Reconnect the anti-tip bracket, if the range is moved. Failure to follow these instructions can result in death or serious burns to children and adults. INSTALLATION REQUIREMENTS Tools and Parts Gather the required tools and parts before starting installation. Read and follow - KitchenAid KDRP707RSS | Installation Instructions - Page 5
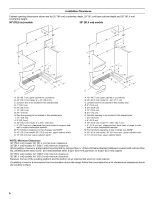
local codes. Mobile home installations require: s When this range is installed in a mobile home, it must be secured to the floor during transit. Any method of securing the range is adequate as long as it conforms to the standards listed above. 30" (76.2 cm) models Product Dimensions 36" (91.7 cm - KitchenAid KDRP707RSS | Installation Instructions - Page 6
clearance 36" (91.4 cm) models: 48" (121.9 cm) minimum clearance Between the top of the cooking platform and the bottom of an unprotected wood or metal cabinet. If installing a hood or a microwave hood combination above the range, follow the hood instructions for dimensional clearances above the - KitchenAid KDRP707RSS | Installation Instructions - Page 7
Connection To properly install your range, you must determine the type of electrical connection you will be using and follow the instructions provided for it by a qualified service technician. No attempt shall be made to convert the appliance from the gas specified on the model/serial rating plate - KitchenAid KDRP707RSS | Installation Instructions - Page 8
range. The rigid pipe must be level with the range connection. All strains must be removed from the supply and fuel lines so range will be level and in line. s Must include a manual . Burner Input Rating - Altitude Input ratings shown on the model/serial rating plate are for elevations up to 2,000 ft - KitchenAid KDRP707RSS | Installation Instructions - Page 9
Failure to do so can result in back or other injury. Install Anti-Tip Bracket WARNING 1. Remove shipping materials, tape and protective film from range. Keep shipping pallet under range. Remove oven racks, grates and parts package from inside oven. 2. Remove the 2 screws on each side of the top of - KitchenAid KDRP707RSS | Installation Instructions - Page 10
range servicing. Use 8 gauge solid copper wire. Electrically ground range. Failure to follow these instructions can result in death, fire, or electrical shock. This range range. This range is manufactured with a frame connected, green or bare ground wire. Connect the range from range E. range range wires - KitchenAid KDRP707RSS | Installation Instructions - Page 11
installation. See "Tools and Parts." Attachment screws are included in the literature package. A. 3 front screws (4 rear screws required but not shown) Attaching the Island Trim 36" model shown A A. Center hole not used 4. Using 2 or more people, tip the range F E. Manual gas shutoff valve F. - KitchenAid KDRP707RSS | Installation Instructions - Page 12
user instructions located in the Use and Care Guide. Electronic Ignition System Initial lighting and gas flame adjustments Cooktop and oven oven selector to RESET. Check Operation of Steam Assist Technology 1. Turn oven selector to "SELECT STEAM." The indicator light will flash next to "HIGH STEAM." - KitchenAid KDRP707RSS | Installation Instructions - Page 13
is turned on. s Check that the range is plugged in and the circuit breaker has not tripped or the household fuse blown. Repeat start-up. If the oven still does not operate at this point, contact your dealer or authorized service company for assistance. Install Burner Grates Place burner grates over - KitchenAid KDRP707RSS | Installation Instructions - Page 14
Schematic CLASSIC COMMERCIAL STYLE OVEN WITH STEAM ASSIST WIRING DIAGRAM STEAM BOARD APPLIANCE MANAGER () *Blower remains off until oven reaches 190°F (88°C) and may continue running up to 45 minutes after oven has turned off. NOTE: Circuit is shown in standby/off mode with oven door closed. 14 * - KitchenAid KDRP707RSS | Installation Instructions - Page 15
Notes 15 - KitchenAid KDRP707RSS | Installation Instructions - Page 16
9758978 © 2005. All rights reserved. ® Registered Trademark/TM Trademark of KitchenAid, U.S.A. 7/05 Printed in U.S.A.
-
 1
1 -
 2
2 -
 3
3 -
 4
4 -
 5
5 -
 6
6 -
 7
7 -
8
-
9
-
10
-
11
-
12
-
13
-
14
-
15
-
16
 |
 |
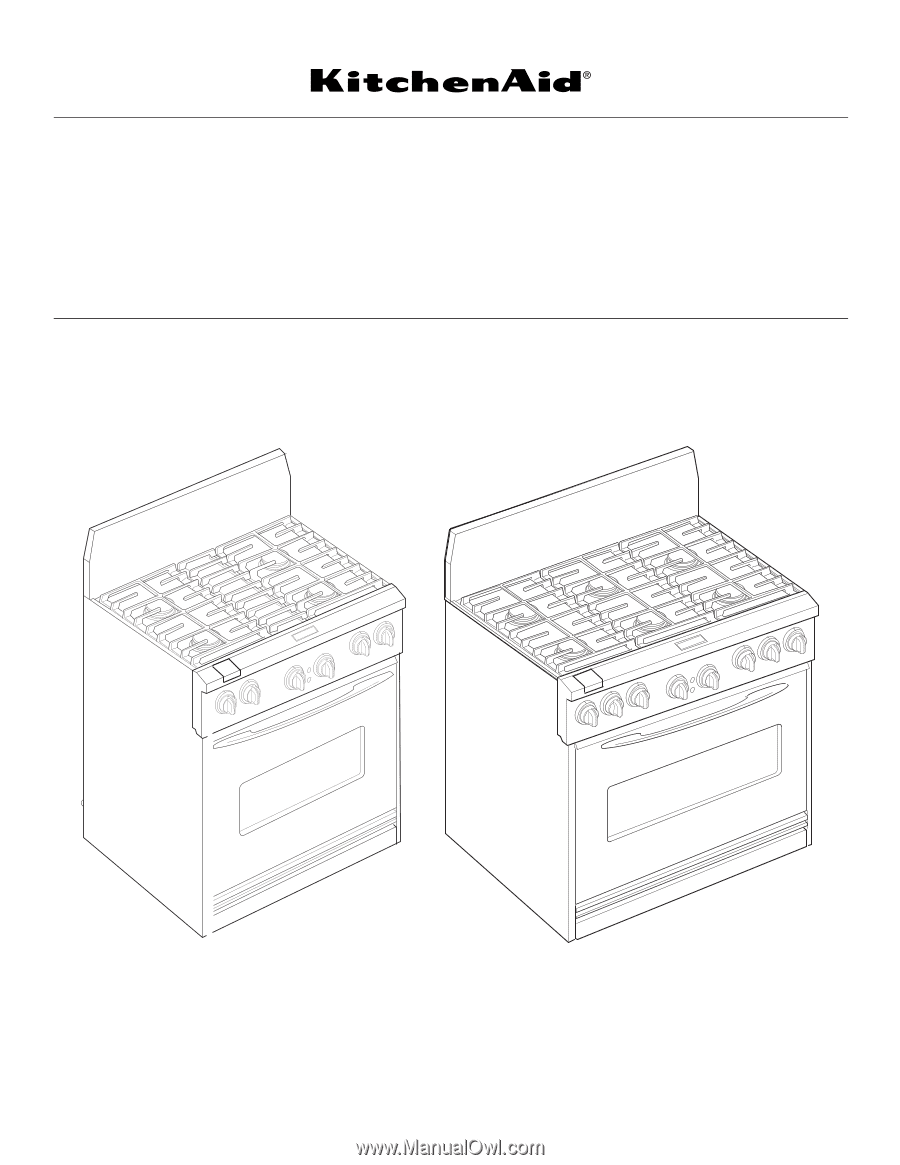
30" (76.2 CM) AND 36" (91.4 CM)
CLASSIC COMMERCIAL-STYLE DUAL FUEL
CONVECTION RANGE WITH STEAM-ASSIST
INSTALLATION INSTRUCTIONS
for residential use only
Table of Contents
............................................................................................................
2
9758978
OF
F
F
O
OF
F
F
F
O
OF
F
F
O
OF
F
F
F
O
OF
F
F
O
OF
F
F
O
OF
F
F
O
OF
F
F
O