KitchenAid KDRP707RSS Installation Instructions - Page 12
Electronic Ignition System, Check Operation of Steam Assist Technology - service manual
 |
View all KitchenAid KDRP707RSS manuals
Add to My Manuals
Save this manual to your list of manuals |
Page 12 highlights
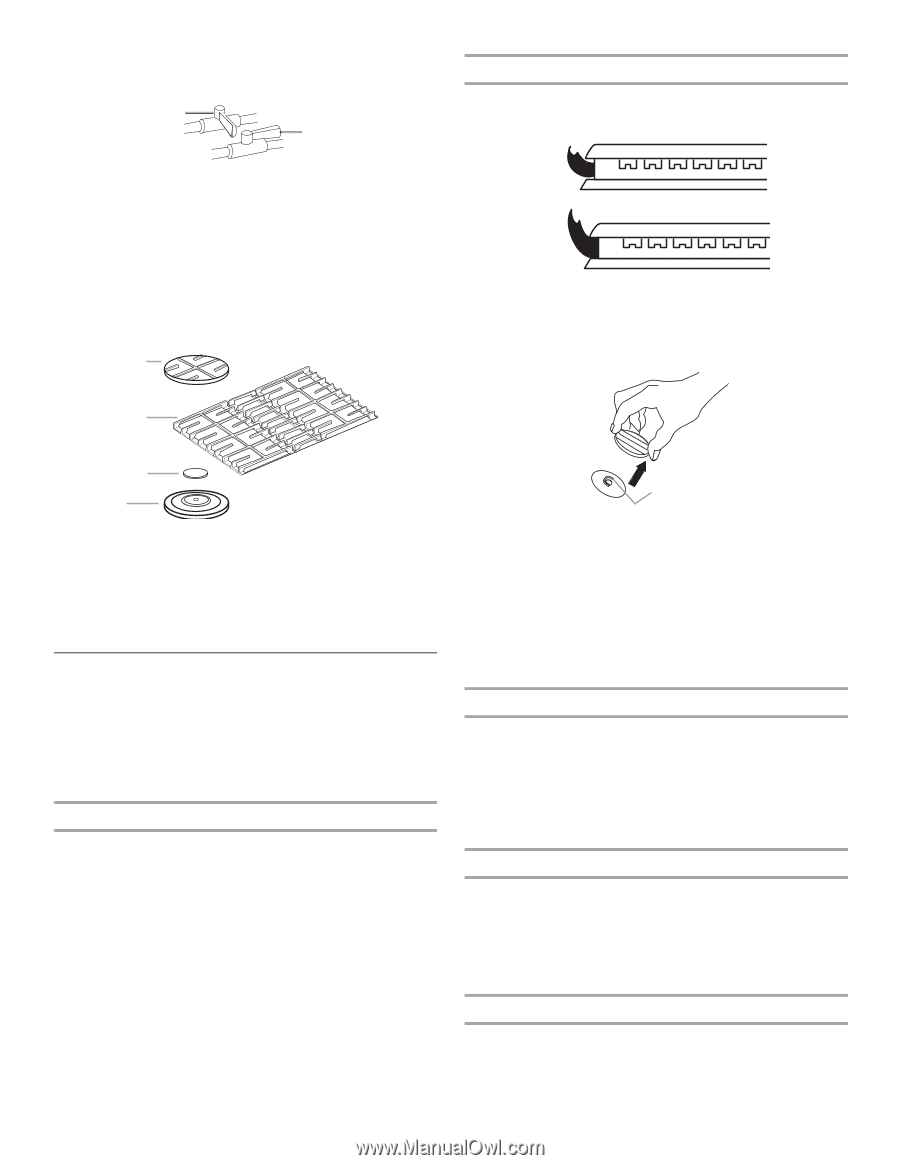
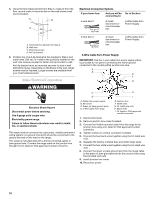
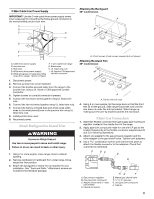
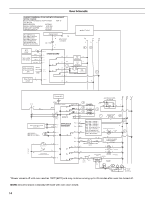
Complete Connection 1. Open the manual shutoff valve in the gas supply line. The valve is open when the handle is parallel to the gas pipe. A B A. Closed valve B. Open valve 2. Test all connections by brushing on an approved noncorrosive leak-detection solution. Bubbles will show a leak. Correct any leak found. 3. Remove cooktop burner caps, grates and simmer plate from parts package. Align notches in burner caps with pins in burner base. Burner caps should be level when properly positioned. If burner caps are not properly positioned, surface burners will not light. Place burner grates over burners and caps. D Adjust Flame Height Adjust the height of top burner flames. The cooktop "low" burner flame should be a steady blue flame approximately ¼" (0.64 cm) high. A B A. Low flame B. High flame The flame can be adjusted using the adjustment screw in the center of the valve stem. The valve stem is located directly underneath the control knob. C B A A. Burner base B. Burner cap C. Burner grate D. Simmer plate 4. Turn on power supply. "PF" should appear on the clock display. For further information, please refer to the user instructions located in the Use and Care Guide. Electronic Ignition System Initial lighting and gas flame adjustments Cooktop and oven burners use electronic igniters in place of standing pilots. When the cooktop control knob is turned to the "LITE" position, the system creates a spark to light the burner. This sparking continues, as long as the control knob is turned to "LITE." Check Operation of Cooktop Burners Push in and turn each control knob to the "LITE" position. The flame should light within 4 seconds. The first time a burner is lit it may take longer than 4 seconds to light because of air in the gas line. If burners do not light properly: s Turn cooktop control knob to the "OFF" position. s Check that the range is plugged in and the circuit breaker has not tripped or the fuse blown. s Check that the gas shutoff valves are set to the "open" position. s Check that burner caps are properly positioned on burner bases. Repeat start-up. If a burner does not light at this point, contact your dealer or authorized service company for assistance. 12 A A. Adjustment screw If the "low" flame needs to be adjusted: 1. Remove the control knob. 2. Hold the knob stem with a pair of pliers. Use a small flat- blade screwdriver to turn the screw located in the center of the control knob stem until the flame is the proper size. 3. Replace the control knob. 4. Test the flame by turning the control from "LO" to "HI," checking the flame at each setting. Check Operation of Oven Element 1. Turn oven selector to BAKE. Default temperature appears in the temperature display. 2. Press ENTER. The display reads "PrE" when the oven temperature begins to rise. 3. Wait 2 minutes, open oven door and hold hand above oven floor and feel for heat. Do not touch oven floor. Press CANCEL and turn oven selector to RESET. Check Operation of Oven Broil Element 1. Close the oven door. 2. Turn oven selector to BROIL. "HI" will appear in the temperature display. 3. Press ENTER. Look through oven window. The top element should glow red, and heat should be radiating out of the door. Press CANCEL and turn oven selector to RESET. Check Operation of Steam Assist Technology 1. Turn oven selector to "SELECT STEAM." The indicator light will flash next to "HIGH STEAM." 2. Pour water into the water inlet until the "HALF" indicator lights up.
-
 1
1 -
2
-
3
-
4
-
5
-
6
-
 7
7 -
 8
8 -
 9
9 -
 10
10 -
 11
11 -
 12
12 -
 13
13 -
 14
14 -
 15
15 -
 16
16
 |
 |