KitchenAid KDRS463VBK Installation Instructions - Page 18
Level Range, Install Grill Grease Trays on grill models
 |
View all KitchenAid KDRS463VBK manuals
Add to My Manuals
Save this manual to your list of manuals |
Page 18 highlights
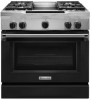
Level Range NOTE: Range must be level for satisfactory baking performance. 1. Place rack in oven. 2. Place level on rack and check levelness of the range - first side to side, then front to back. 3. Lift burner assembly up and out to remove. 4. Slide drip tray into opening on the right front side of the grill basin. There are guides to assure correct placement of the drip tray. A 3. If range is not level, adjust the leveling rods. Turn leveling rods located behind the kick plate to level range and to raise or lower range to the desired countertop height. NOTE: All roller feet must be off the floor upon final installation. A. Drip tray 5. Insert the large grease tray all the way under the back edge of the grill basin and hook it into the slots. A B A B A. Rear leveling rod B. Front and brass leveling rod Install Grill Grease Trays (on grill models) 1. Remove flame spreader. Pull forward slightly on the flame spreader to release the tabs from the rear slots and lift out. B B A A. Large grease tray B. Slots 6. Insert the small grease tray all the way under the front of the grill basin and hook it into the slots. When the 2 grease trays are installed properly, the small grease tray will hook over the large grease tray. A B C A A. Grill front B. Rear tabs and slots 2. Cut and remove tie strap from rear of burner assembly. A D A. Large grease tray B. Grease tray connection C. Small grease tray D. Slots 7. Insert the orifice tube on the front of the burner assembly into the opening at the front of the grill basin and set burner assembly into place. A. Tie strap 18 A A. Front opening
-
 1
1 -
2
-
3
-
4
-
5
-
6
-
7
-
8
-
9
-
10
-
11
-
12
-
 13
13 -
 14
14 -
 15
15 -
 16
16 -
 17
17 -
 18
18 -
 19
19 -
 20
20 -
 21
21 -
 22
22 -
 23
23 -
24
-
25
-
26
-
27
-
28
-
29
-
30
-
31
-
32
-
33
-
34
-
35
-
36
-
37
-
38
-
39
-
40
-
41
-
42
-
43
-
44
-
45
-
46
-
47
-
48
-
49
-
50
-
51
-
52
 |
 |
