KitchenAid KGRS505XSS Use & Care Guide - Page 13
Oven Vents, Baking, Broiling - Upper Oven Only
 |
UPC - 883049199481
View all KitchenAid KGRS505XSS manuals
Add to My Manuals
Save this manual to your list of manuals |
Page 13 highlights
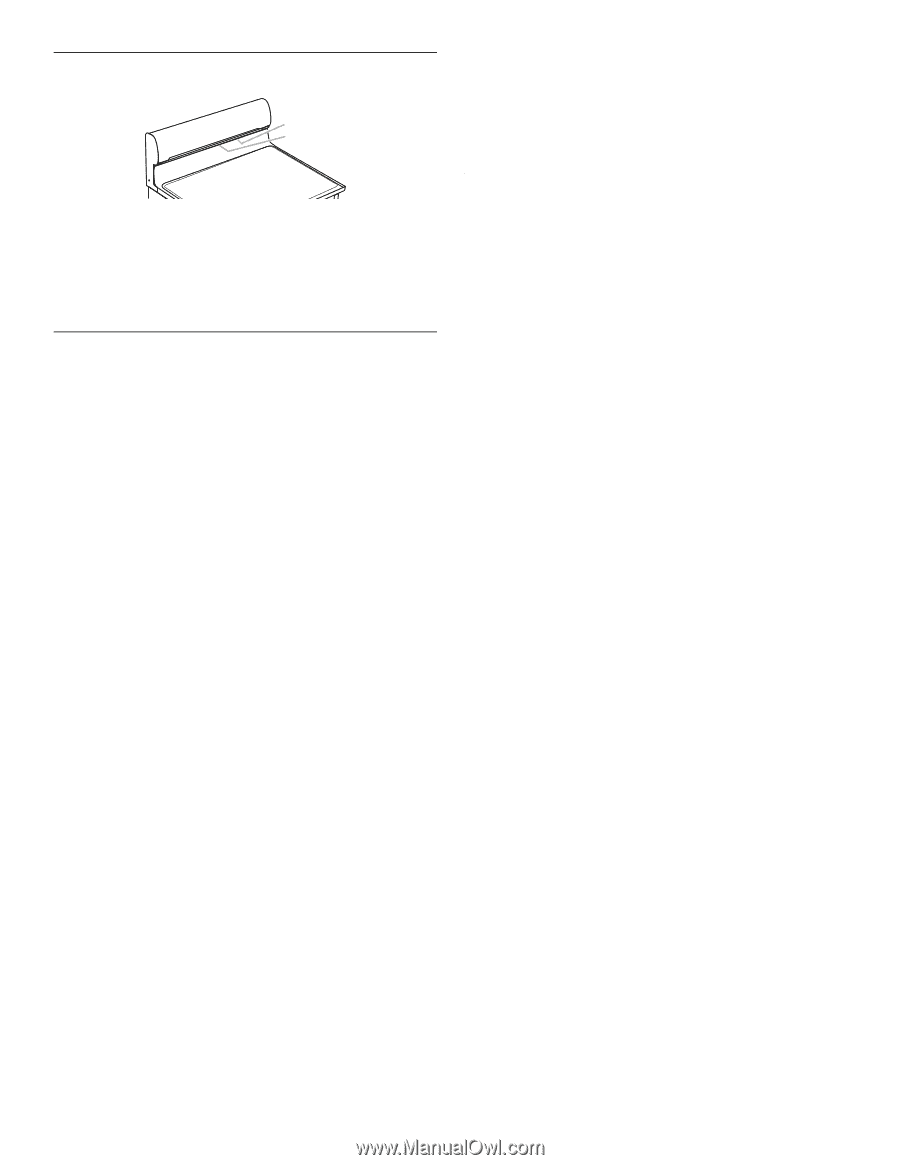
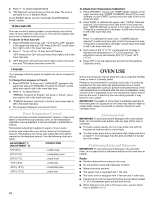
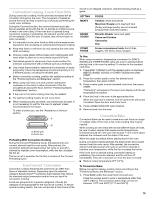
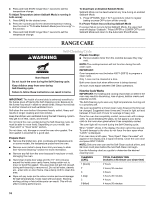
Oven Vents A B A. Lower oven vent B. Upper oven vent The oven vents release hot air and moisture from the ovens, and should not be blocked or covered. Blocking or covering the vents will cause poor air circulation, affecting cooking and cleaning results. Do not set plastics, paper or other items that could melt or burn near the oven vents. Baking Before baking, position racks according to the "Positioning Racks and Bakeware" section. ■ Allow at least ½" (1.3 cm) between the baking pan or casserole and the top burner in the upper oven. Loaf, angel food or bundt pans are not recommended in the upper oven. ■ When preheating with a baking/pizza stone inside the upper oven, do not set oven above 450°F (250°C). To use baking/ pizza stones at temperatures above 450°F (250°C) in the upper oven, put stone in after the preheat beep. When preheating with a baking/pizza stone in the oven, allow at least 30 minutes for preheating. ■ Use only 1 flat rack in the upper oven. To Bake: 1. Press upper or lower oven BAKE. "BAKE" will scroll in the upper or lower text area (depending on oven selection), and 350°F (175°C) will be displayed. "Set temp or" will scroll in the selected oven text area, followed by "Push START." 2. Press the number pads to enter the desired temperature. NOTE: The temperature may be changed at any time by pressing the number pads to enter the desired temperature and then START. Changing the temperature once food is placed in the oven could affect the performance. 3. (Optional) If a Set Cooking Time is desired, press COOK TIME. Press the number pads until the desired cook time is displayed. "Push START" will scroll in the selected oven text area. 4. Press START. "Preheating" will appear in the selected oven text area. "Preheating" remains in the text area until the set temperature is reached. 5. When the preheat cycle is complete, "Preheat done Insert food " will scroll twice in the selected oven text area. "Bake" will scroll in the selected oven text area until OFF for the selected oven is pressed. 6. Place food in the oven. 7. Press upper oven or lower oven OFF when finished. 8. Remove food from the oven. NOTE: If Cook time is to be used baked goods, increase the cook time by 15 minutes and allow oven to preheat. Place food in oven when preheat is complete. When Cook Time expires, the oven(s) will turn off. Broiling - Upper Oven Only Broiling uses direct radiant heat to cook food. The lower the temperature, the slower the cooking. Thicker cuts and unevenly shaped pieces of meat, fish and poultry may cook better at lower broiling temperatures. ■ For best results, use a broiler pan and grid (not provided). It is designed to drain juices and help avoid spatter and smoke. If you would like to purchase a broiler pan, one may be ordered. See "Assistance or Service" section to order. ■ For proper draining, do not cover the grid with foil. The bottom of the pan may be lined with aluminum foil for easier cleaning. ■ Trim excess fat to reduce spattering. Slit the remaining fat on the edges to avoid curling. ■ Select 550°F (288°C) broil for most broiling. Select 450°F (232°C) broil for low-temperature broiling of longer cooking foods such a poultry to avoid over browning. ■ Pull out oven rack to stop position before turning or removing food. Use tongs to turn food to avoid the loss of juices. Very thin cuts of fish, poultry or meat may not need to be turned. ■ After broiling, remove the pan from the oven when removing the food. Drippings will bake on the pan if left in the heated oven, making cleaning more difficult. Before broiling, position rack according to the Broiling Chart. Preheat oven for 5 minutes. Position food on grid in the broiler pan, then place it in the center of the oven rack. Close the door to ensure proper broiling operation. To Broil Using Variable Temperature: 1. Close oven door. 2. Press upper oven BROIL. "BROIL" scrolls down in the upper text area and "550°F" is displayed. "Set temp or" scrolls in the selected oven text area followed by "Push START." 3. Press START. "Broiling" appears in the upper oven text area and remains until the set temperature is reached or the cook time has counted down. NOTE: The oven temperature can be changed at any time by pressing the number pads until the desired temperature is displayed and pressing START. Once the set temperature is reached, "Broil" scrolls in the upper oven text area. 4. Preheat oven for 5 minutes. 5. Place the food in the upper oven. 6. Close oven door. 7. Press UPPER OVEN OFF when finished. 8. Remove food from the oven. 13
-
 1
1 -
2
-
3
-
4
-
5
-
6
-
7
-
 8
8 -
 9
9 -
 10
10 -
 11
11 -
 12
12 -
 13
13 -
 14
14 -
 15
15 -
 16
16 -
 17
17 -
 18
18 -
19
-
20
-
21
-
22
-
23
-
24
-
25
-
26
-
27
-
28
-
29
-
30
-
31
-
32
-
33
-
34
-
35
-
36
-
37
-
38
-
39
-
40
-
41
-
42
-
43
-
44
-
45
-
46
-
47
-
48
 |
 |