KitchenAid KURO24RSBX Use & Care Guide - Page 7
Attach the Overlay Panel, Install the Door - custom panel
 |
UPC - 883049028934
View all KitchenAid KURO24RSBX manuals
Add to My Manuals
Save this manual to your list of manuals |
Page 7 highlights
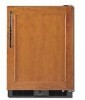
Attach the Overlay Panel NOTE: If the overlay hooks are not installed, see "Custom Overlay Panel" for overlay hook locations. 1. Position the overlay panel ¹⁄₂" (1.27 cm) higher than the door. Be sure to position the overlay hooks to the pilot holes. 4. Using masking tape, secure the door to the cabinet before installing the top spacer as shown. A B 2. Insert the overlay hooks into the top of the holes in the door. Push against the overlay panel to force the overlay hooks deeper into the door. Pull the overlay panel straight down to secure the overlay hooks to the door. 3. Using a Phillips screwdriver, attach the overlay plates to the bottom of the overlay panel and door as shown. A. Top spacer B. Masking tape 5. Place the washer on the top spacer and align the holes. Grease the top hinge pin, top spacer and washer with petroleum jelly. Insert the top hinge pin into the washer and top spacer. 6. Using a Phillips screwdriver and three screws, attach the top hinge to the cabinet as shown. A B C D A B C D A. Overlay panel B. Door C. Overlay plates (2) D. Round-head screws (8) Install the Door IMPORTANT: To ensure proper operation, be sure to grease the top hinge, top spacer and washer with petroleum jelly. 1. Using a Phillips screwdriver and three screws, attach the top spacer to the door. 2. Using petroleum jelly, grease the bottom spacer hole and the bottom hinge pin. Align the washer with the bottom spacer hole. 3. Install the door by inserting the bottom hinge pin into the bottom spacer hole. Be sure the washer remains in place. Slowly lower the door straight and evenly onto the bottom hinge pin. Close the door. Be sure the door properly aligns to the cabinet. NOTE: Provide additional support for the door when moving the hinges. Do not depend on the door magnets to hold the door in place while you are working. E F A. Screws (3) B. Top Hinge C. Washer D. Top spacer E. Door F. Overlay panel 7. Remove the masking tape from the door. 7
-
 1
1 -
 2
2 -
 3
3 -
 4
4 -
 5
5 -
 6
6 -
 7
7 -
 8
8 -
 9
9 -
 10
10 -
 11
11 -
 12
12 -
13
-
14
-
15
-
16
-
17
-
18
-
19
-
20
-
21
-
22
-
23
-
24
-
25
-
26
-
27
-
28
-
29
-
30
-
31
-
32
-
33
-
34
-
35
-
36
-
37
-
38
-
39
-
40
 |
 |
