Kodak DP800 User's Manual - Page 37
rightmost check box will mirror the screen image rear
 |
View all Kodak DP800 manuals
Add to My Manuals
Save this manual to your list of manuals |
Page 37 highlights
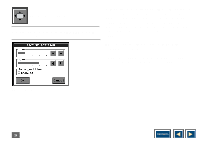
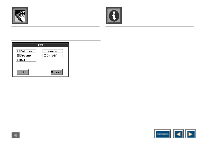
Change picture orientation The Projector is designed for rear projection and ceiling mounting upside down. These adjustments let you easily set up the correct image for your application. Select the above icon from the MAIN MENU. You will get the window below. Switch on the leftmost check box to rotate the screen image 180° (front ceiling mounting). Switching on the rightmost check box will mirror the screen image (rear projection). Switch on both for rear ceiling mounting. Select OK to save your changes and exit, or select Cancel to exit without saving your changes. Change picture orientation 37 Contents
-
 1
1 -
2
-
3
-
4
-
5
-
6
-
7
-
8
-
9
-
10
-
11
-
12
-
13
-
14
-
15
-
16
-
17
-
18
-
19
-
20
-
21
-
22
-
23
-
24
-
25
-
26
-
27
-
28
-
29
-
30
-
31
-
 32
32 -
 33
33 -
 34
34 -
 35
35 -
 36
36 -
 37
37 -
 38
38 -
 39
39 -
 40
40 -
 41
41 -
 42
42 -
43
-
44
-
45
-
46
-
47
-
48
-
49
-
50
-
51
-
52
-
53
-
54
-
55
-
56
-
57
-
58
-
59
-
60
-
61
-
62
 |
 |

Contents
37
The Projector is designed for rear projection and ceiling
mounting upside down. These adjustments let you
easily set up the correct image for your application.
Select the above icon from the MAIN MENU.You will
get the window below.
Switch on the leftmost check box to rotate the screen
image 180° (front ceiling mounting). Switching on the
rightmost check box will mirror the screen image (rear
projection). Switch on both for rear ceiling mounting.
Select OK to save your changes and exit, or select
Cancel to exit without saving your changes.
Change picture orientation
Change picture orientation